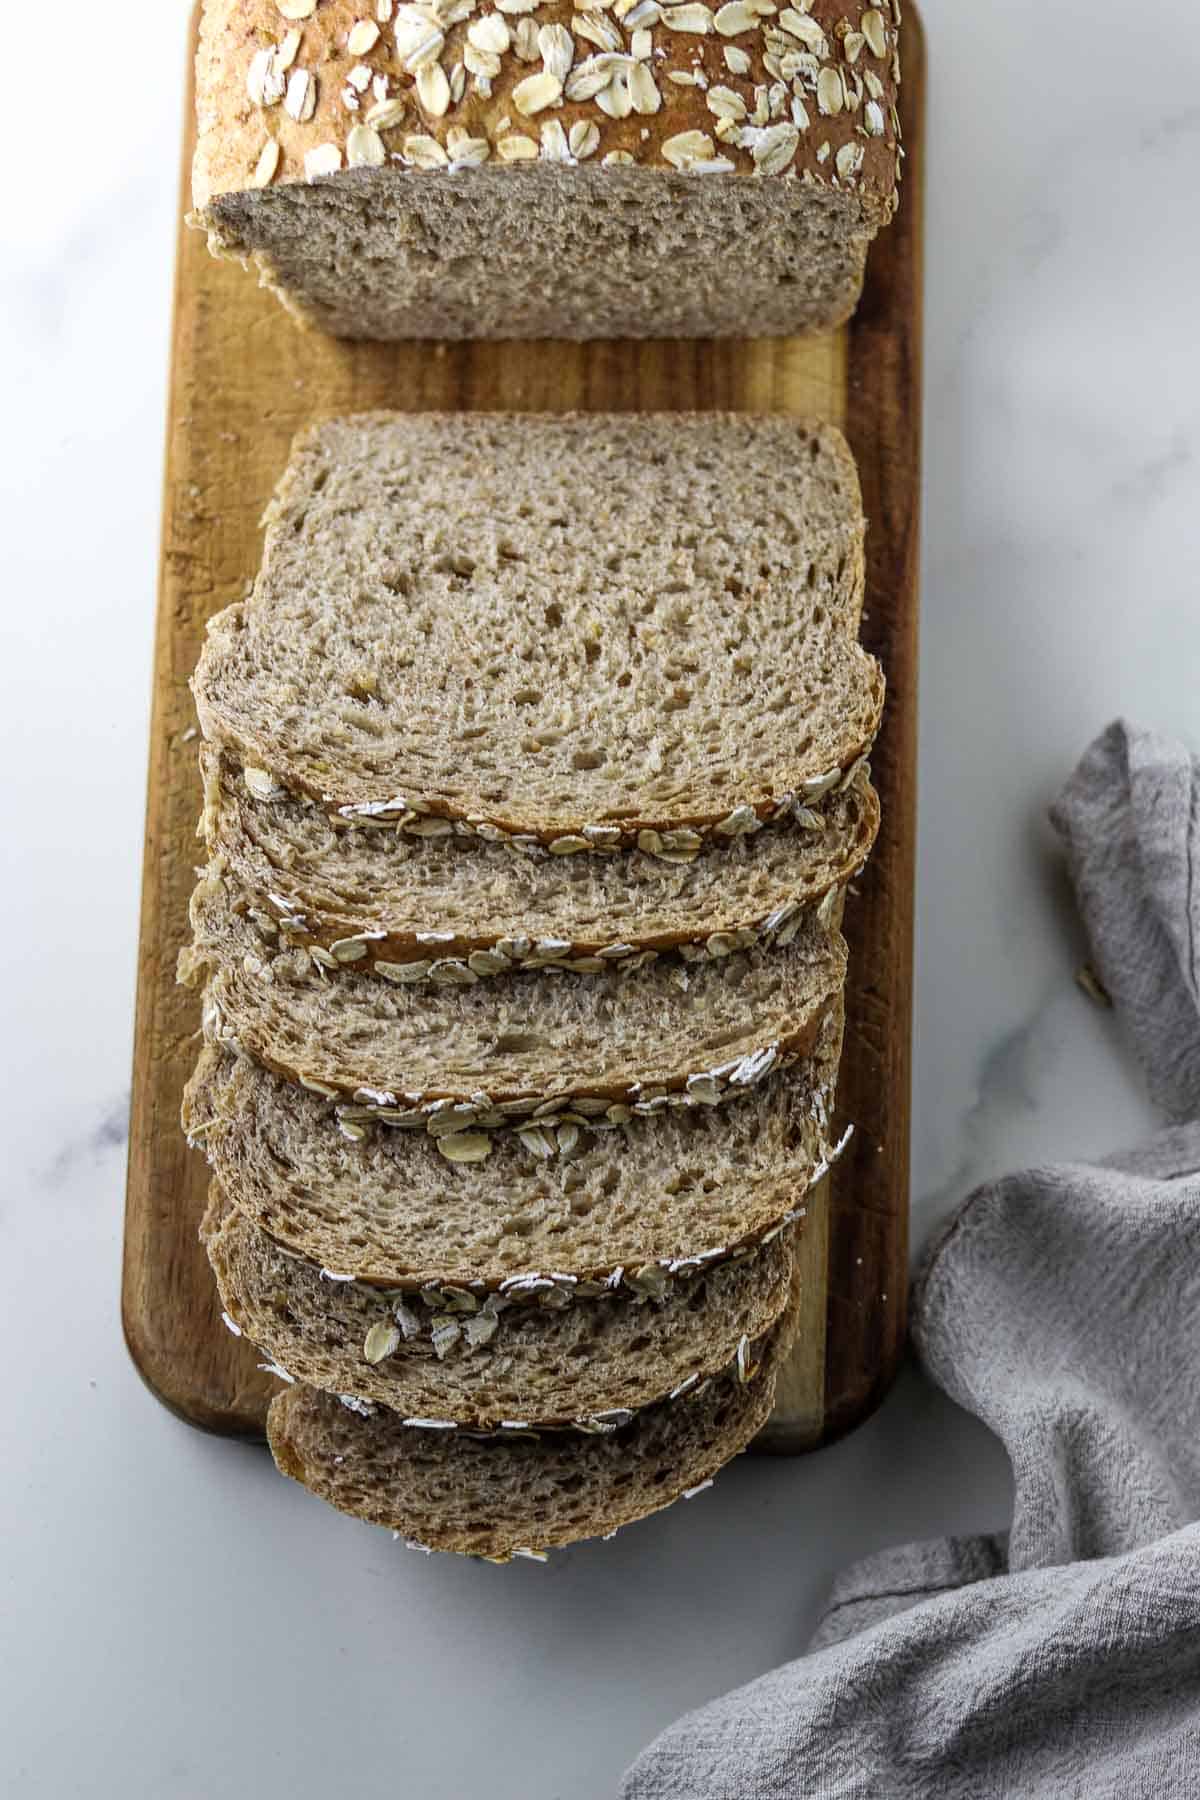
Hearty Norwegian Whole Grain Bread (Grovbrød)
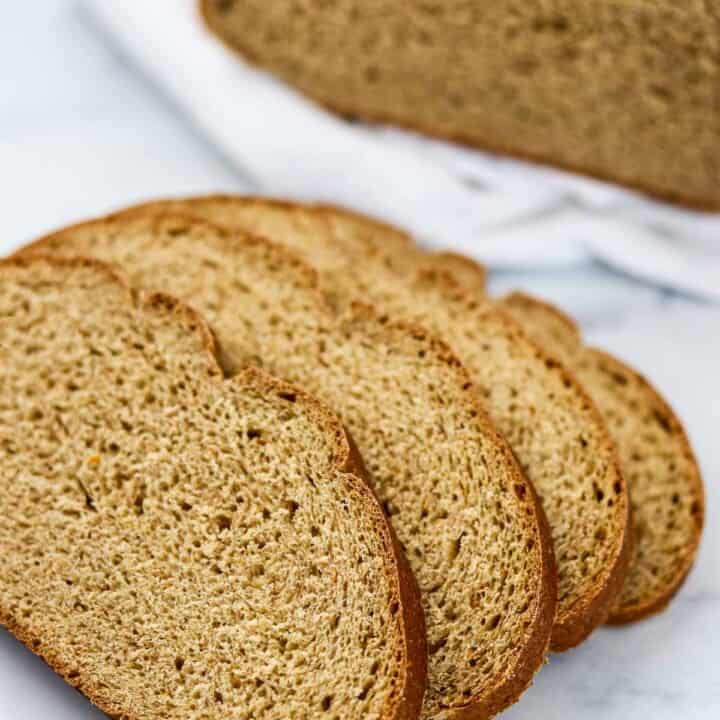
This Norwegian Whole Grain Bread (Grovbrød) is a loaf you'll want to return to again and again. Inspired by Norway's hearty whole grain breads, this everyday loaf combines a variety of grains along with whole wheat and rye flour for rich flavor and wholesome texture while remaining exceptionally light and tender. It's perfect for toast, sandwiches or on it's own with a generous smear of butter.
This Grovbrød recipe is remarkably easy to make thanks to a simple ingredient (7 grain cereal mix) which makes it easy to include a variety of wholesome grains in this bread without having to purchase each grain individually.
If you love hearty Scandinavian breads, check out my recipes for Easy Overnight Danish Rugbrød, Norwegian Crispbread and Soft Swedish Flatbreads (Tunnbröd) for your next bread baking project!
Norwegian Whole Grain Bread (Grovbrød) at a Glance
- ⏰ Hands-on Time: 30 minutes
- ⏰ Cooling and Rising Time: 3 hours
- 🔥 Bake Time: 45 minutes
- 👥 Yield: 2 loaves
- ⭐️ Recipe Description: This Norwegian Whole Grain Bread (Grovbrød) is a hearty yet tender everyday loaf. Perfect for toast and sandwiches, it delivers wholesome whole grain flavor with a soft, reliable crumb.
Jump to:
Why You'll Love this Recipe
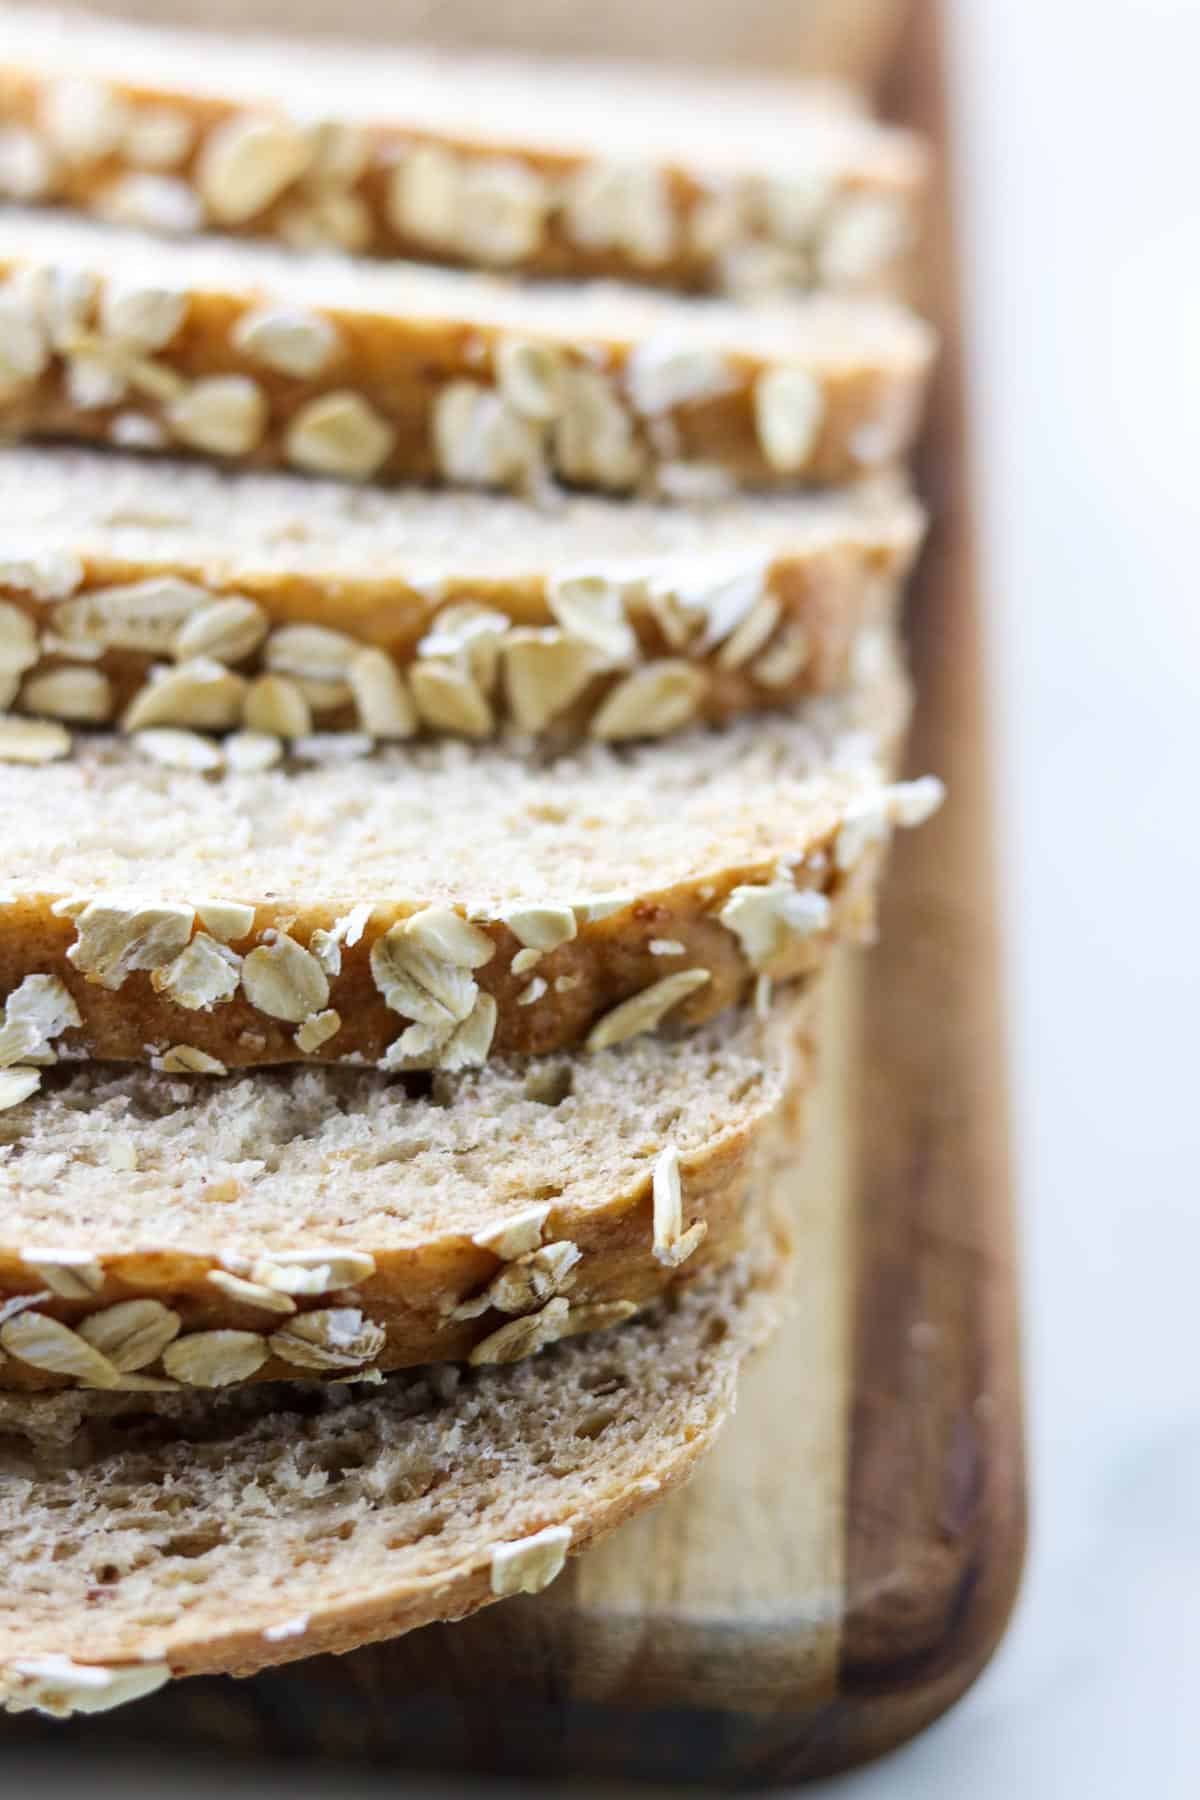
- ♥️ It contains a variety of whole grains (in the form of readily available 7 grain cereal) along with whole wheat flour, rye flour, and bread flour. This combination creates a loaf that is hearty and wholesome but still soft and tender in texture
- ♥️ Instant yeast serves as the leavener which is fast-acting and easy to work with (no proofing in warm water necessary
- ♥️ The recipe makes two loaves at a time and the bread freezes beautifully so you've always got a loaf in reserve
The Ingredients
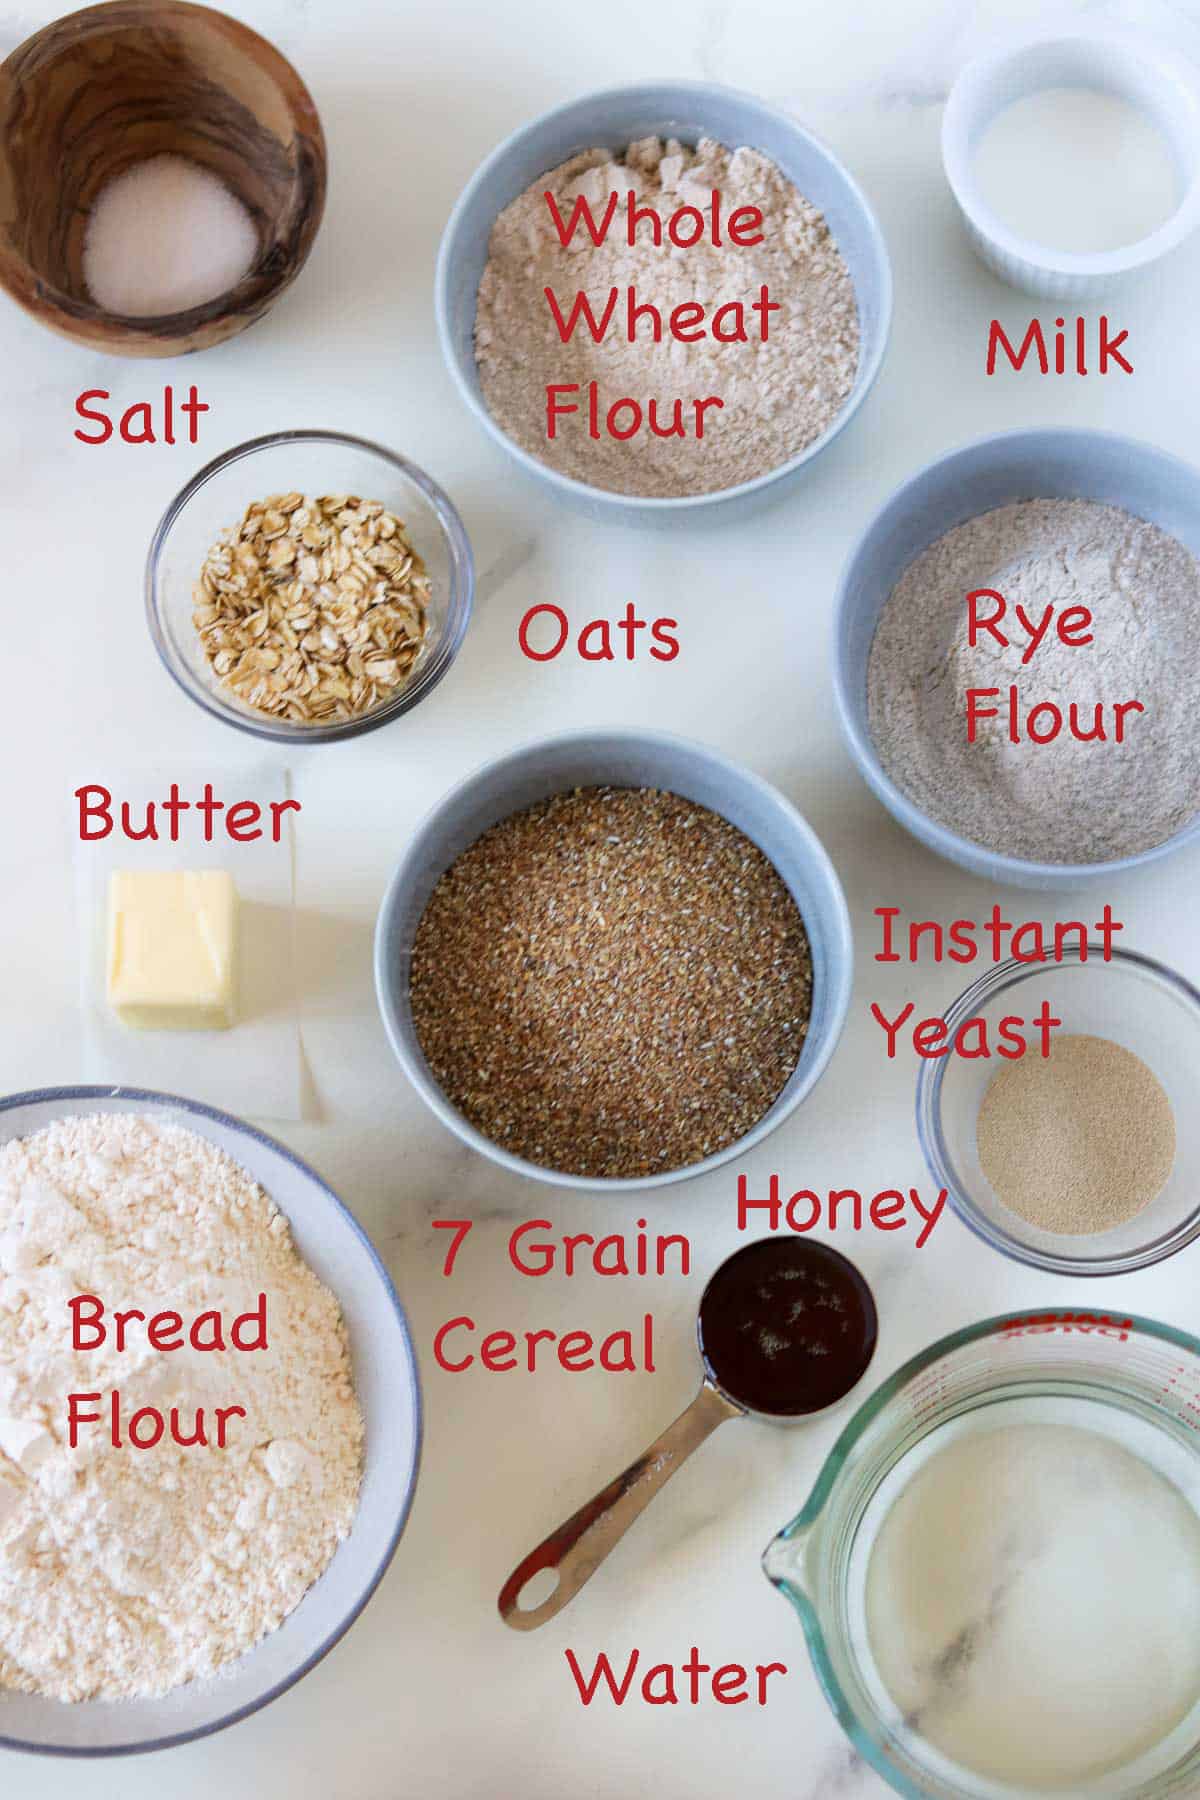
Ingredient Notes:
- This bread contains three types of flour: whole-wheat, rye and bread flour. Whole wheat and rye bring flavor and valuable nutrients, and the bread flour helps form the gluten network that keeps this bread nice and light.
- 7 grain cereal is my secret ingredient for multi-grain breads. I use it in many of my bread recipes. Why? Because it serves as a ready-made mix of chopped grains which means I don't have to go out and source each grain individually AND it is easy to find (either at your local grocery store or on Amazon).
- I use instant yeast (rather than active dry) because it works quickly, effectively and without any fussing around with proofing the yeast prior to using it. See the FAQ section below for how to substitute active dry yeast for the instant yeast in this recipe.
- Honey provides just the right amount of sweetness and melted butter helps create a soft, tender texture.
See recipe card for exact amounts and detailed instructions.
Special Equipment Needed
- Two 9x5 standard size loaf pans. I really like the glass (Pyrex) loaf pans.
- A heavy duty stand mixer. You can certainly mix and knead this dough by hand, but a stand mixer makes quick and easy work of it.
How to Make Norwegian Whole Grain Bread (Grovbrød)
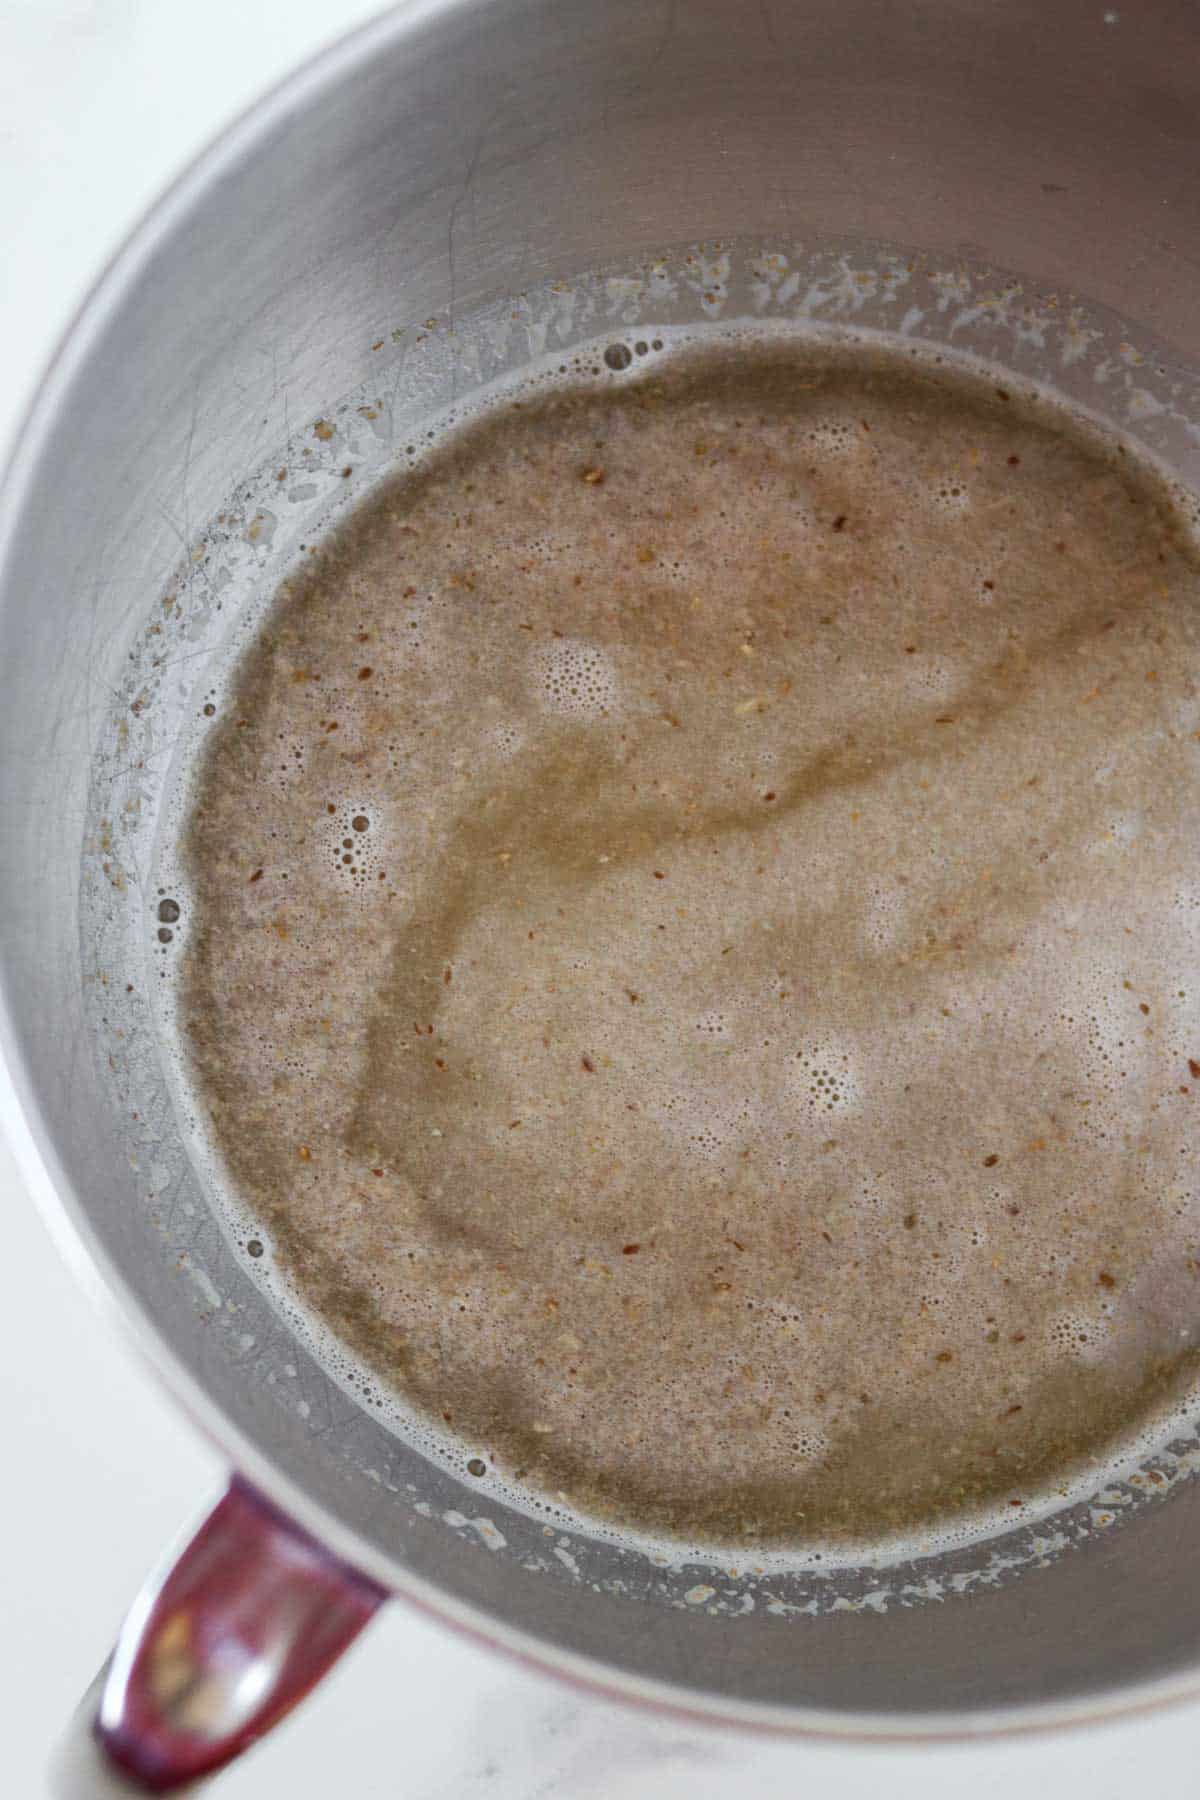
- Begin by placing the cereal mix in the work bowl of heavy-duty stand mixer. Pour the boiling water over and let the mixture sit until it is cooler than 100 degrees F. (this could take up to an hour).
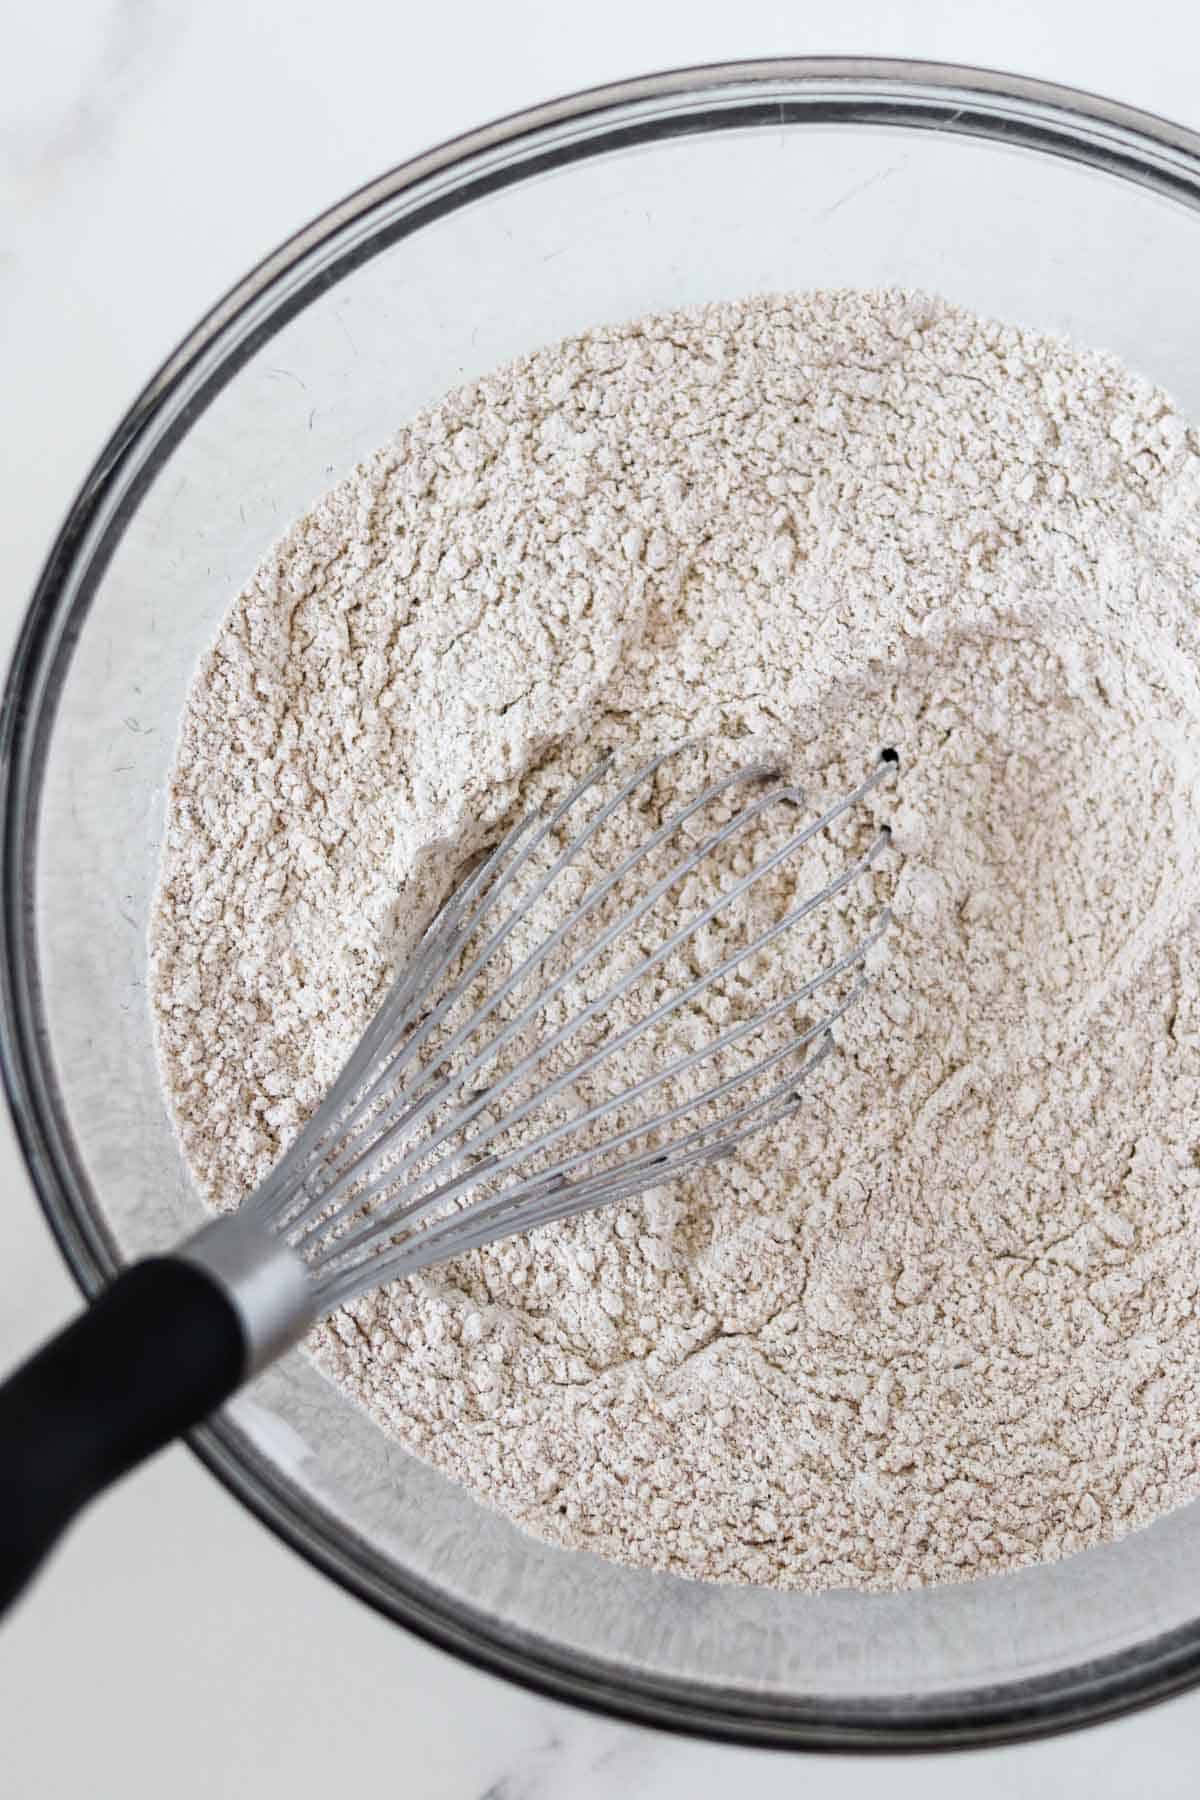
- In the meantime, whisk the flours and yeast together in a large bowl and set aside.
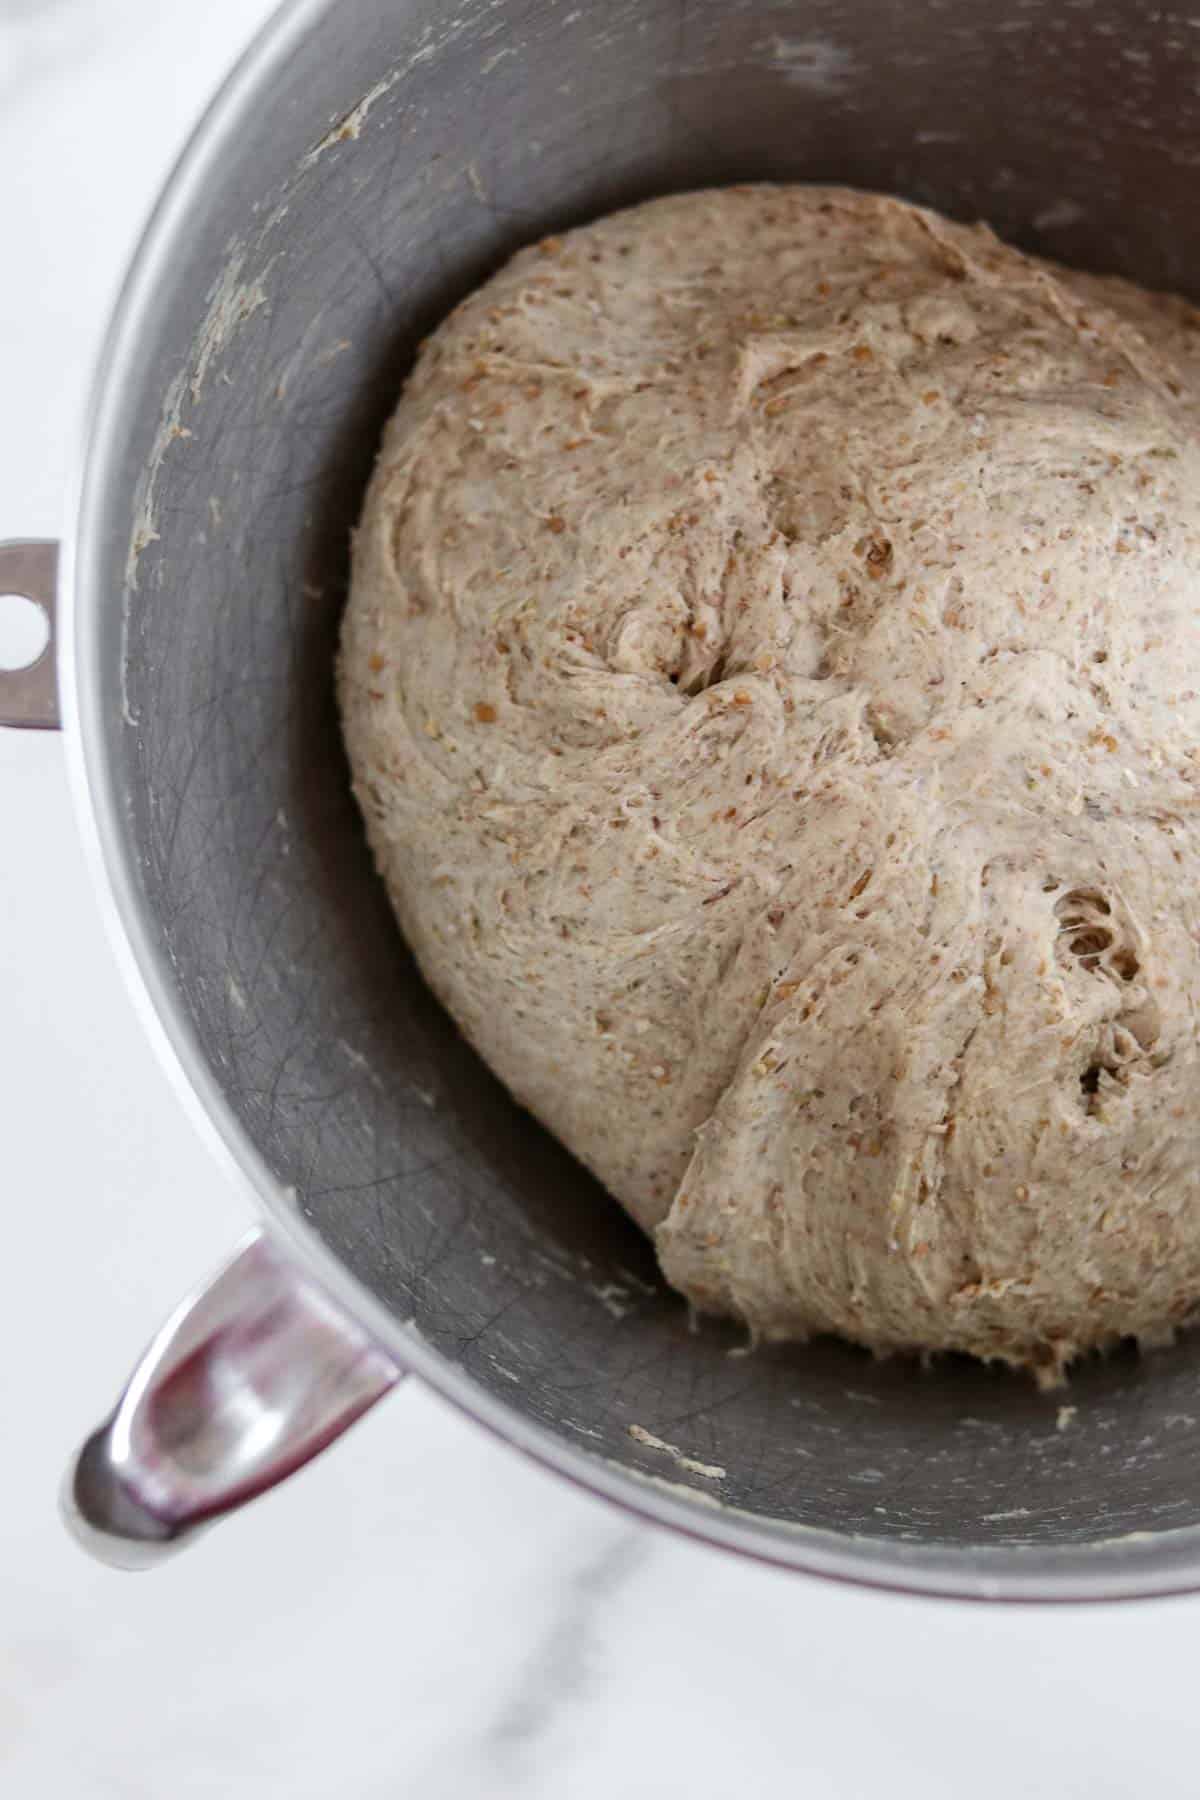
- Once the cereal mixture has cooled, add the honey, salt and melted butter to the mixer bowl. Fit the mixer with the dough hook attachment and mix the ingredients on low for a few seconds until they just come together. Add the dry ingredients to the mixing bowl and mix on low until a dough forms. Increase the speed to medium and knead for 6-8 minutes or until the dough is clearing the sides of the bowl (it will still feel tacky to the touch). Remove the bowl from the mixer and cover with plastic wrap.
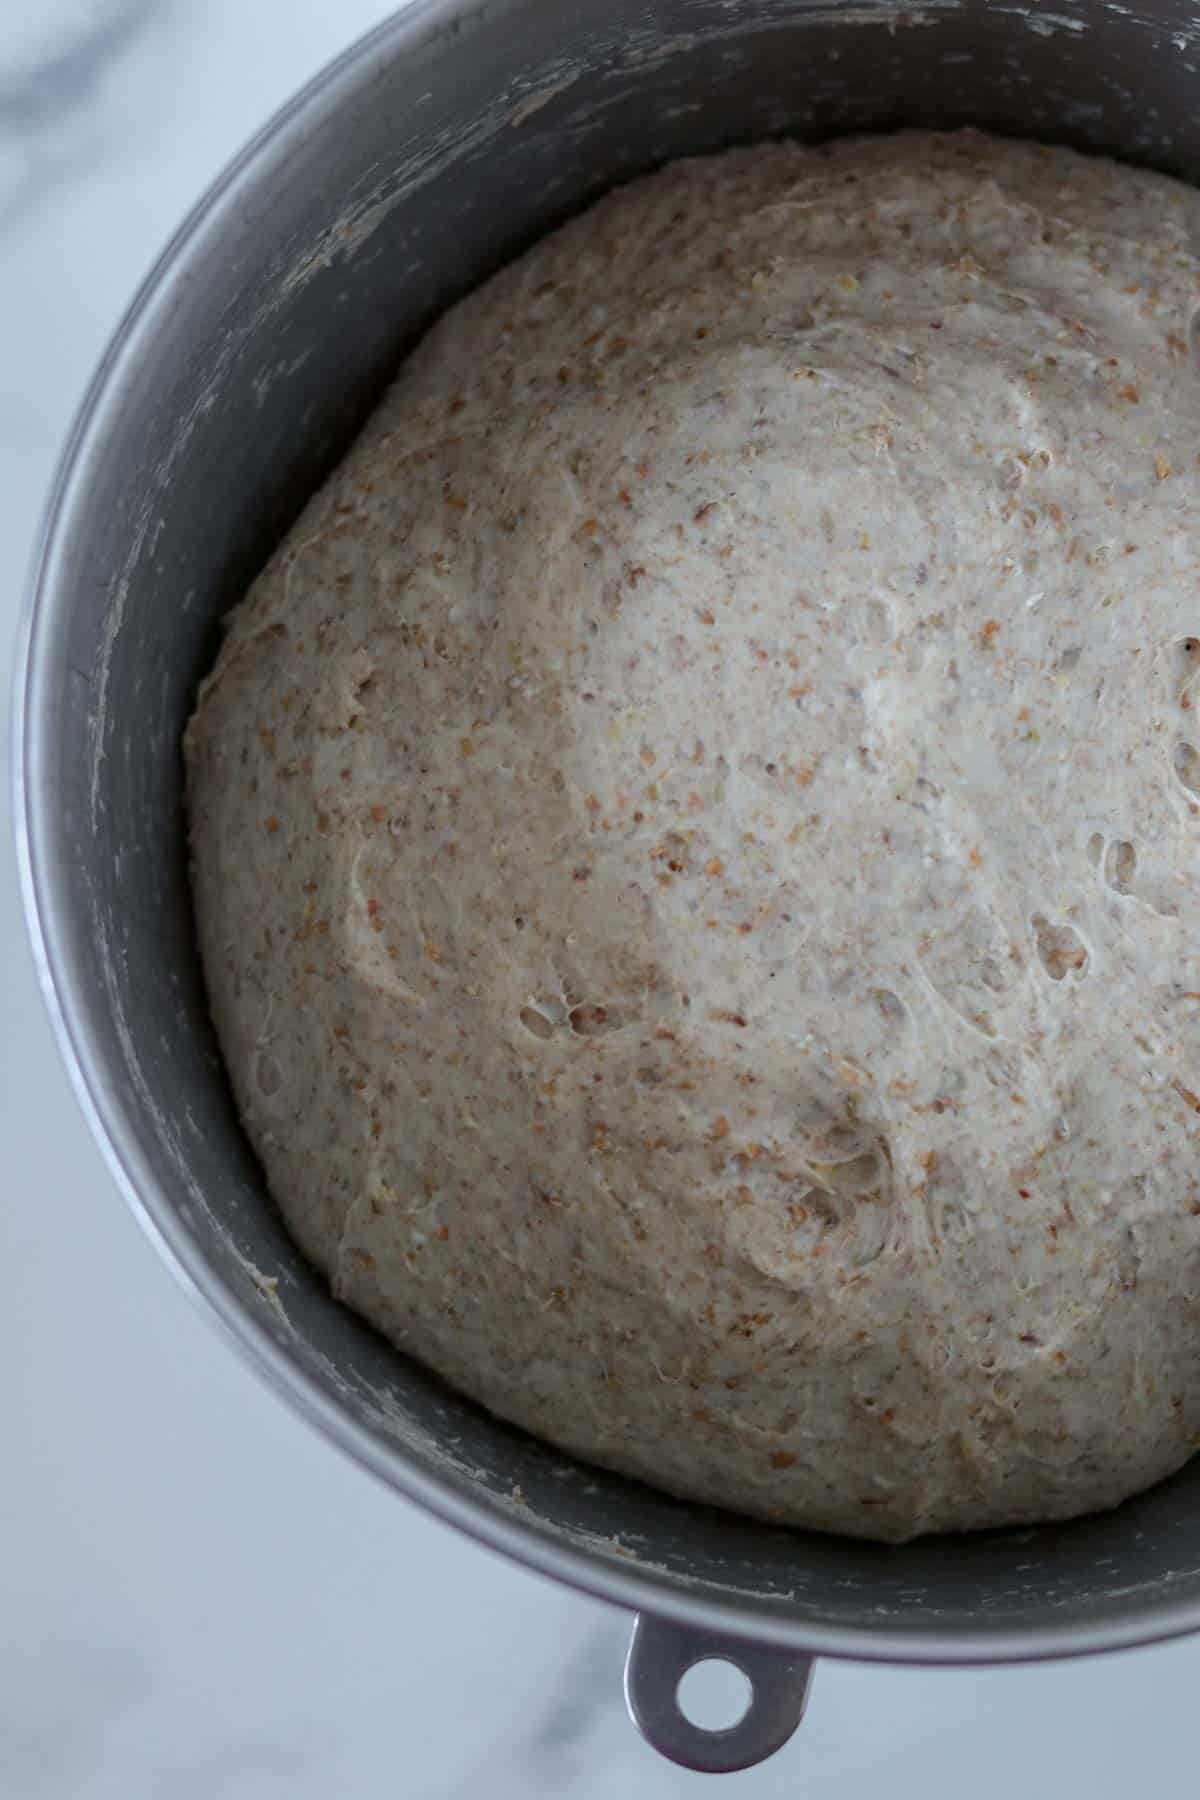
- Let it sit at room temperature until the dough has doubled in size, about 1 hour.
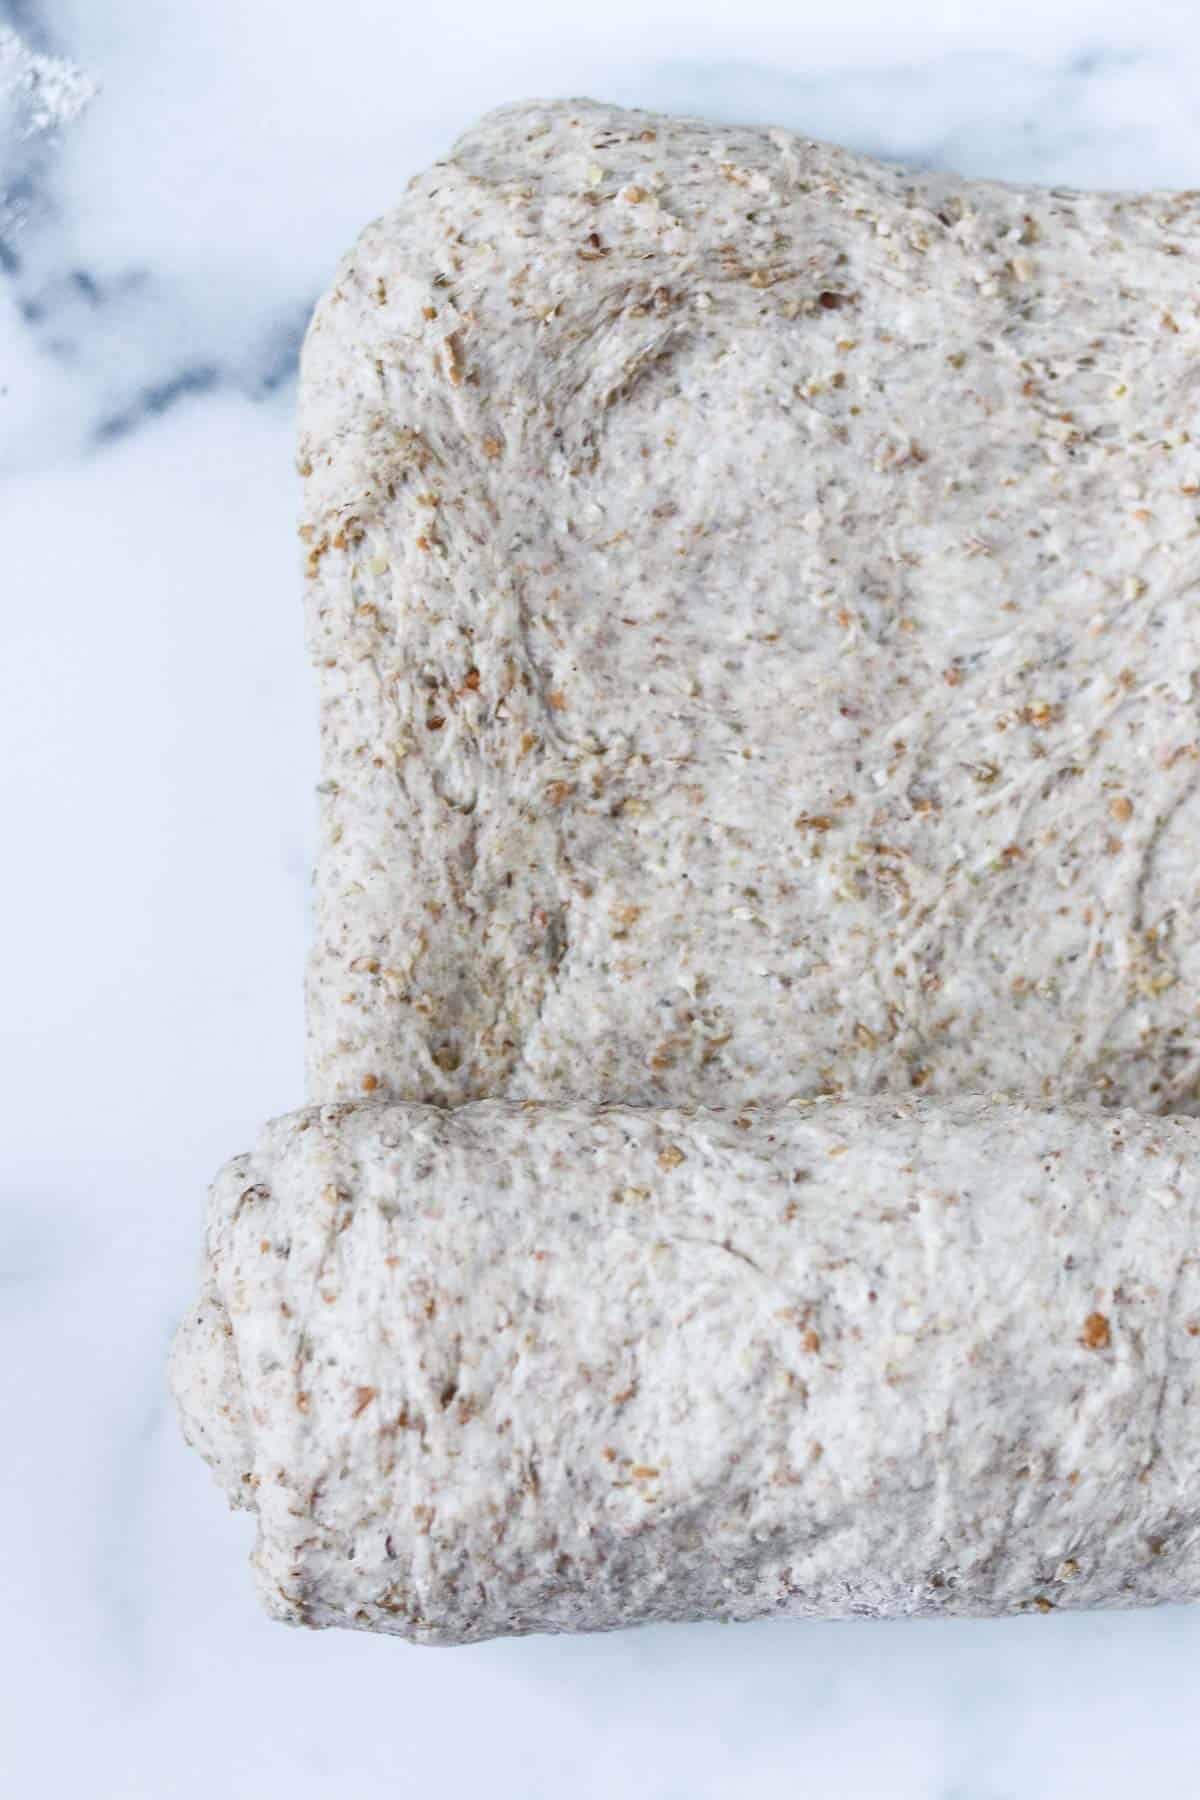
- Preheat the oven to 375 degrees F. and grease 2 standard 9 x 5 loaf pans. Transfer the risen dough to a clean work surface that has been lightly dusted with flour. Split the dough in half and, working with one half of the dough at a time, pat it into a rectangle that is about 8 inches long and 1 inch thick. Roll the dough into a loaf shape and pinch the seam together.

- Roll the dough into a loaf shape and pinch the seam together. Fold the ends of the rolled cylinder up and over to meet the seam. Pinch together to adhere. Transfer the formed loaf to one of the prepared loaf pans, seam side down. Repeat with the remaining half of dough.
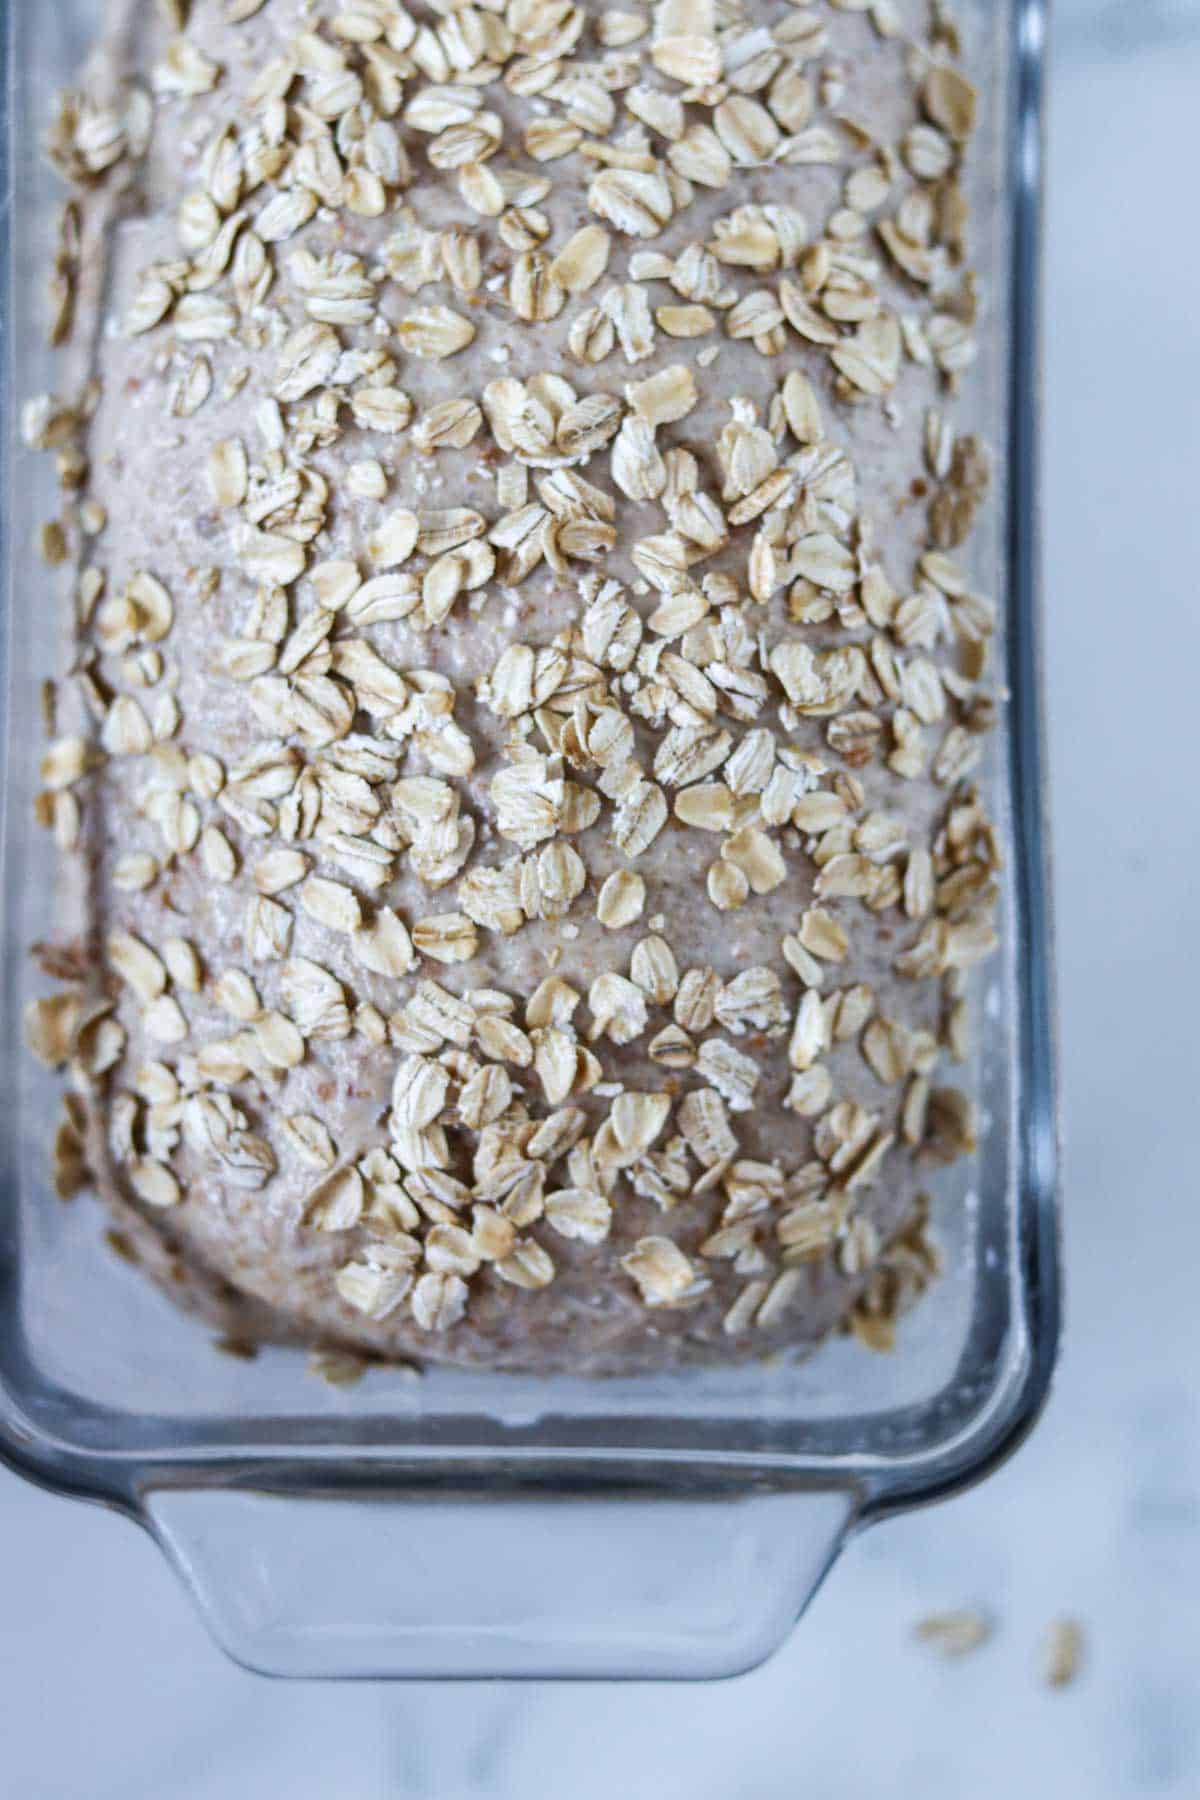
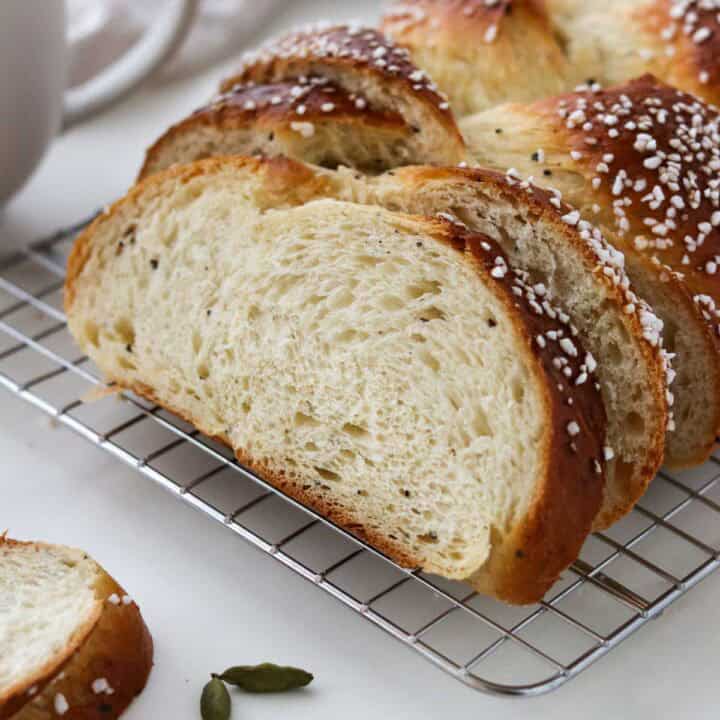
- Cover the loaves lightly with plastic wrap and let them rise until they begin to extend beyond the top of the loaf pan, about 45 minutes to an hour. Remove the plastic wrap and brush the loaves with milk and sprinkle with the oats, pressing lightly to adhere.
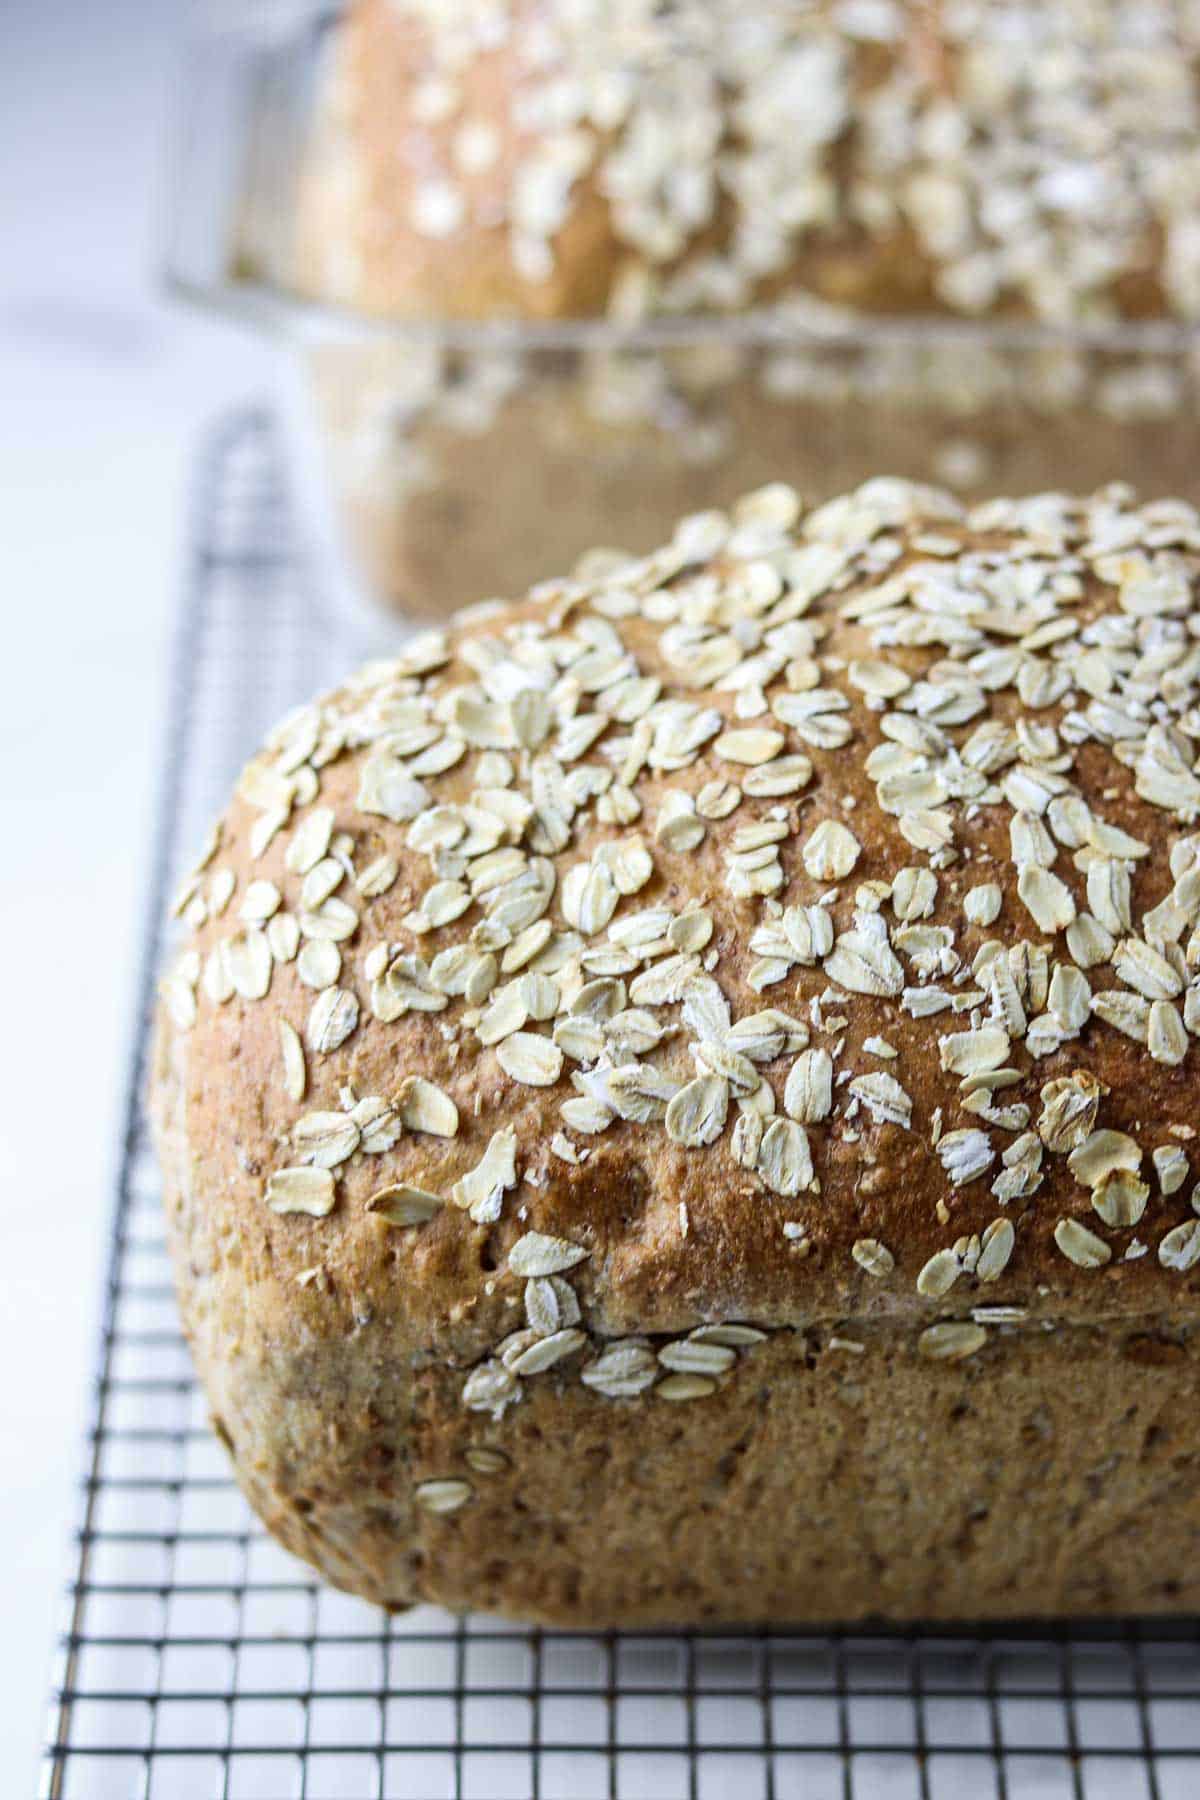
- Bake until golden brown and the internal temperature of the loaves reaches 200 degrees, 40-50 minutes. Cool in the pans for 20 minutes and then transfer to a wire rack to cool completely before enjoying.
Expert Tips
- Be sure to wait until the water and cereal mixture has cooled (to below 100 degrees F) before adding the other ingredients. This should take about an hour, and the mixture should feel just slightly warm to the touch. If the yeast comes into contact with the water while it's too hot, you risk killing the yeast and not having your bread rise.
- Know that the rising times given in the recipe may differ depending on the temperature of the dough and of your kitchen. It's better to go off of the visual cues (i.e., the dough has doubled in size or has extended beyond the top of the loaf pan) for best results.
- To ensure that your loaf is done, it's nice (but not necessary) to have a probe thermometer to check the temperature in the center of the loaf (it should be around 200 degrees F).
FAQs
Yes. Simply add the same amount of active dry yeast to the water and cereal mixture after it has cooled but is still slightly warm to to the touch. Let it sit for 5-10 minutes and proceed with the recipe as directed.
These loaves will keep well at room temperature for up to 3 days as long as they are wrapped in plastic wrap or stored in a plastic bag.
This bread freezes very well! Once the loaves have completely cooled, wrap them tightly in plastic and then in foil or alternatively in a ziploc freezer bag. If you want to be able to grab a slice as you need it, feel free to slice the bread prior to freezing it.
You can, but it will be a bit sticky at first and will take longer than using a mixer (more like 10-12 minutes of kneading).
Related Recipes
Looking for more delicious Scandinavian-inspired bread recipes? Give these blog favorites a try:

If you tried this Norwegian Whole Grain Bread (Grovbrød) recipe or any other recipe on my website, please leave a 🌟 star rating and let me know how it goes in the comments below. I love hearing from you!
Recipe

Norwegian Whole Grain Bread (Grovbrød)
Equipment
- Heavy duty stand mixer
- 2 Standard sized loaf pans (9x5)
Ingredients
- For the dough:
- 1 ¼ cup 7 grain cereal mix I use the Bob's Red Mill brand
- 2 ½ cups boiling water
- 3 cups bread flour
- 1 cup dark rye flour
- 1 cup whole wheat flour
- 2 ½ teaspoons instant yeast
- ¼ cup honey
- 4 tablespoons unsalted butter melted and cooled
- 1 tablespoon fine salt
- To finish:
- Milk for brushing on loaves
- Old-fashioned rolled oats for sprinkling
Instructions
- Place cereal mix in the bowl of a heavy-duty stand mixer. Pour boiling water over the grains. Let the mixture sit for about an hour or until it has cooled down to 100 degrees F.
- Whisk bread, rye and whole wheat flours and yeast together in a medium bowl. Set aside.
- Once the grain mixture has cooled, add honey, melted butter and salt. Mix briefly with the dough hook attachment to combine.
- WIth the mixer running on low, slowly add the dry ingredients to the wet ingredients. Mix on low until it is just combined, scraping down the bowl as necessary. Increase the speed to medium and knead for 6-8 minutes. The dough should be clearing the sides of the bowl but will still be tacky to the touch.
- Remove the bowl from the mixer and cover with plastic wrap. Let the dough rise at room temperature for an hour or until doubled in size.
- Preheat the oven to 375 degrees F. and set the oven rack in the middle position. Grease two 9 x 5 inch loaf pans and set aside. Lightly flour a clean countertop or work surface.
- Scrape the dough out onto the work surface and divide into two halves. Working with one half at a time, pat the dough out into a rectangle that is about 1 inch thick and 8 inches wide. Roll the rectangle lengthwise into a loaf shape. Pinch the seam together and fold the ends under to meet the seam, pinching the spot where the ends and the bottom of the loaf meet. Place the loaf into one of the prepared loaf pans, seam side down, and cover lightly with plastic wrap. Repeat with the remaining half of the dough. Let the loaves rise until they begin to extend over the edge of the loaf pan, about 45 minutes at room temperature.
- Brush each loaf with milk and sprinkle with oats, pressing lightly to help them adhere. Bake the loaves until golden brown, about 45-50 minutes (when the bread is done, the internal temperature of each loaf will be 200 degrees). Cool in the pan for 15-20 minutes and then transfer to a wire rack to cool completely before enjoying.

I made this yesterday and it is amazing! I didn’t have the 7 grain mix, so used some oats and a couple other grains on hand because I was too lazy to run to the store. Baked it as one loaf in an Emile Henry Pullman/long loaf clay pan. Baked for 45 minutes, then removed the lid and baked another 10 minutes to reach 200 degrees. This is definitely going into my frequent baking rotation. Can’t wait to try it with the 7 grain cereal mix (on my grocery list today). Thank you for this lovely recipe!
Thank you for the feedback, Erika! Your adjustments sound fantastic. I'm so glad you enjoyed the bread!
Kristi
I baked yesterday! Glad you teach how to prepare the hot cereal for bread. I reduced the amount of honey, so add some water. Yes, great sandwich bread:) This is my 2nd bread from your recipe, they all taste good! Thanks, Kristi!
So glad you enjoyed it and thanks so much for leaving a review!
Kristi
I am wondering if anyone has done this recipe in there bread maker? And what setting they used etc!
Can just one loaf be made by simply halving all the ingredients?
Yes, absolutely!
Can the amount of salt be reduced
Yes! Absolutely. Maybe start by cutting it half and see if you like the results.
Kristi
Have you tried baking it in a Dutch oven? Wanted to try, but was wondering if anyone has tired it yet .... and how it turned out
Thanks so much! Love this recipe by the way!
Hi Jamie,
I haven't tried it but I think it would probably work just fine! Please let me know if you give it a go. Glad you are enjoying the bread recipe!
Kristi
I made this bread for my husband and he really enjoyed it! It was the first time I have made bread in awhile. Thanks for the recipe!
I am now wishing for a similar gluten free recipe for myself:)
Hi Ann,
So glad you enjoyed it! Hope the sandwich turned out well!
Kristi
Hi Ann,
I'm glad your husband enjoyed the bread! You could try my gluten free seed cracker recipe for you. They are delicious!
Kristi
Would this fit in a 13 x 4 Pullman or would I need to adjust somehow? Love your buttermilk bread recipe, thank you so much!
Hi Kim,
Thanks for your question! I've never tried this recipe in a pullman pan but I feel like you might have a bit too much dough. You could certainly try it, but I would probably only fill the pullman pan with a loaf that fills about 2/3 of the loaf pan. You could always make a few rolls or a small loaf with the remaining dough. Please let me know how it turns out!
Kristi
This bread looks lovely! Do you have recipe available in metric units (grams)?
Hi Naana,
Thanks for your question! I haven't done it in grams but I will add it to my to do list!
Kristi
Hello, there. Did this recipe ever get updated with grams measurements? I might be missing it. New to your recipes. Loved the Swedish limpa made using the provided grams measurements. Cheers.
Hi Missa,
Thanks for your question! This recipe does have gram measurements - you need to scroll to the bottom of the ingredient list on the recipe card and it will say "US Customary" - "Metric". Click on Metric and you should be good to go. I get this question a lot. I wish they were easier to find. In any event, I hope you enjoy the bread. Please report back and let me know how it goes.
Happy Baking,
Kristi