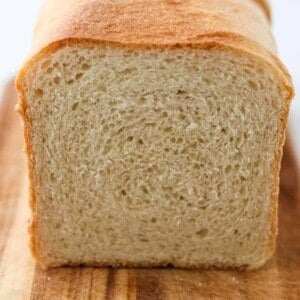
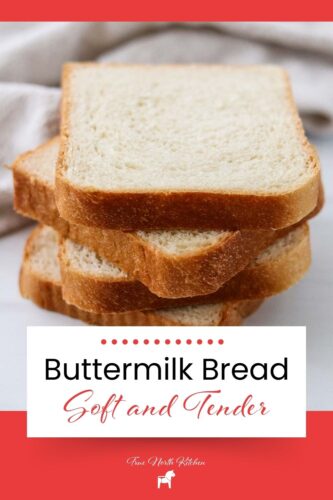
Soft and Tender Buttermilk Bread
This easy homemade buttermilk bread recipe has a tender crumb and a hint of tangy flavor from the buttermilk. Pillowy soft and fluffy, it's perfect for sandwiches, toast, or simply enjoying with butter and jam. You are going to LOVE this wholesome bread!

This recipe was inspired by a recent trip to Denmark where I enjoyed many open faced sandwiches on toasted bread just like this one. It's incredibly versatile and is beautifully crisp yet tender when toasted. I just adore this bread.
I have many recipes for hearty rye and whole grain breads on my website such as Easy Overnight Danish Rye Bread or this delicious Norwegian Brown Bread. But sometimes it's nice to have something on the lighter side. This Buttermilk Bread is exactly that.
Jump to:
Ingredients
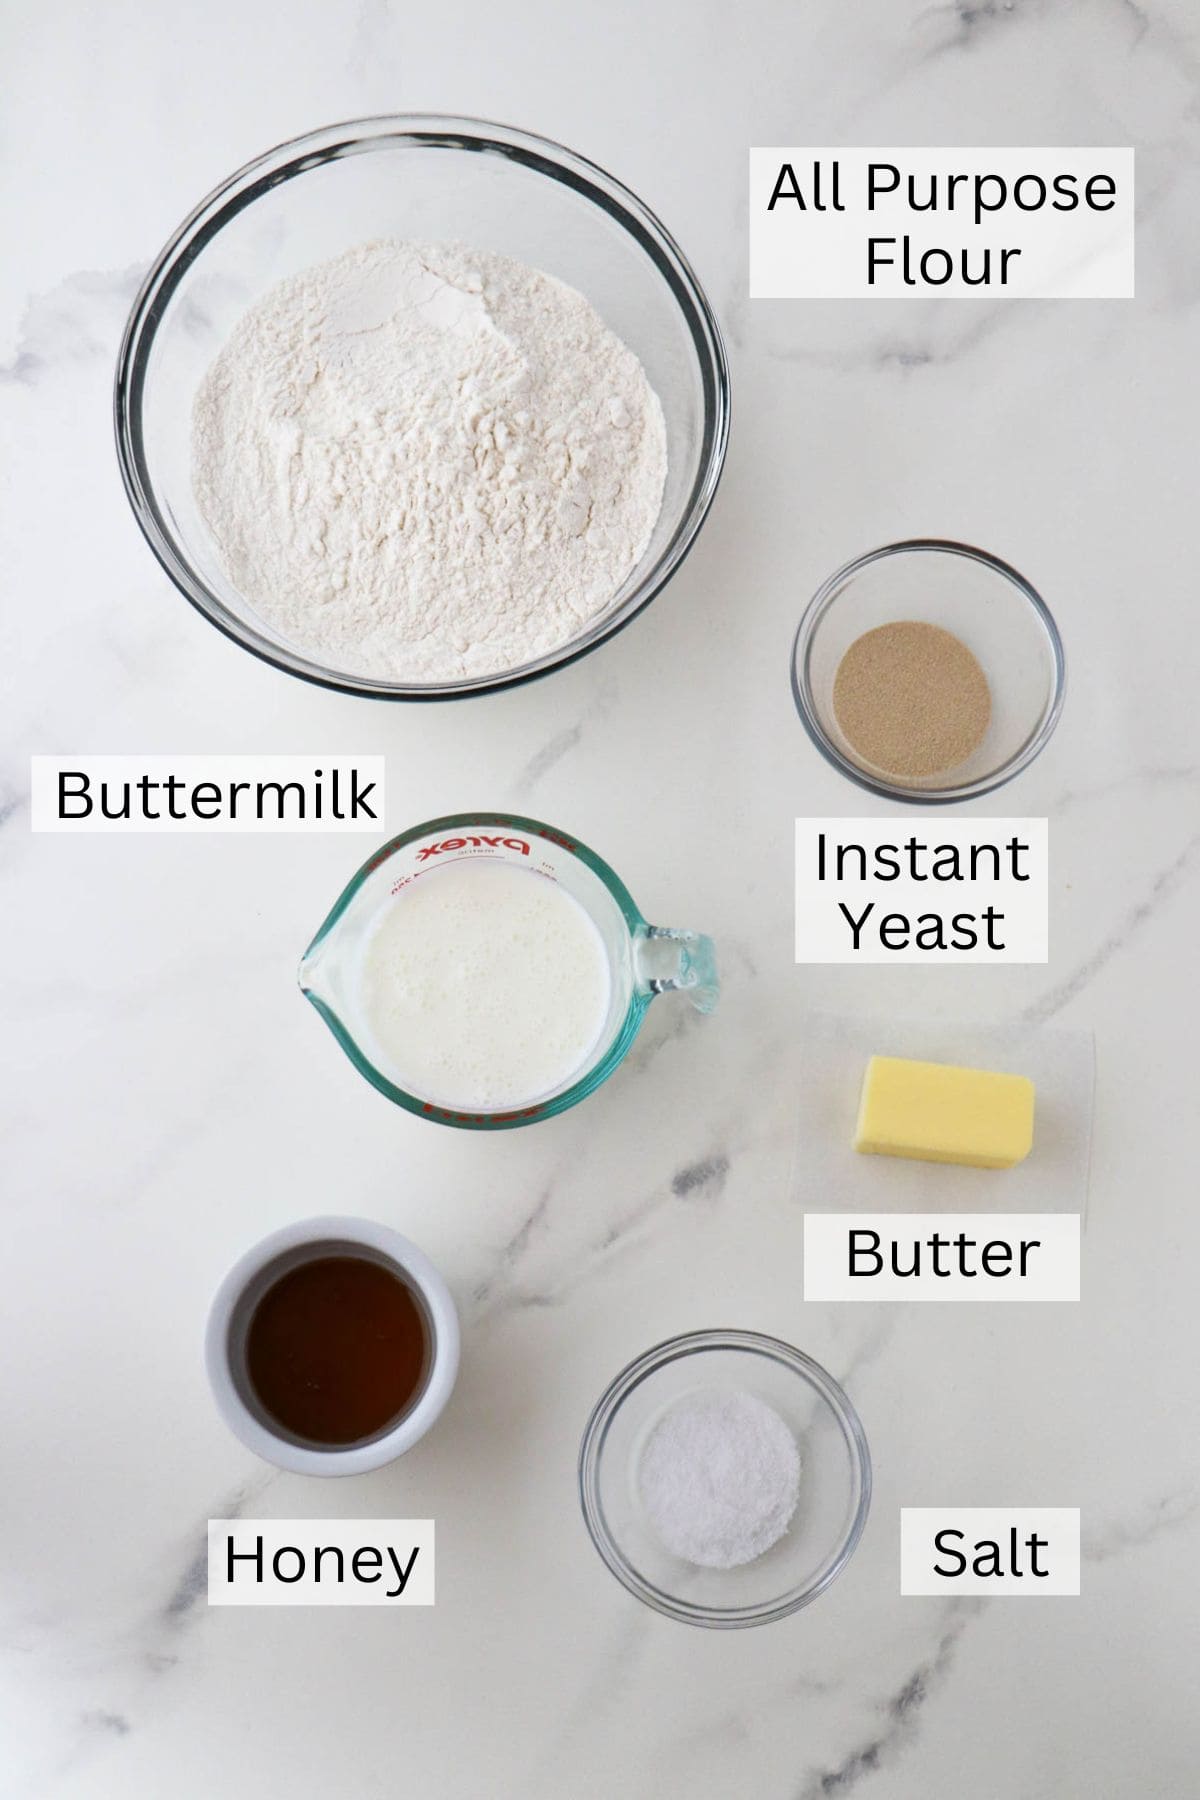
- All Purpose Flour: All-purpose is our flour of choice here. It is what most of us have on hand for baking and it creates a sturdy yet soft crumb.
- Buttermilk: Provides a distinctive tang and helps create a tender texture.
- Instant Yeast: Instant yeast acts as a leavener in this recipe.
- Honey: Adds a subtle sweetness and balances the tanginess of the buttermilk.
- Unsalted Butter: Contributes richness and flavor.
- Salt: Enhances the flavor of this loaf and brings out the best in the other ingredients.
See recipe card below for exact amounts and detailed instructions.
Substitutions
- No buttermilk? No problem! Make a quick substitute buttermilk by combining 1 tablespoon of distilled white vinegar or lemon juice with 1 cup of milk. Let stand at room temperature for about 10 minutes or until it begins to clump and thicken.
- You could replace the honey with maple syrup if you like.
- Vegetable oil can stand in for the butter.
- To use active dry yeast rather than instant yeast, warm the buttermilk slightly (it should be just warm to the touch (100-110 degrees F) and sprinkle 1 tablespoon of active dry yeast over the top. Stir to combine. Let sit for 10 minutes or until it becomes a bit bubbly. Proceed with the recipe as directed.
Variations
- Herbed Buttermilk Bread: Add chopped fresh rosemary, thyme, dill and/or chives to the dough towards the end of the kneading time.
- Whole Wheat Buttermilk Bread: Replace up to half of the the all-purpose flour with whole wheat flour.
Instructions

- Step 1: Whisk the dry ingredients in the bowl of a stand mixer.

- Step 2: Whisk the remaining ingredients in a medium bowl until the honey is completely incorporated.

- Step 3: Mix on medium low with the dough hook until a dough forms. Increase speed to medium and knead until soft and smooth (7 minutes). Transfer dough to a greased bowl.
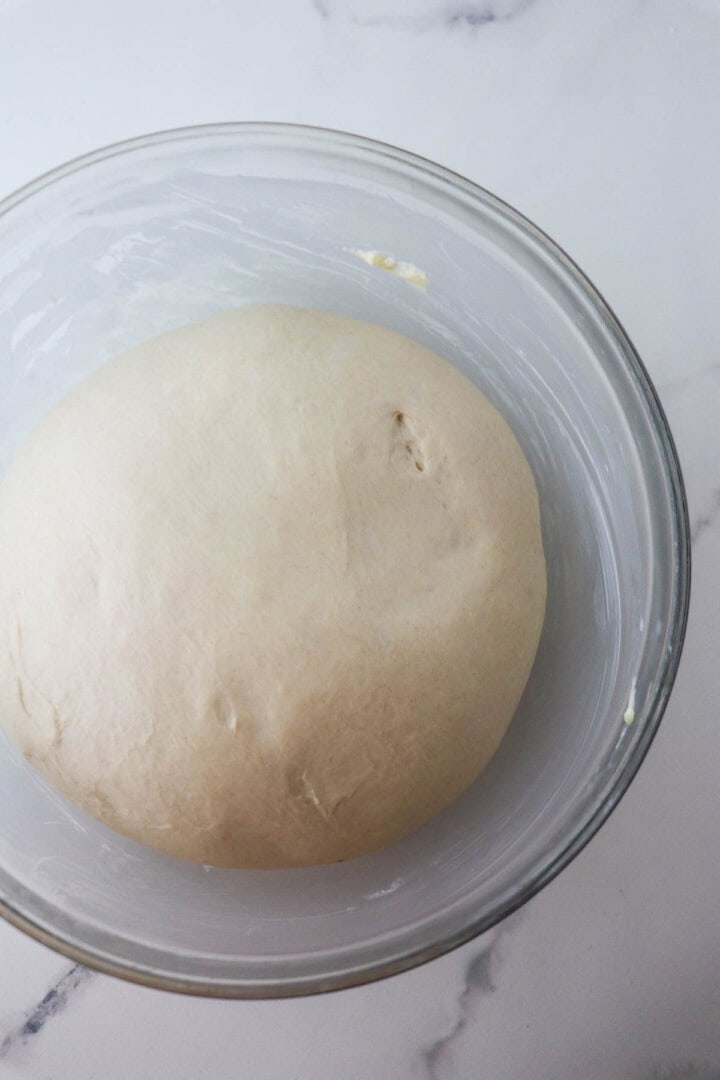
- Step 4: Cover and let rise at room temperature until doubled in size, about 1 ½ hours.
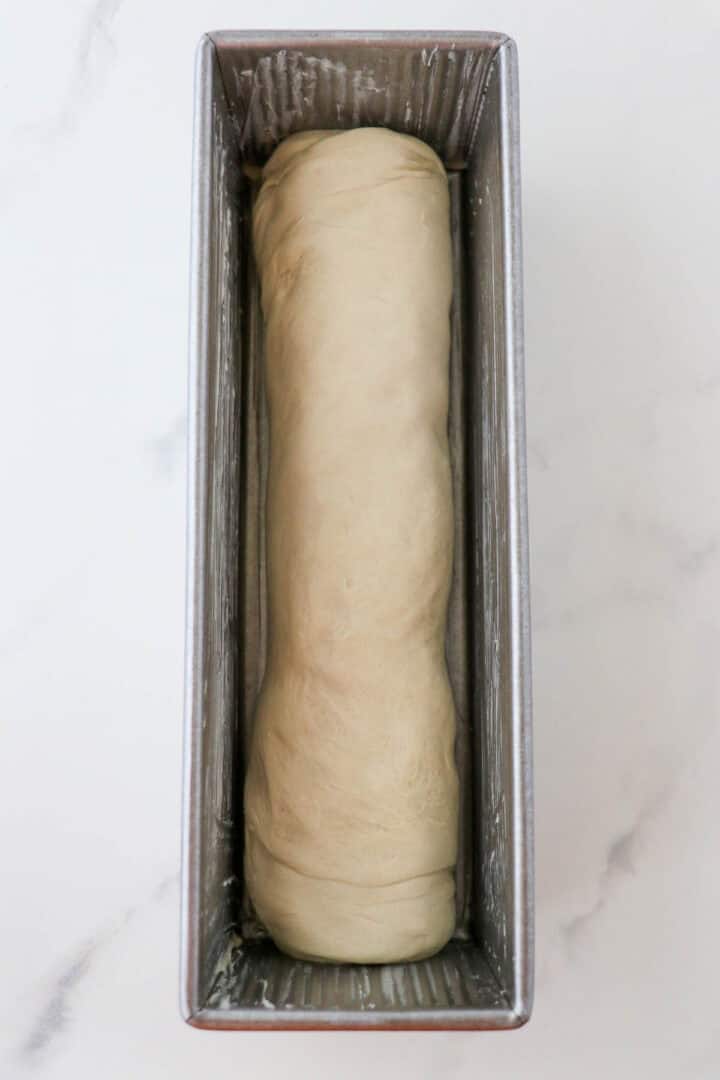
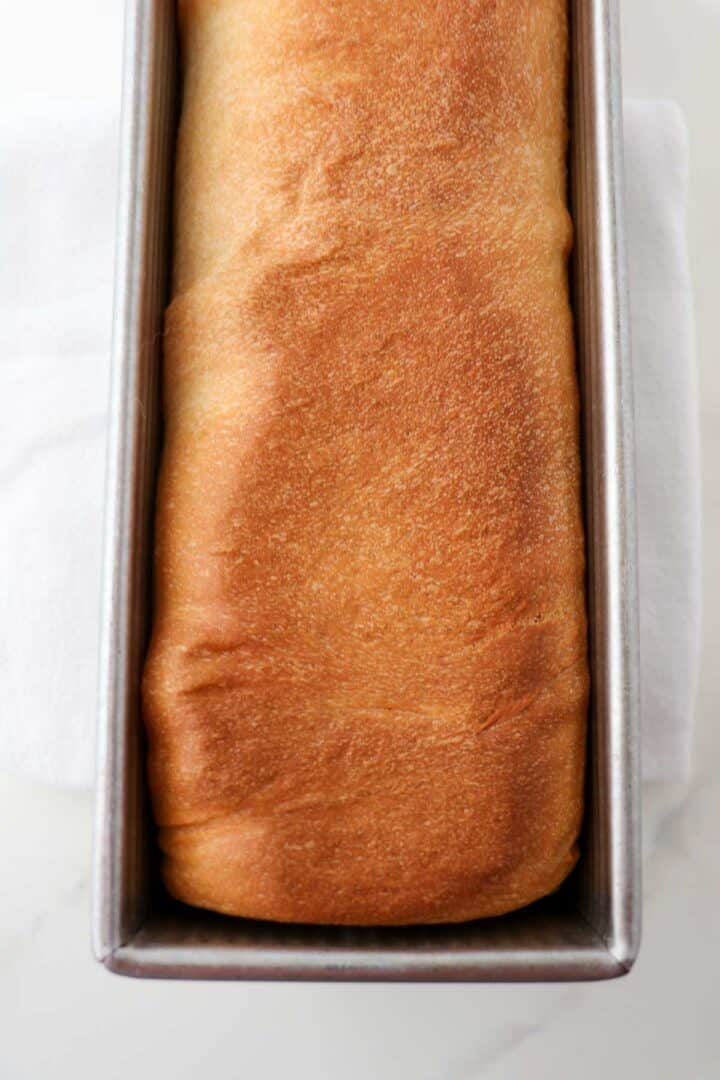
- Step 5: Press or roll dough into a 10 x 12 inch rectangle with the long side parallel to the countertop. Roll away from to create a tight cylinder. Pinch the seam in place. Place seam side down in a greased pullman pan.
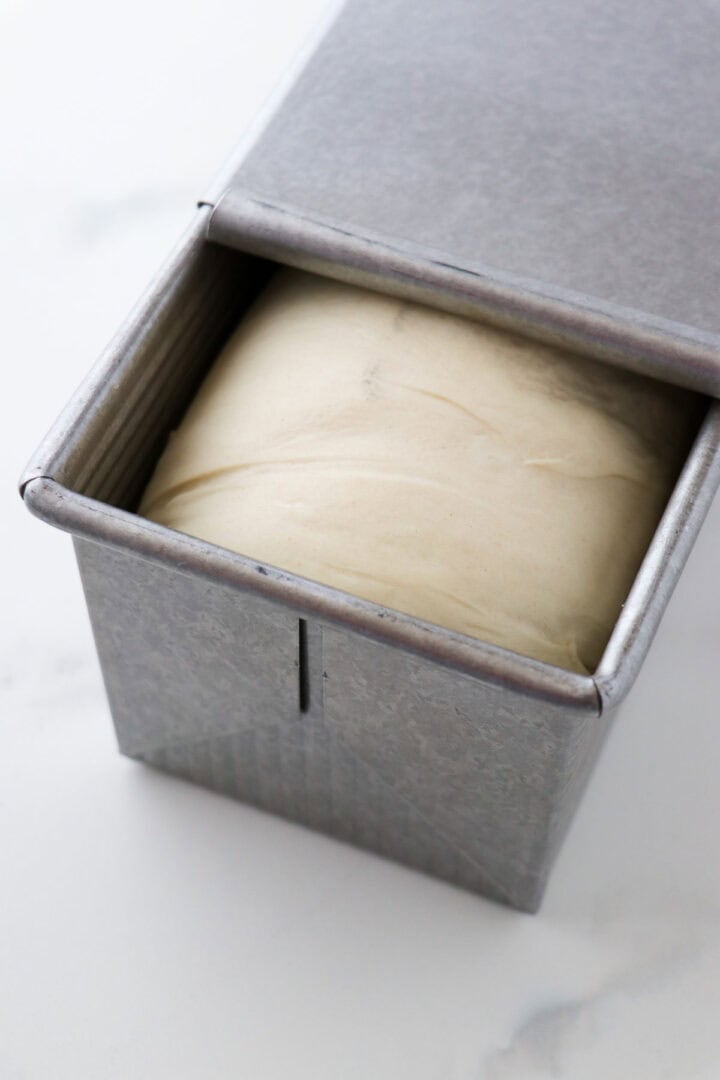
- Step 6: Slide the pullman pan lid on and let rise until the dough is flush with the top of the pan, about 1- 1 ½ hours.
- Step 7: Bake at 350 degrees F with the lid on for 20 minutes. Carefully remove the lid and rotate the pan. Continue baking uncovered for 15-20 minutes or until the loaf is golden brown.

- Step 8: Let the loaf cool in the pan for 15 minutes and then tip out onto a wire rack. Cool completely before slicing and serving.
Recipe FAQ
Buttermilk bread tastes like a traditional white sandwich bread with a subtle tang and richness to it.
In addition to adding a bit of tang to the flavor of the bread, the acidity of buttermilk helps contribute to the soft texture and tender crumb of the loaf.
This recipe will still be successful if you use regular milk but you won't get the subtle tanginess or extra tender crumb.
You can store this bread well wrapped at room temperature for up to 3 days. Freeze for longer storage (see FAQ below).
Absolutely! It freezes really well. Either tightly wrap the whole loaf in plastic and then in foil or cut the loaf into slices and freeze as many slices as you want to pull out together at a time in packets.
You can use two standard sized greased loaf pans and make two loaves. Use a greased baking sheet as a makeshift lid during the covered portion of the baking process. Baking times may vary slightly.
How to Use Buttermilk Bread
This versatile bread is up for just about anything, but here are some ideas for how you might use this bread beyond the basics:
- Use it for Cardamom French Toast.
- Make Traditional Toast Skagen and use Buttermilk Bread as the base.
- Caramelize cubes of this bread in butter and sugar and make a Danish Apple Trifle.
- Use this bread for a traditional grilled cheese or this Toasted Goat Cheese Sandwich with Sundried Tomatoes and Olives.
- Make smørrebrød at home and use toasted Buttermilk Bread as the base layer.
- Make a batch of Queen's Jam (Blueberry Raspberry Jam) - a quick and easy refrigerator recipe with no canning - and spread it over buttered, toasted Buttermilk Bread.
Related Recipes
Looking for more Scandinavian -inspired breads? Give these a try:


If you tried this Soft and Tender Buttermilk Bread or any other recipe on my website, please leave a 🌟 star rating and let me know how it goes in the comments below. I love hearing from you!
Recipe
Soft and Tender Buttermilk Bread
Equipment
Ingredients
- 4 cups all-purpose flour 20 ounces
- 1 tablespoon instant yeast
- 2 teaspoons salt
- 1 cup buttermilk
- ⅓ cup water room temperature
- 4 tablespoons unsalted butter melted
- 2 tablespoons honey
- Butter for greasing the bowl and the pan
Instructions
- Whisk the flour, yeast and salt together in the bowl of a stand mixer. Combine the remaining ingredients in a medium bowl and whisk until the honey has dissolved.
- Insert the dough hook attachment and turn the mixer on at low speed. Slowly add the liquid ingredients into the dry ingredients. Mix on low until the dough just comes together.
- Increase mixer speed to medium-low and knead the dough until it is smooth and elastic and clears the sides of the bowl, about 7 minutes.
- Transfer the dough to a large, lightly greased bowl and let rise at room temperature until doubled in size, about 1 ½ hours.
- Grease the bottom, sides and inside lid of a 13 x 4 inch pullman pan. Remove the dough from the bowl and transfer to a clean work surface. Press into a 10 x 12 inch rectangle with the long side parallel to the countertop. Roll the dough away from you to create a tight cylinder. Pinch the seam together and place the cylinder, seam side down in the prepared pan, pressing the dough into the corners.
- Slide the lid onto the pan and let rise at room temperature until it is level with the top of the pan, about 1 - 1 ½ hours.
- Preheat the oven to 350 degrees. Place the covered pan into the oven and bake for 20 minutes. Carefully remove the lid and rotate the pan. Continue baking, uncovered, for an additional 15-20 minutes or until the loaf is golden brown and an instant-read thermometer inserted into the loaf registers 210 degrees F. Let the loaf cool in the pan for 15 minutes before gently tipping it out onto a wire rack. Cool completely before serving.


I have a question regarding the ingredient list, you say 4 cups of flour or 20 ounces. But 1 cup of flour is typically 120 grams, and 1 ounce is 28 grams. So is this recipe closer to 480 grams of flour or 560 grams of flour? Would you ever consider writing your recipe with gram conversions instead?
Hi Susie,
Thanks for your question! The weight of a cup of flour depends on how you measure it. I use the dip and sweep method (fluff flour briefly, dip measuring cup in and level off). This will give you approximately 5 ounces of flour. The spoon and level method (gently spooning the flour into the measuring cup and leveling off) will give you a lighter weight per cup. I do have grams available for some of my recipes. I will make it a point to add that as an option here. I hope you give the recipe a try!
Kristi
Hi Kristi!
I do not have a Pullman pan but am guessing my bread loaf pans will be fine, correct? What do you mean to rotate the pan? Also, how much rotation? Planning to make your braided cardamom loaf this week, too. Thanks so much. Appreciate you!
Hi Laura,
Great question! A standard 9 x 5 loaf pan will work, but you’ll likely need two pans. The dough amount is designed for a 13 x 4 inch Pullman pan, which has more volume than a typical loaf pan. The finished loaf will also be rounded on the top rather than perfectly square like the pullman version.
You have two good options:
• Divide the dough between two 9 x 5 pans for slightly smaller loaves.
• Or divide about ⅔ of the dough into one 9 x 5 pan and use the remaining dough for a small mini loaf or a few rolls.
Let the dough rise until it crowns about 1 inch above the rim, then bake at 350°F. Start checking around 30-35 minutes for smaller loaves (they’ll bake faster than the Pullman version).
And when I say “rotate the pan,” I simply mean turn it 180 degrees halfway through baking so it browns evenly, just one half-turn.
You’re going to love it. Pairing it with the braided cardamom loaf sounds like the best baking week ever!
Kristi
This recipe is so easy and so spectacular delicious. My kids love it. Thank you for posting it.
I'm so glad you and your kids are enjoying it. Thanks for leaving a comment!
Kristi
This bread is tender, soft and easy to make. And I love that it has a perfectly square shape thanks to the pullman pan! It makes excellent toast and sandwiches.