Gluten-Free Seed Crackers (Norwegian Crispbread)
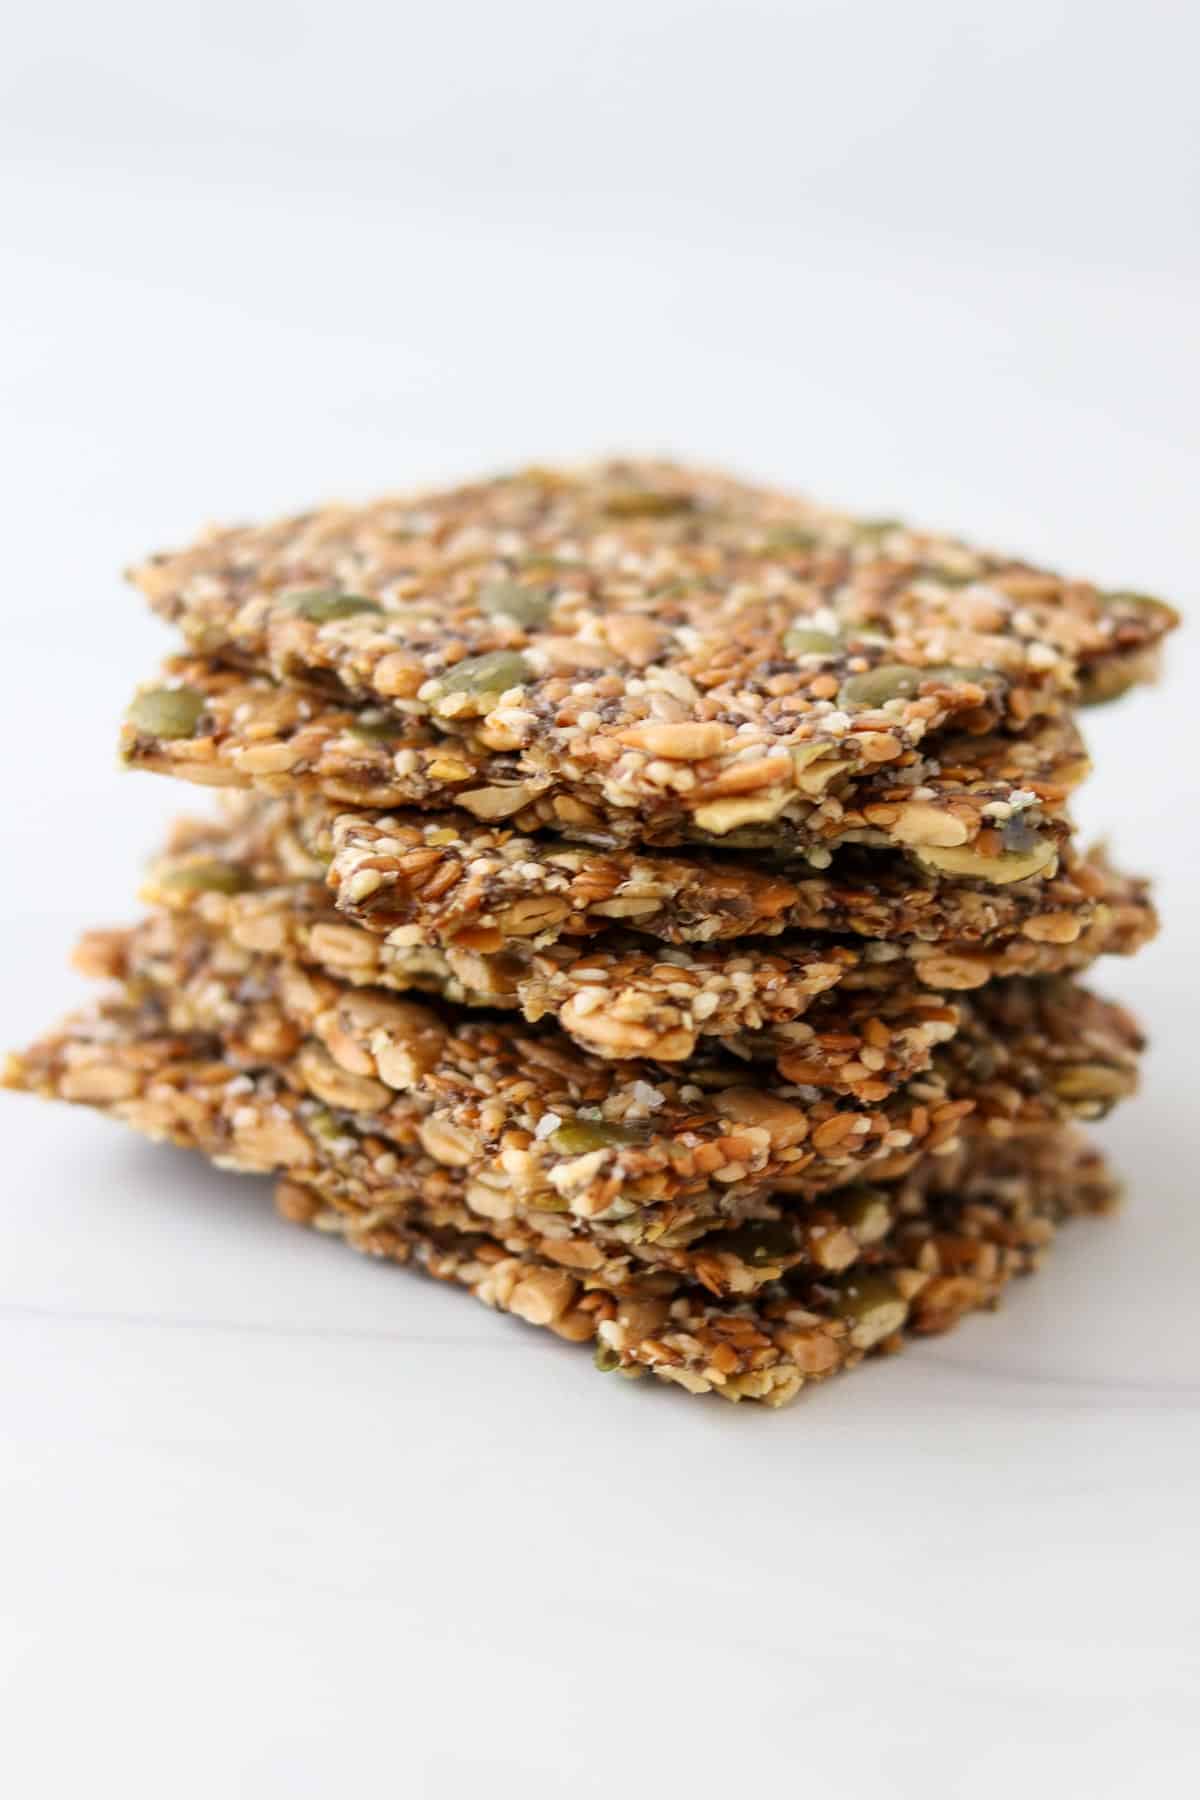
Whether you call these crackers or Norwegian Crispbread (Knekkebrød), these golden, crispy seed crackers are a dream, both to make and to eat! 5 different varieties of seeds come together with the help of a little water and cornstarch to create one of the best homemade gluten-free crackers you'll ever have the pleasure of eating.
And the good news is that the process for making them couldn't be easier! I'm talking no more than 10 minutes of hands-on time here. Grab ALL THE SEEDS, a bowl and a sheet pan and let's get started!
Why This Recipe Works
- These 5 seed crackers are incredibly easy to make. Simply stir the ingredients together, spread the dough out on a sheet pan and bake. Done! Perfectly crisp, homemade gluten-free crackers.
- The mix of seeds included creates a tasty and nutritious cracker.
- This recipe contains NO FLOUR. Cornstarch and chia seeds serve to bind the crackers together.
What Makes This Recipe Nordic/Scandinavian?
Scandinavians eat a lot of crispbread, Swedes boasting the highest consumption, closely followed by Norway. It is considered a form of bread, not just a cracker, and serve it for breakfast, lunch, dinner and as a snack in between meals. It is often made with rye flour but can also include wheat, oats or barley and/or a variety of seeds such as flax or sunflower.
Norwegian Crispbread (Knekkebrød) is often made as a hearty seed cracker that is bound together with rye flour. This recipe is quite simply a gluten-free version which substitutes corn starch for the rye flour. This artisan crispbread from Norwegian Baked is an excellent example of the traditional variety (and a delicious option if you don't mind a little gluten (rye flour has a minimal amount) and don't want to bake it yourself).
Ingredients
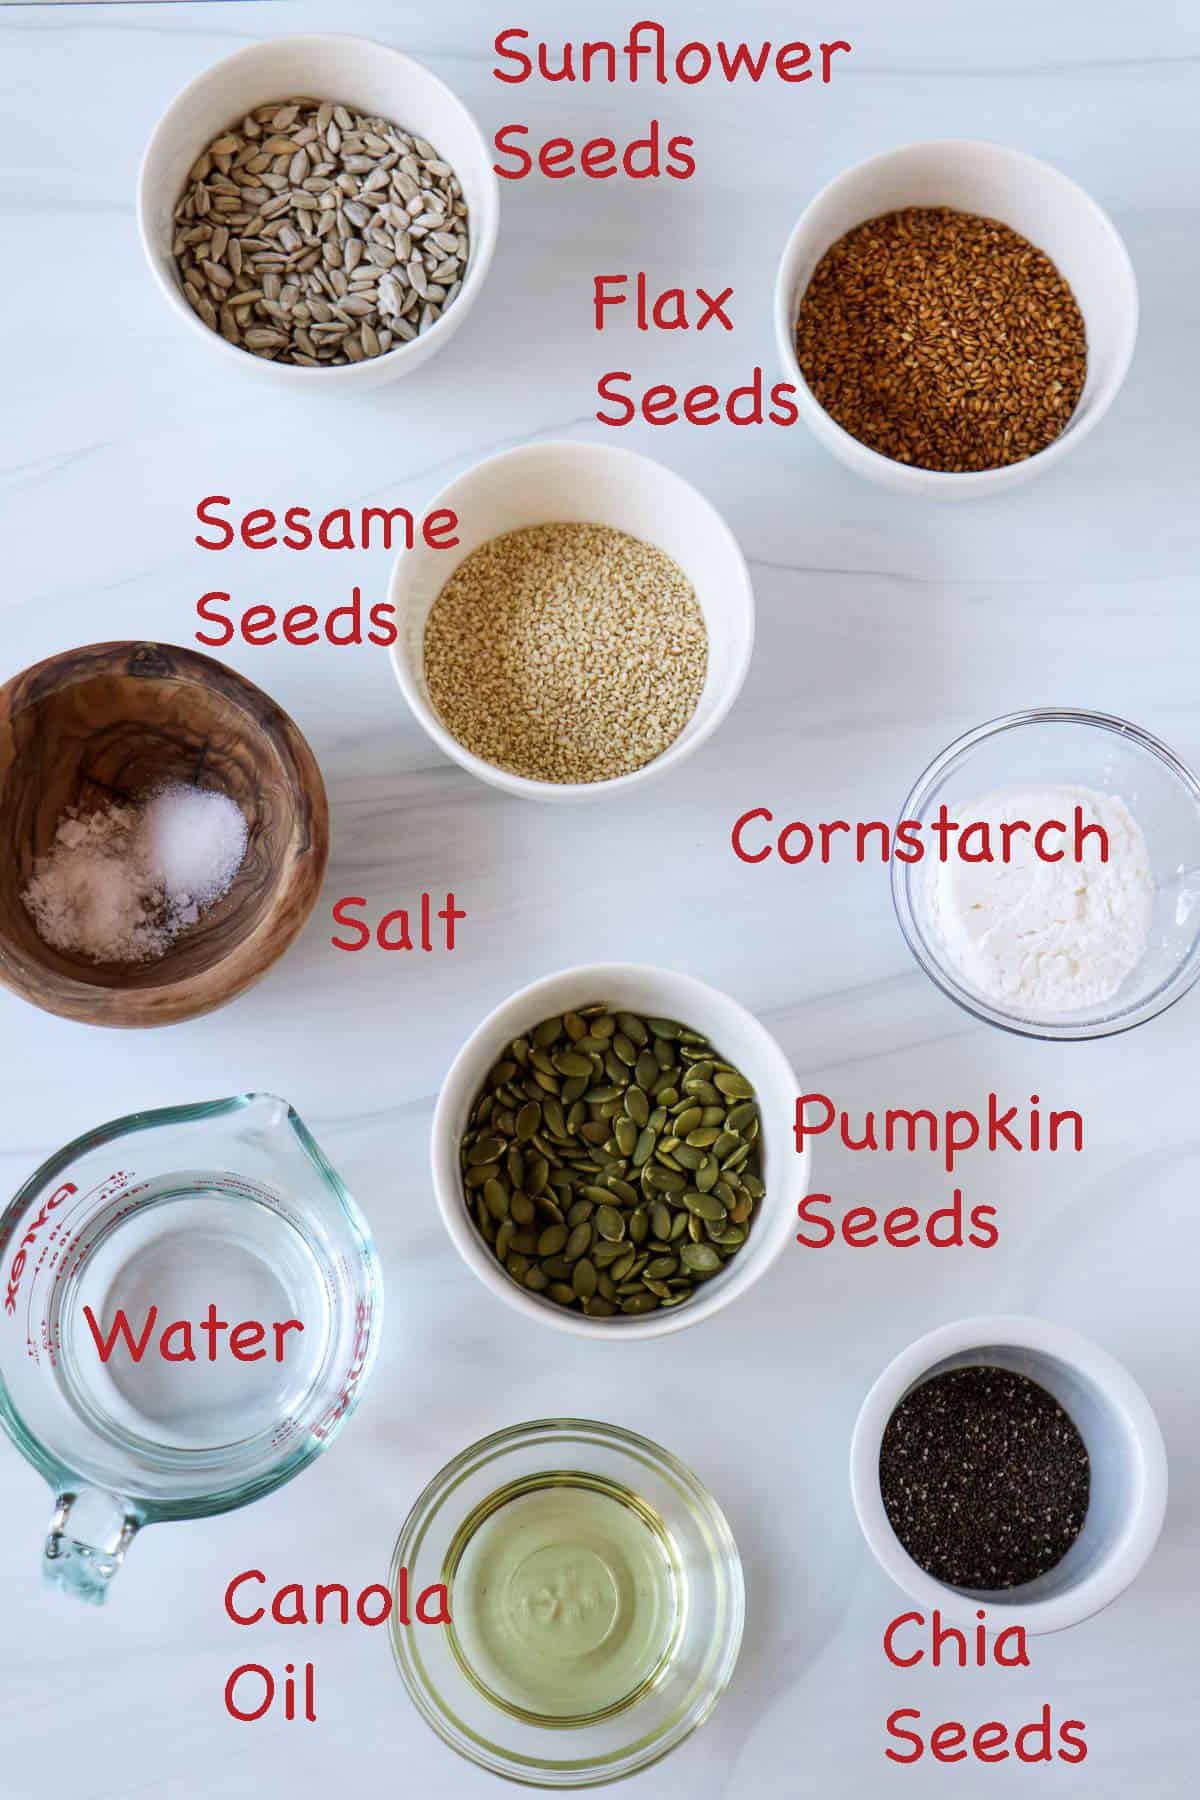
- The stars of the show here are the seeds: Pumpkin (pepitas), sunflower, flax, sesame and chia. We've got them all! Not only do they bring great flavor to these crunchy crackers, the are each nutritious in their own way. See the FAQ section below for more on the nutritional value of seeds.
- Cornstarch helps bind the crackers together.
- Canola oil helps them brown and crisp in then oven.
Special Equipment Needed
- Parchment paper
- 13x18 Rimmed baking sheet
- Small offset spatula (not essential but helpful)
How To Make This Recipe
- Preheat the oven to 275 degrees. Line a rimmed baking sheet with parchment paper and set aside.
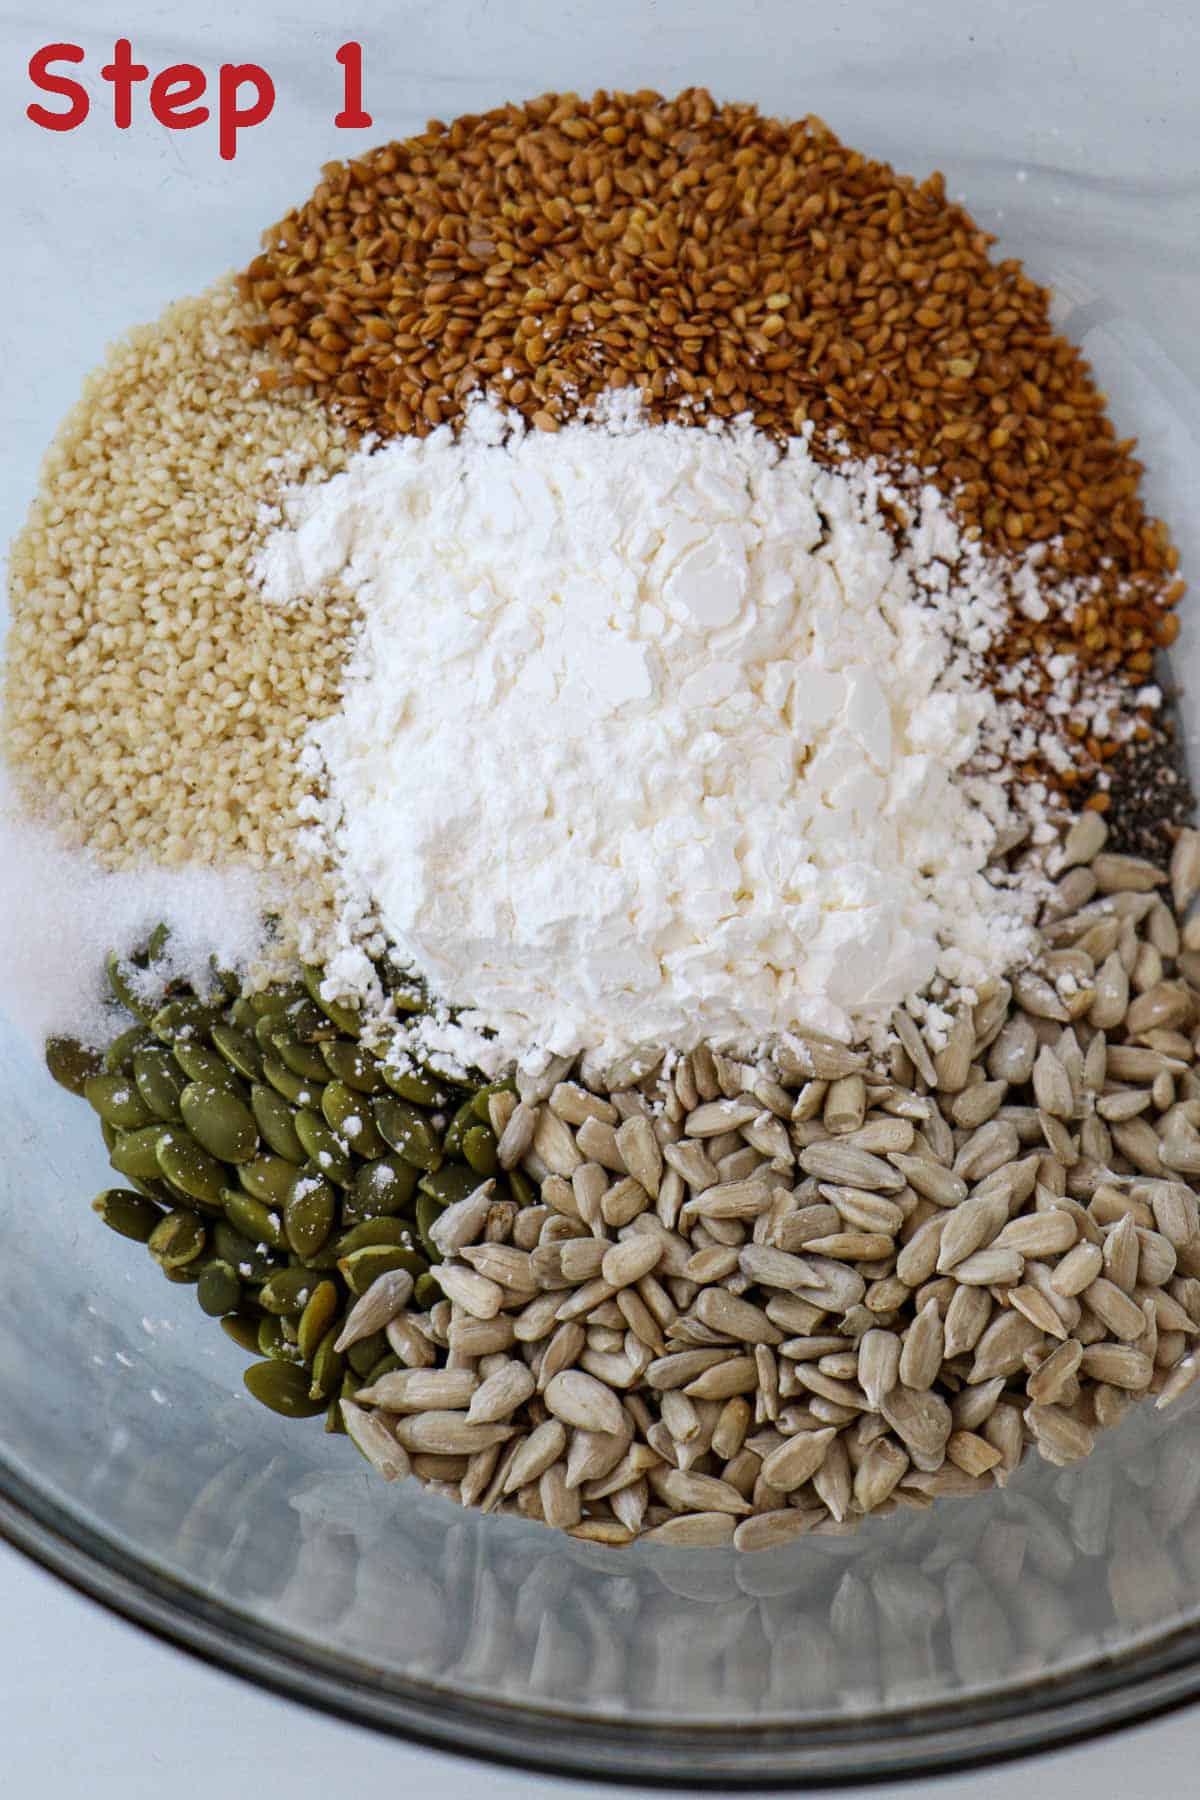
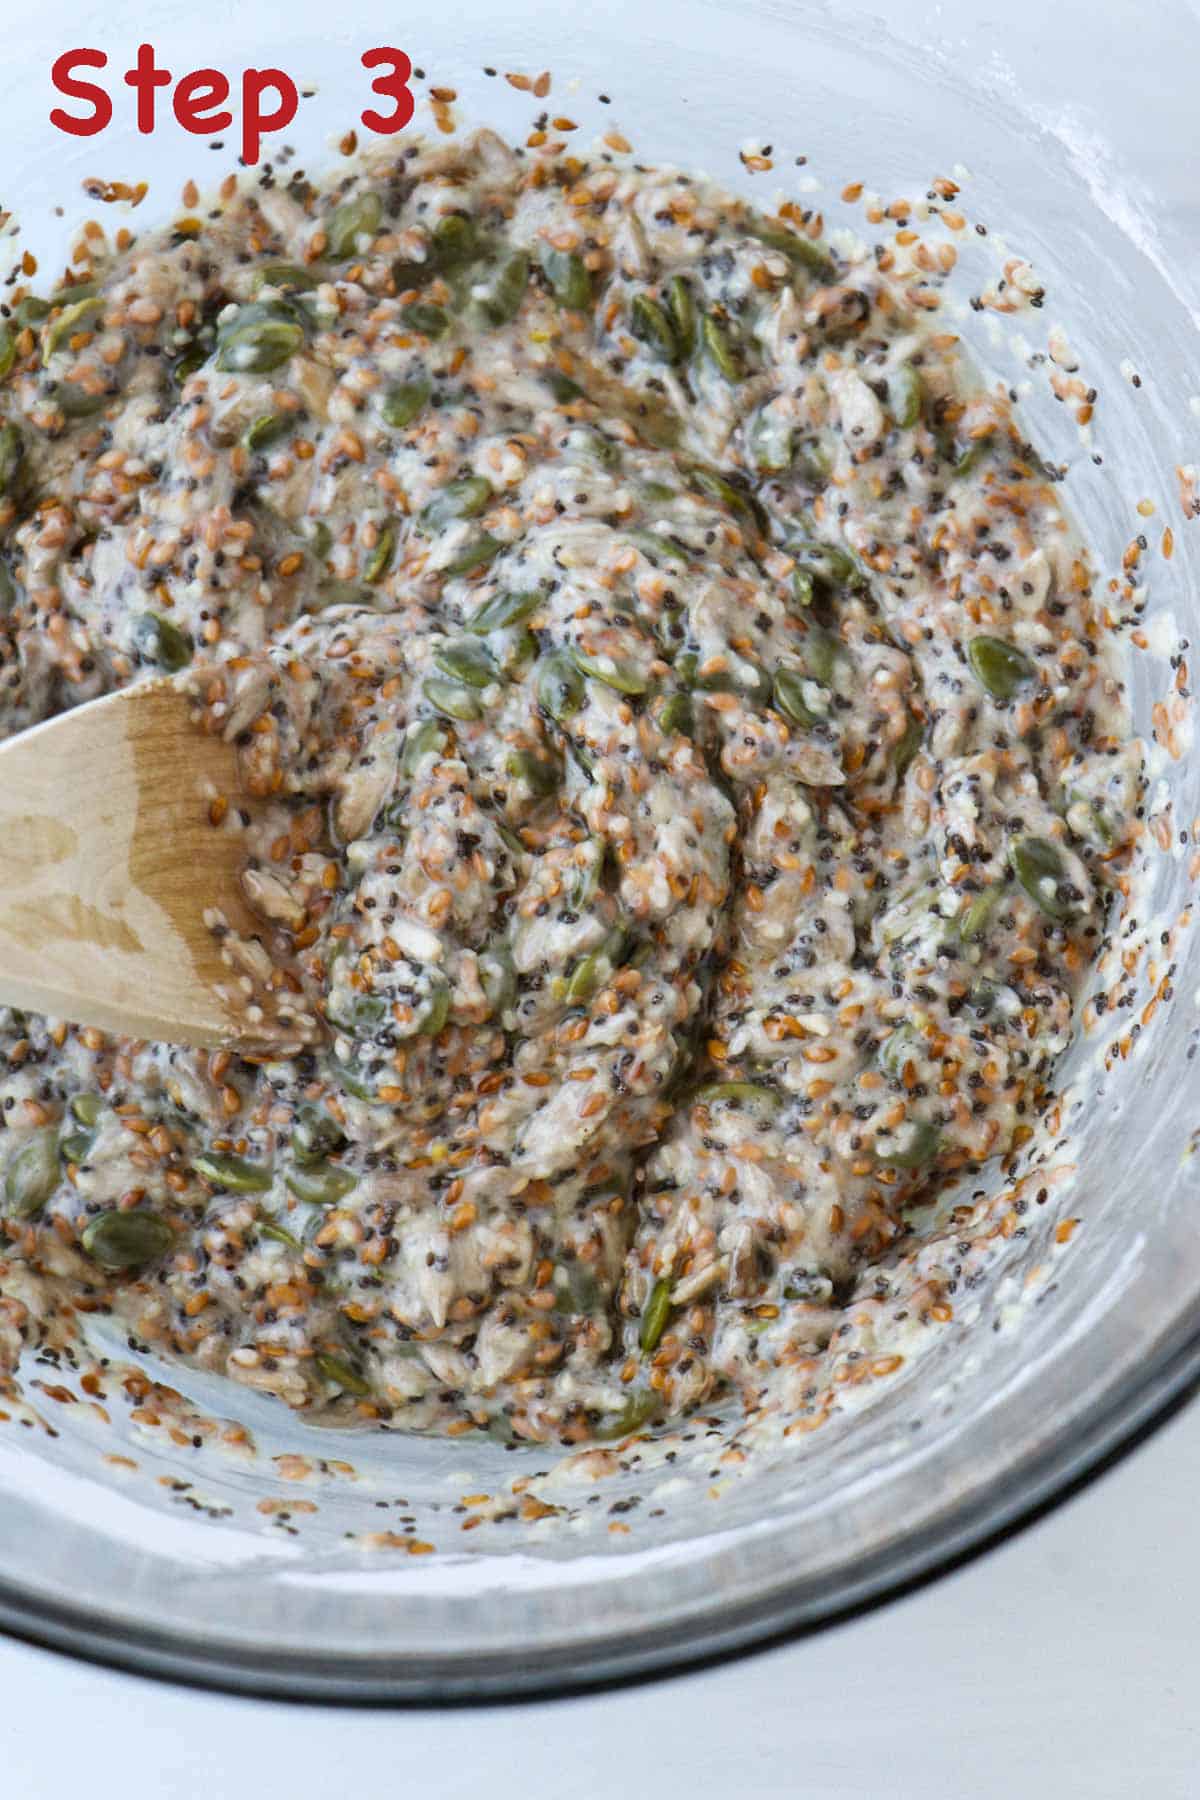
- Put all of the dry ingredients in a large bowl. Stir to combine.
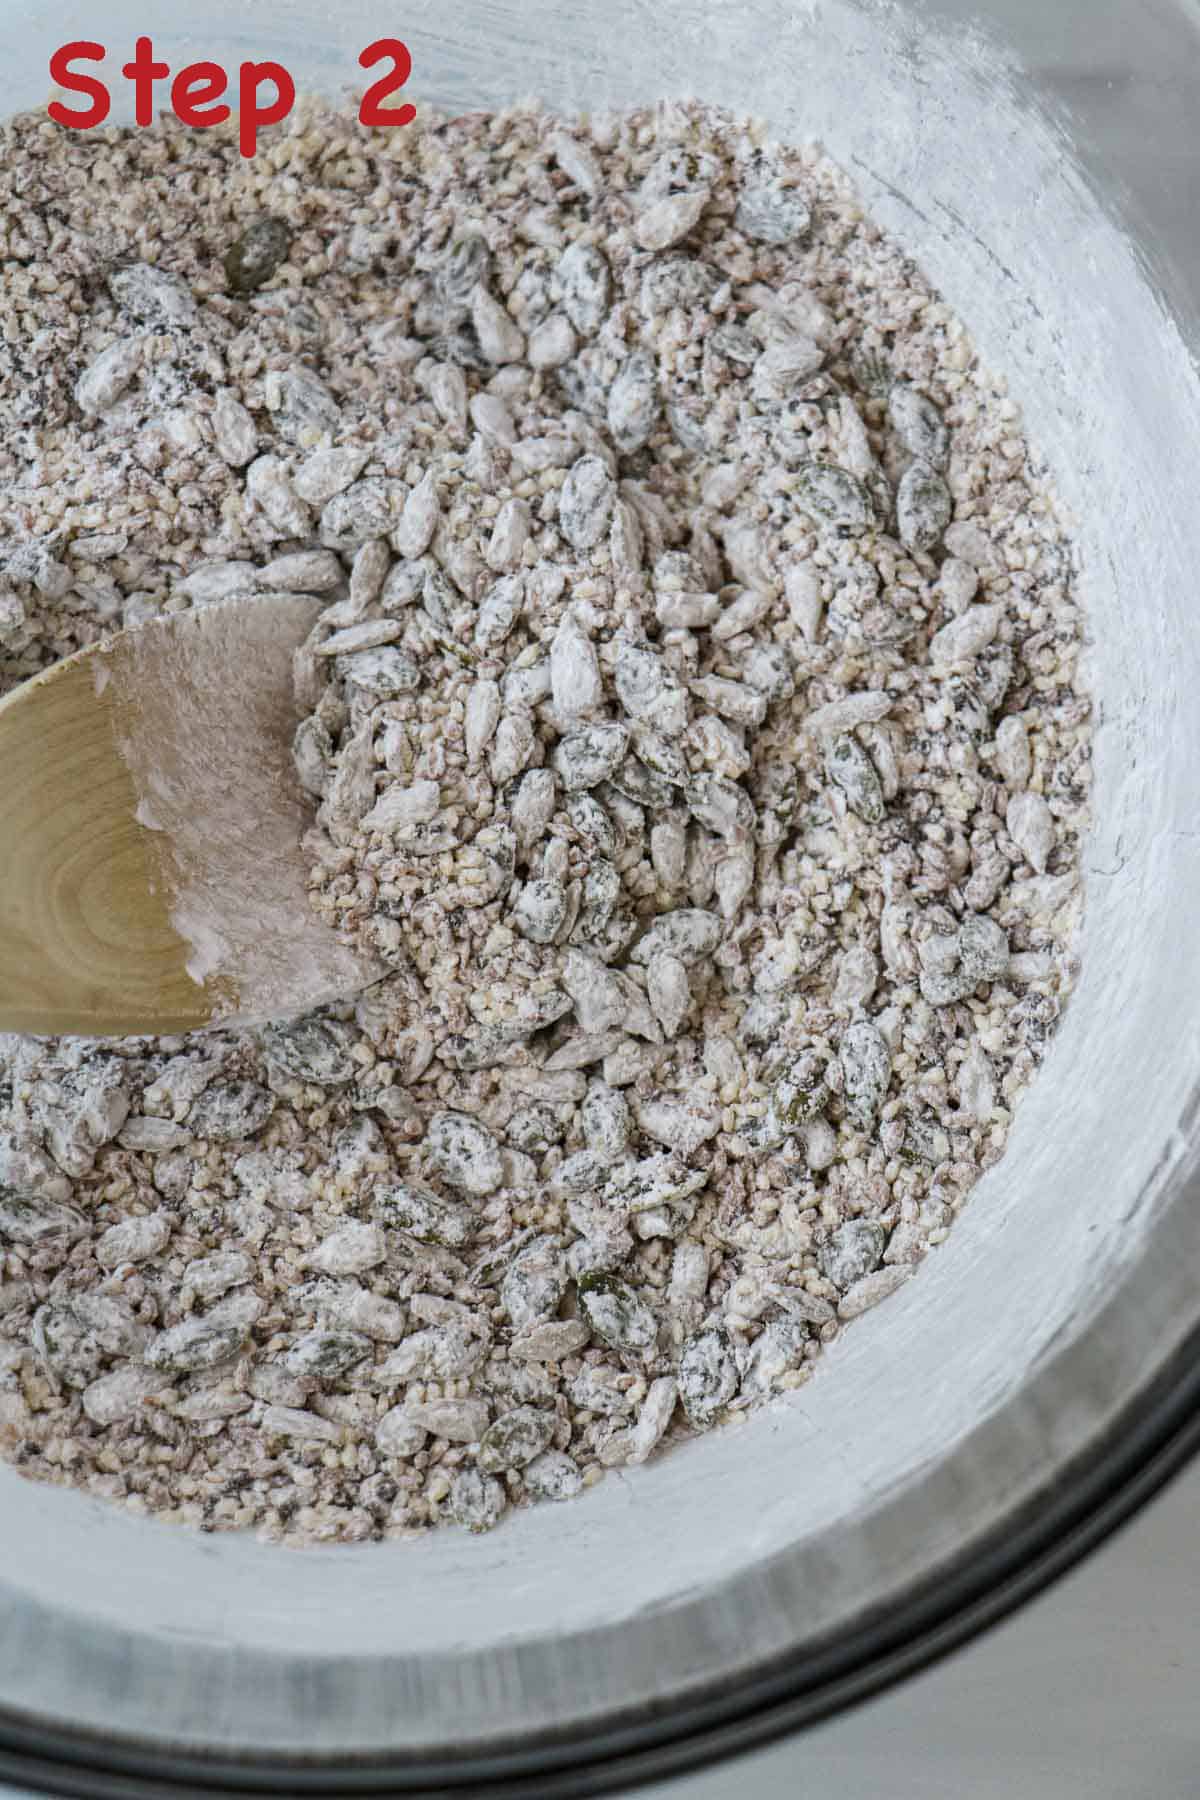
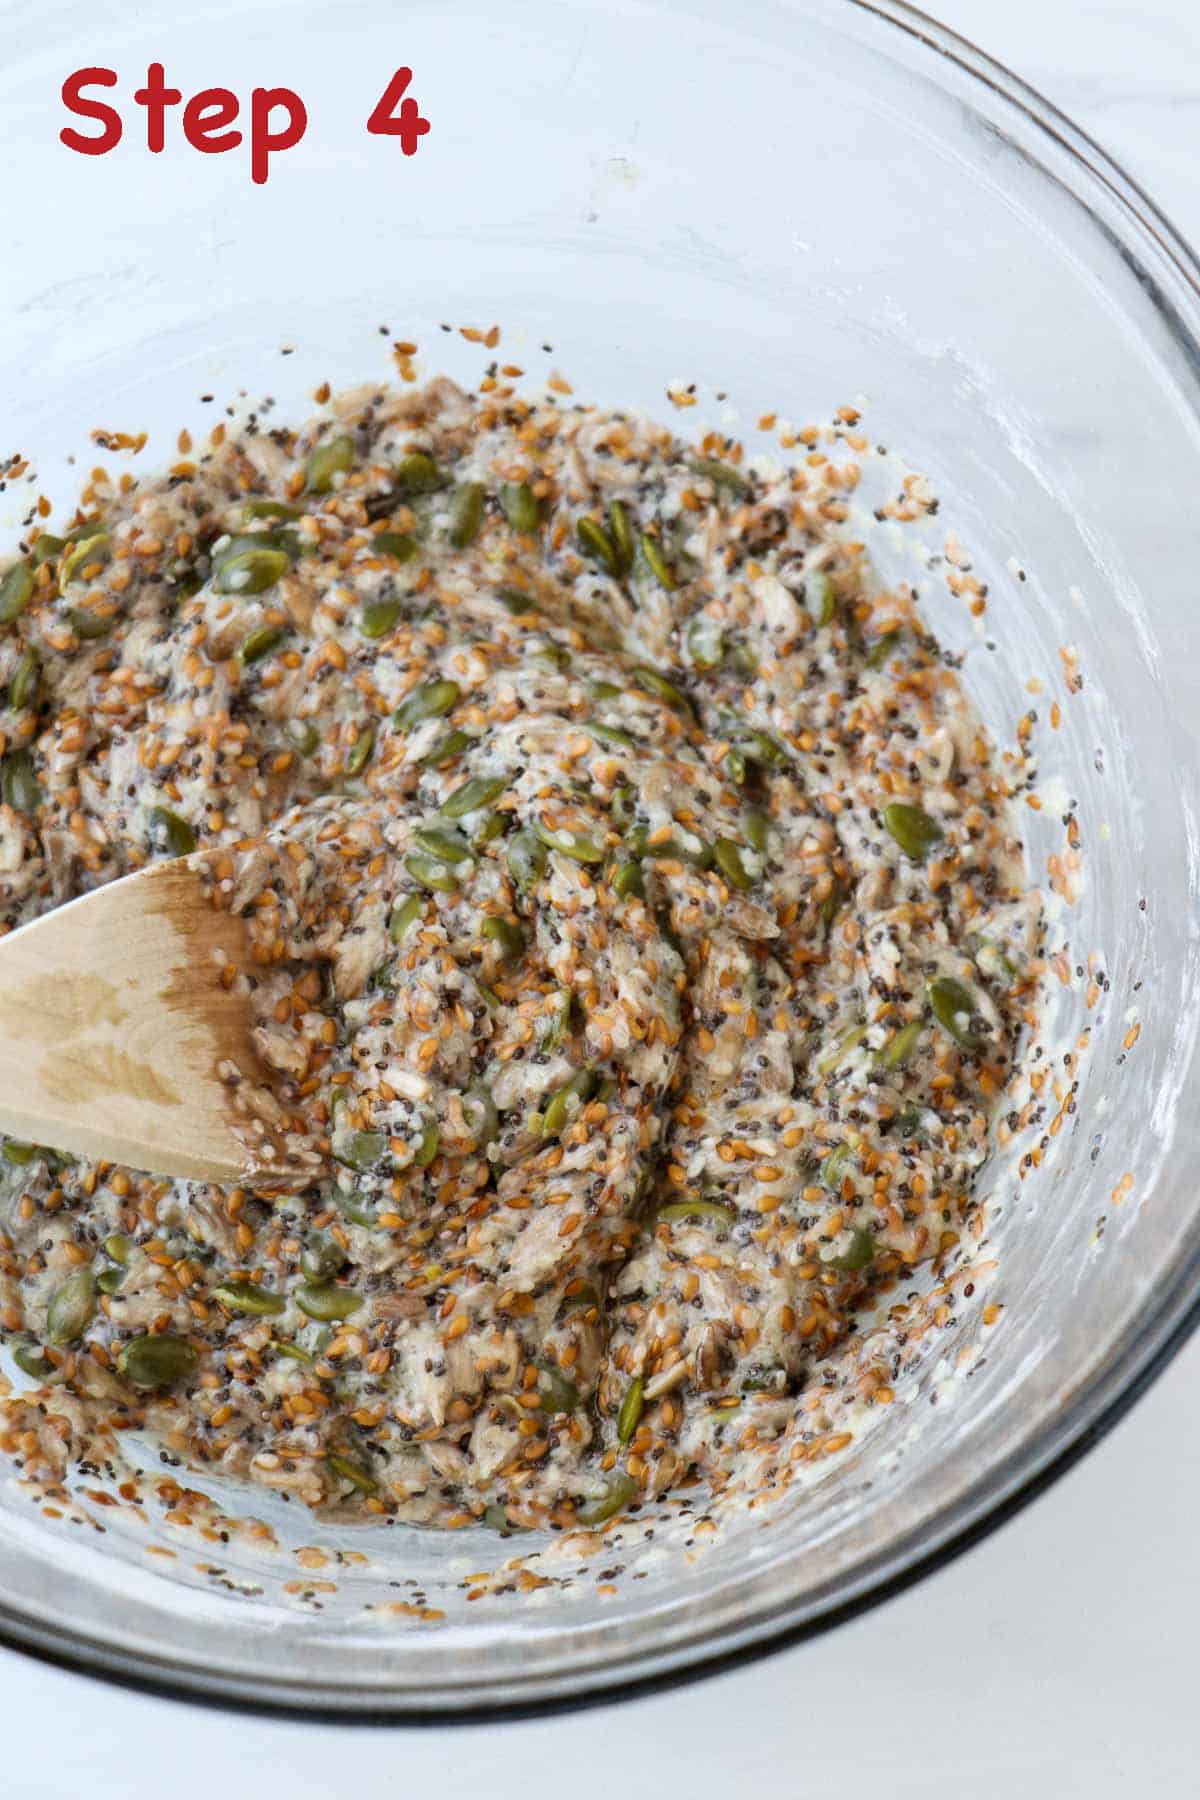
- Add the boiling water and oil. Stir until well mixed. Let the mixture sit for 10 minutes (it will thicken as it sits).
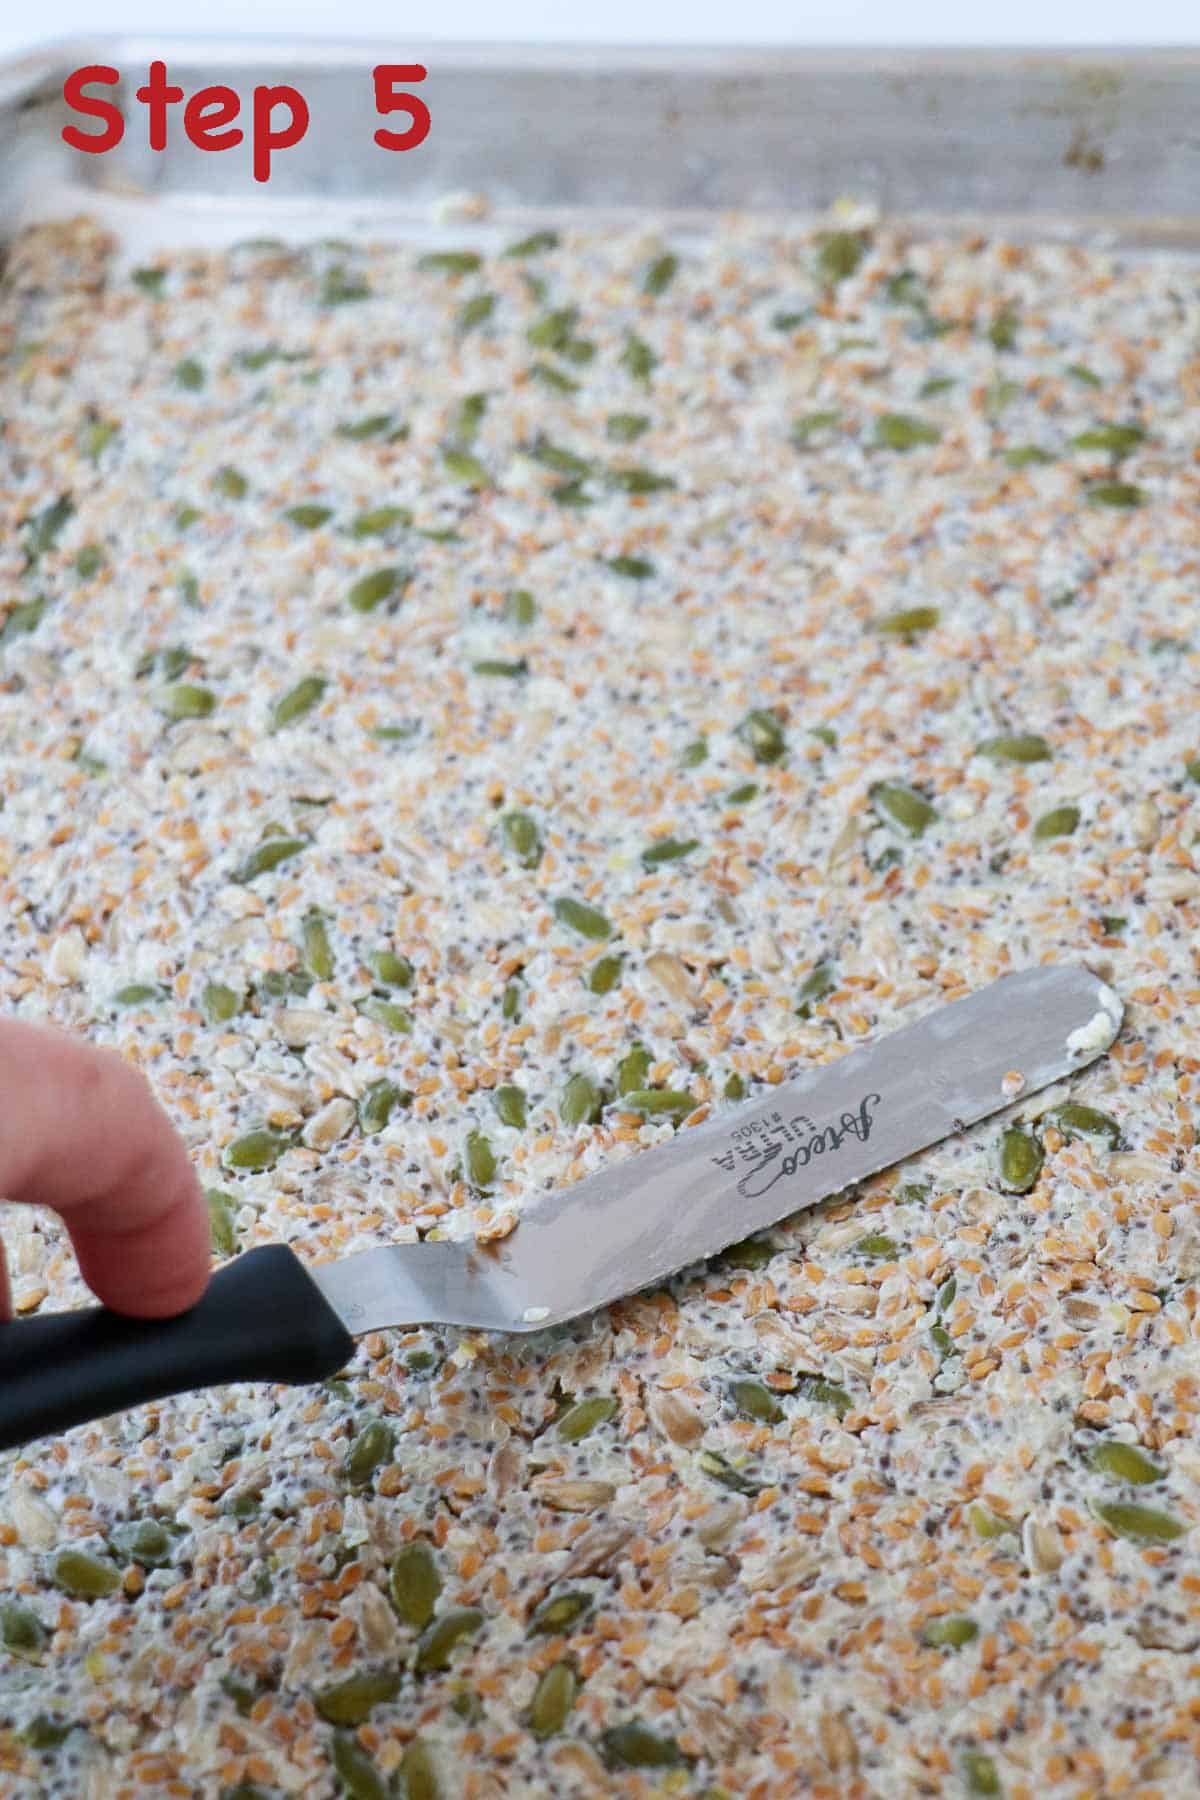
- Scrape the dough out onto the prepared pan. Spread into a thin layer (this is where the small offset spatula comes in handy) that reaches nearly to the edges of the parchment paper.
- Sprinkle with sea salt and transfer to the oven. Bake for about 90 minutes or until golden brown and crispy.

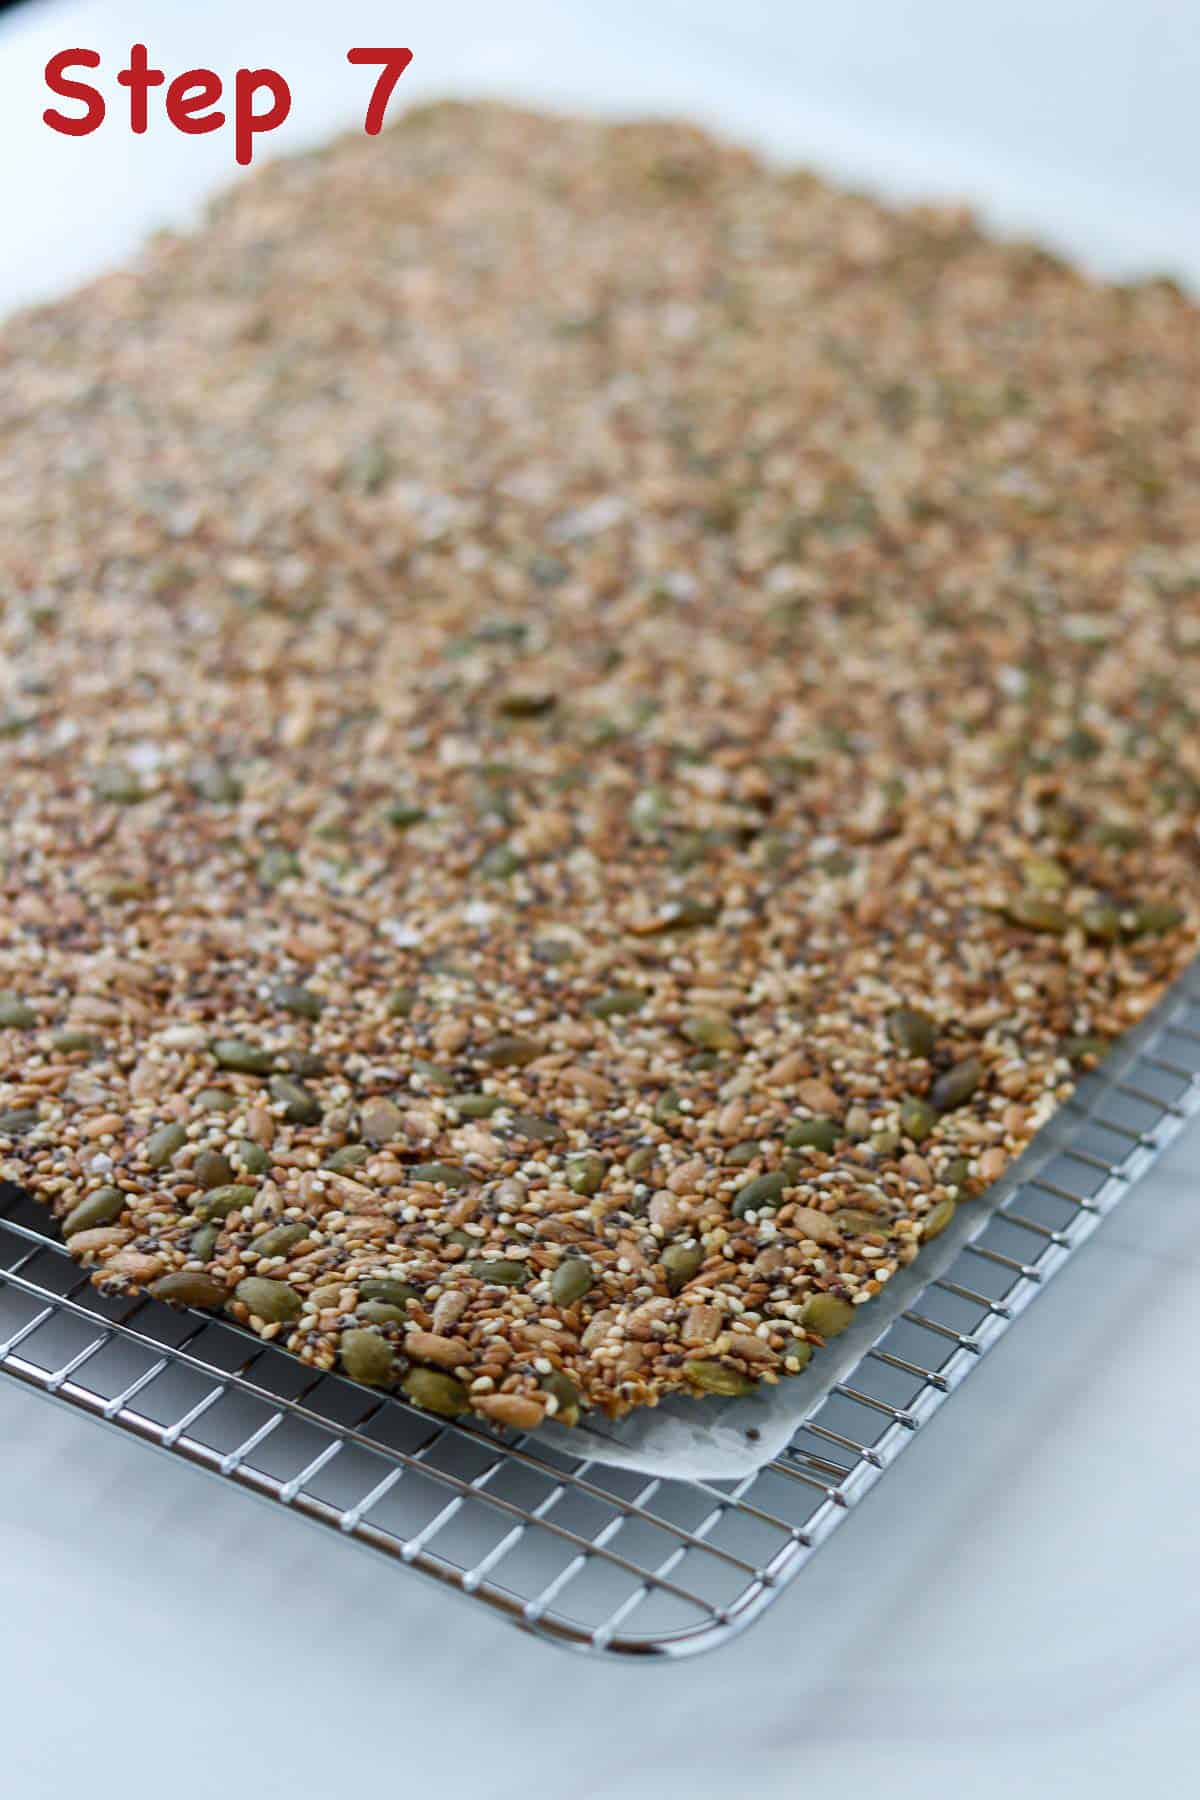
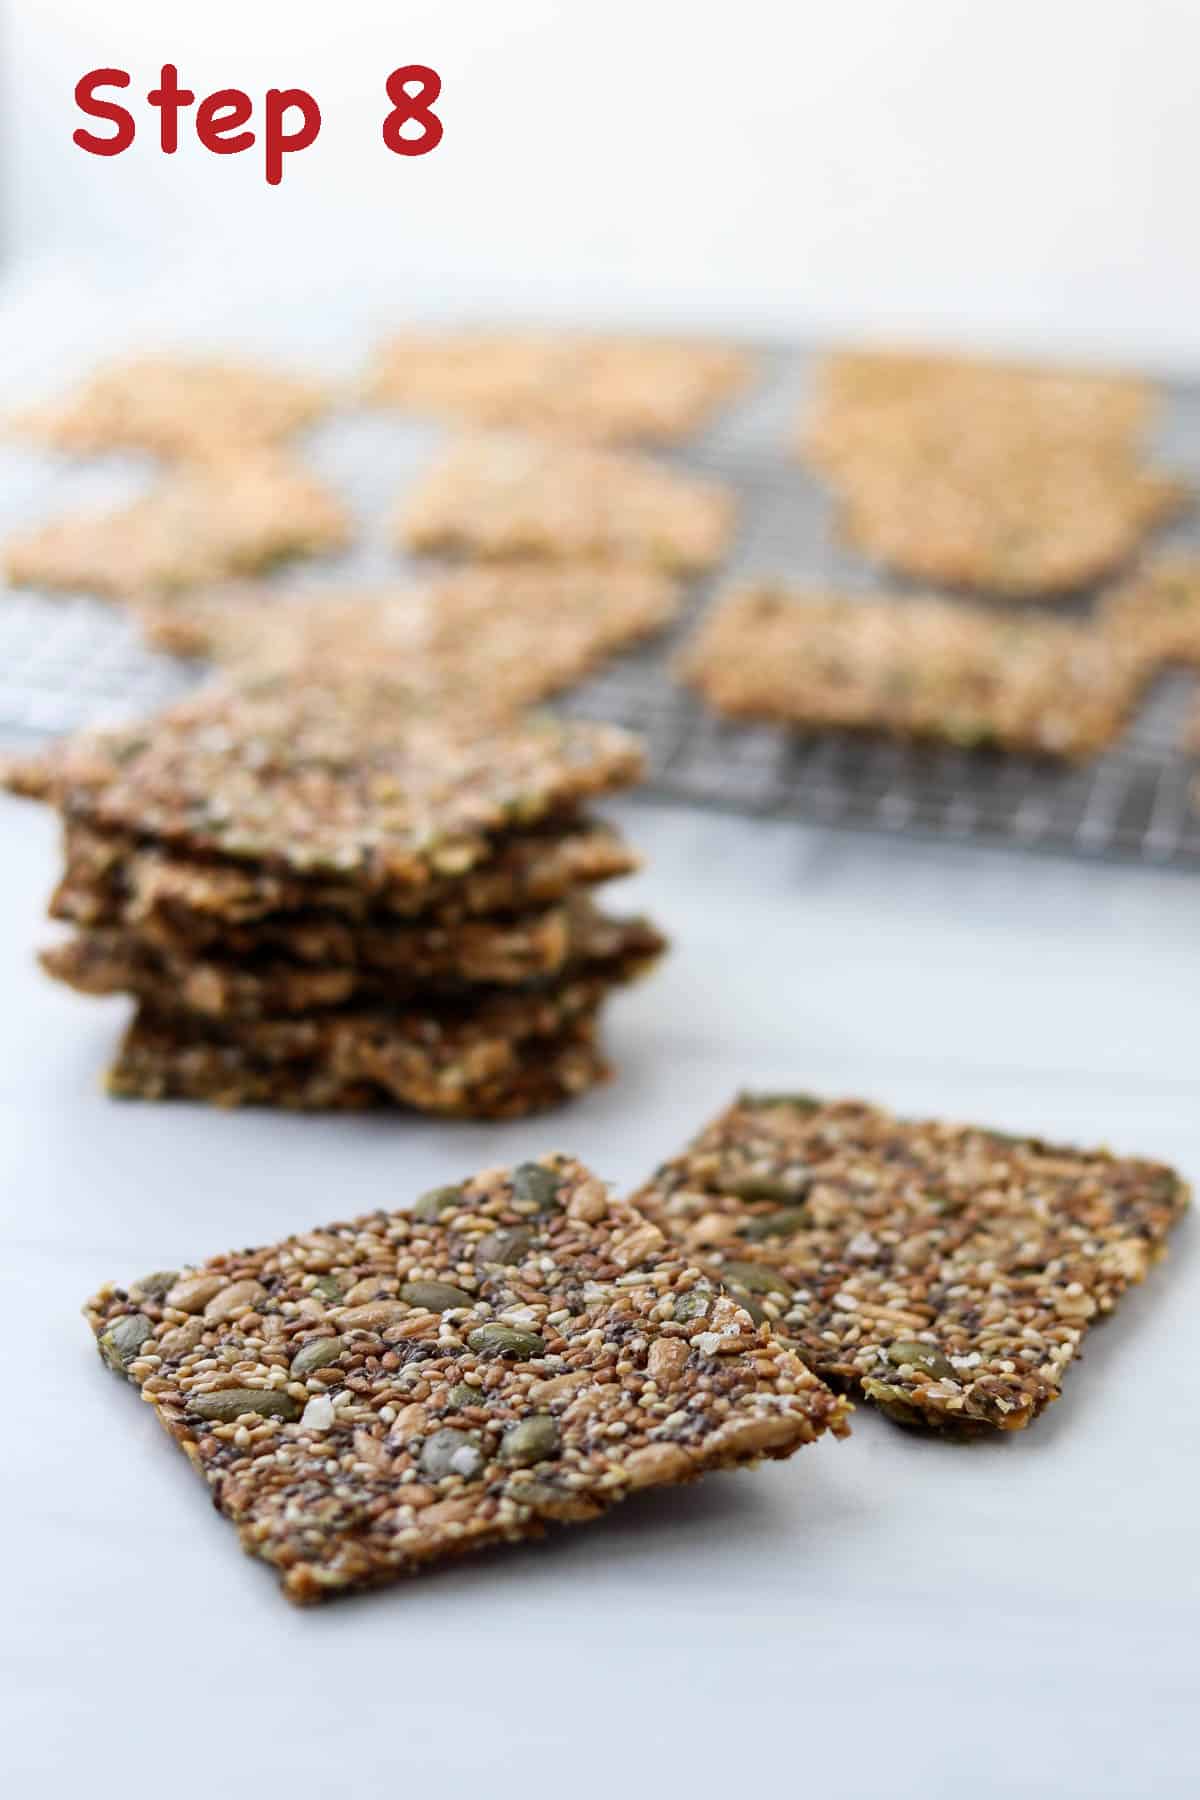
- Allow the baked cracker to cool on the sheet pan until just warm. Transfer the parchment paper with the cracker on top to a wire cooling rack and let it cool completely.
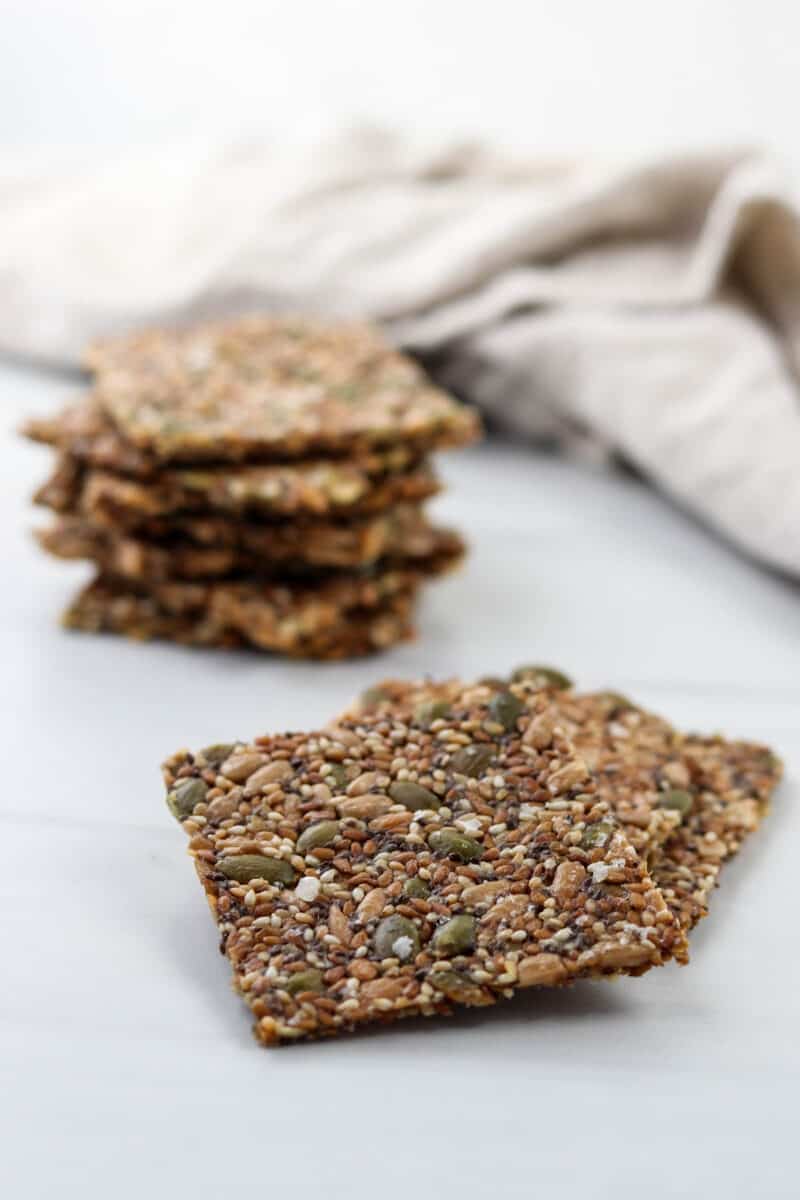
- To serve, either break into randomly-sized pieces for a rustic look or use a serrated knife to cut into squares.
Expert Tips
- Take your time spreading the dough into a thin, even layer. This may take a few minutes so be patient. If you are having trouble, you can always dampen the spatula with water to help smooth things out.
- Rotate the pan occasionally if the crispbread is browning unevenly. Oven temperatures can vary from one corner of the oven to another. Rotating the pan helps everything become evenly golden brown.
FAQs
Yes, they are vegan.
Yes! Seeds are an excellent source of fiber, protein, healthy fats, antioxidants, vitamins and minerals. Flax and chia seeds also good sources of omega-3 fatty acids.
They keep well stored in a tightly sealed container at room temperature for at least a couple of weeks.
Yes! These crackers freeze very well. Simply place in a freezer bag or similar container, seal tightly and store in the freezer for up to 3 months.
What to Serve with Seed Crackers
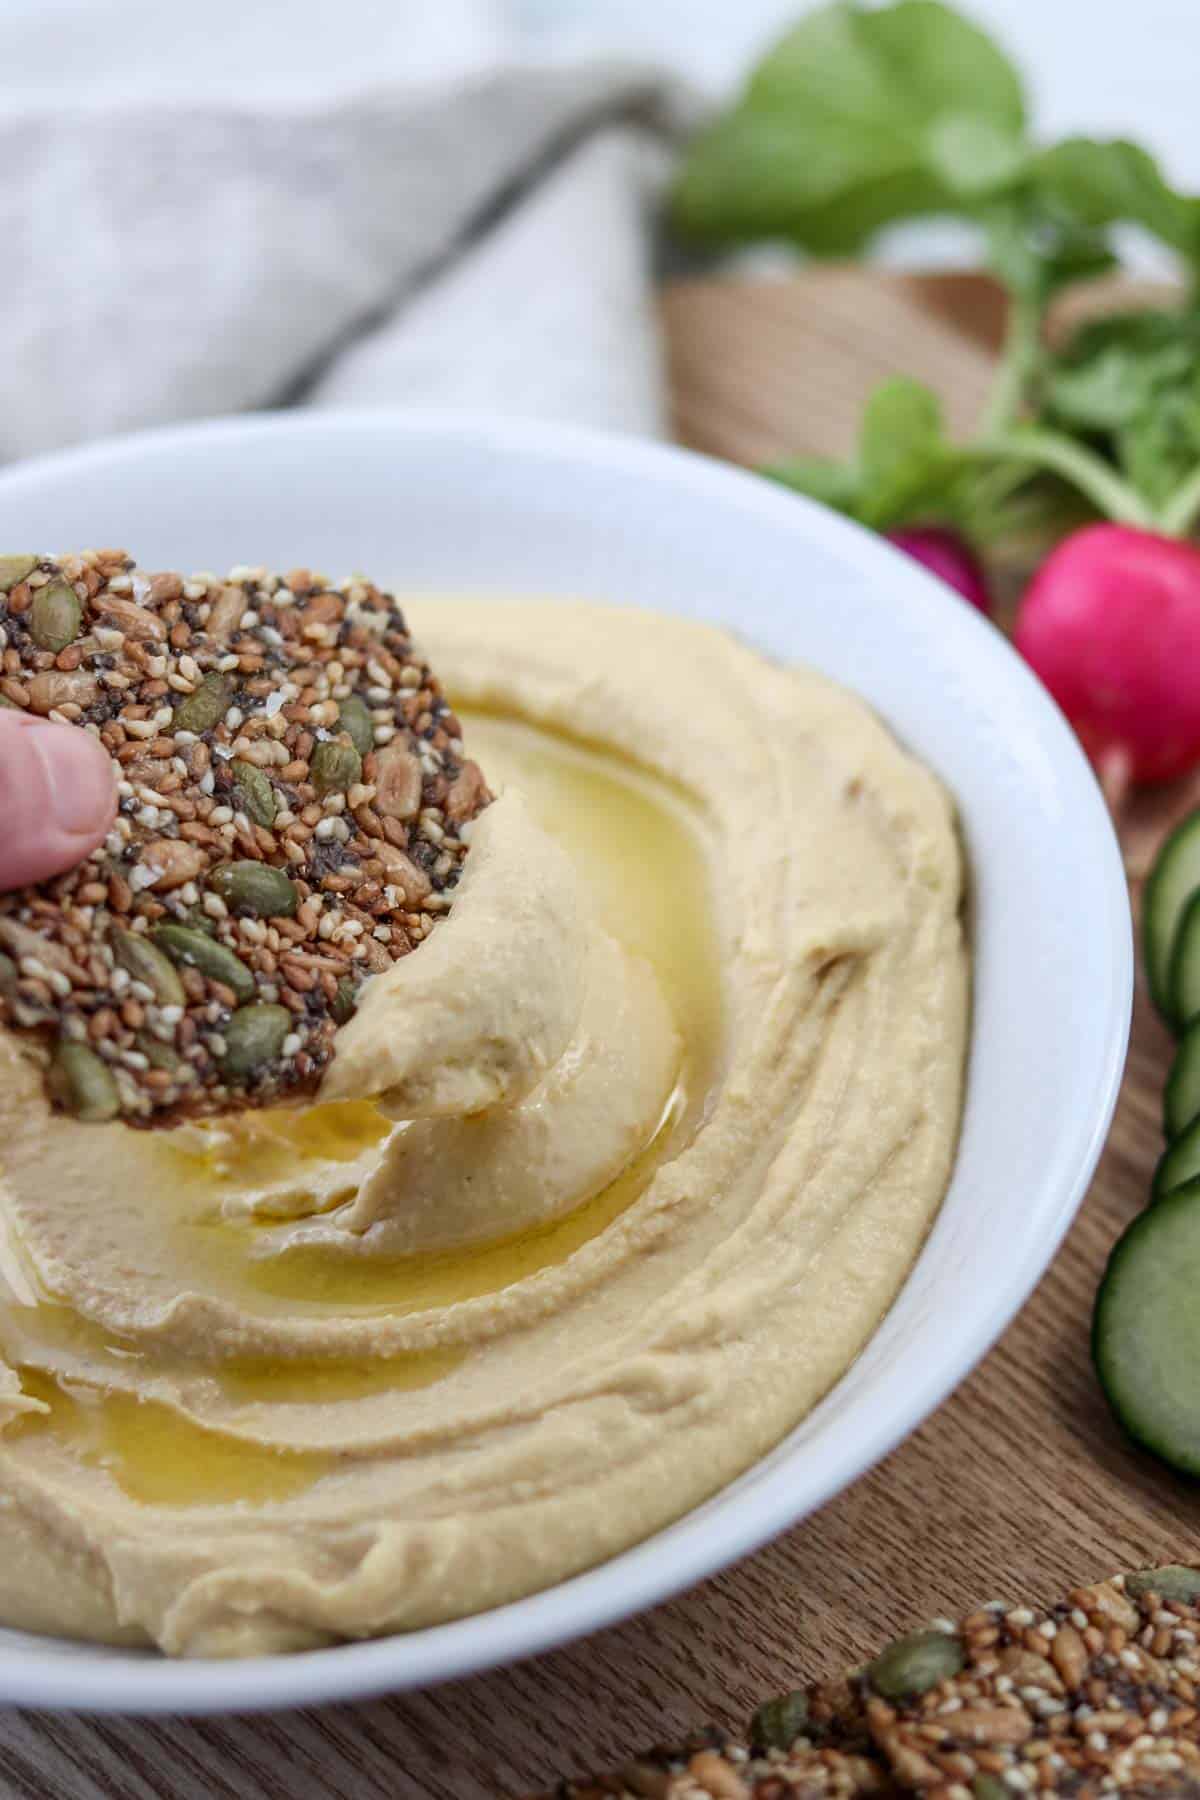
Quite honestly, the options are endless! Sliced cheese and/or cured meats, herring (embrace your inner Norwegian!), hummus, goat cheese, tapenade, hard-boiled eggs, jam.....let your imagination go wild. Here are some of my favorite toppings:
- Mashed avocado, olive oil, salt, pepper flakes and a squeeze of lemon
- Creamy Egg Salad with Dill and Capers
- Roasted Beet Hummus
- Creamy Split Pea Hummus
- Goat cheese and Nordic Summer Herb Sauce
- Cream cheese and Blueberry Cardamom Compote or Roasted Pear Compote with Cardamom, Vanilla and Ginger
- Almond butter and sliced apples
They are also quite nice alongside cozy soups and stews.
Related Recipes
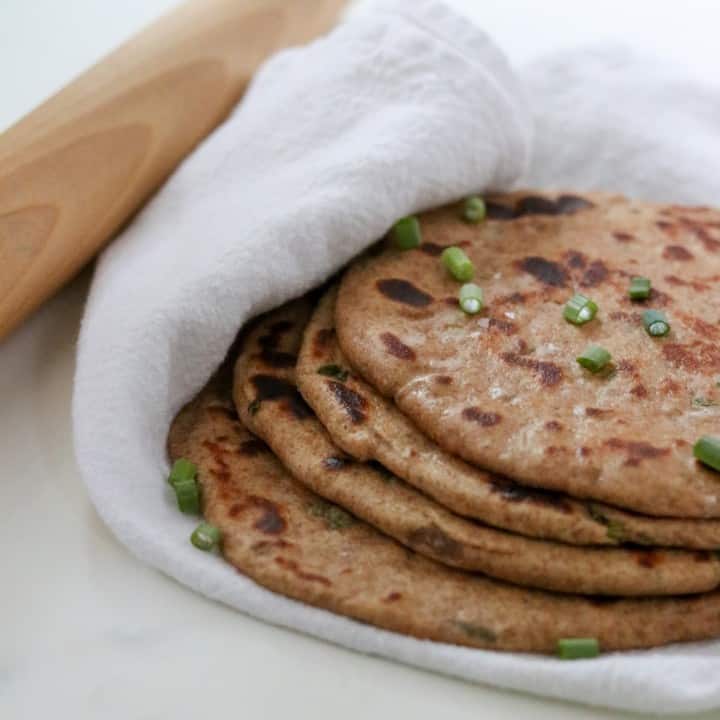
Ready to try your hand at a few other Scandinavian crispbread or flatbread recipes? Give these a try:


Recipe

Gluten-Free Seed Crackers (Norwegian Crispbread)
Ingredients
- ⅓ cup sesame seeds
- ½ cup flaxseeds
- ½ cup raw pepitas pumpkin seeds
- ½ cup raw sunflower seeds
- 2 tablespoons chia seeds
- ⅓ cup cornstarch
- ½ teaspoon salt
- 3 ½ tablespoons canola oil
- ¾ cup boiling water
- Flaky sea salt for sprinkling
Instructions
- Preheat the oven to 275 degrees F. Line a 13x18 rimmed baking sheet with parchment paper and set aside. Stir the seeds, cornstarch and salt together in a large bowl. Add the oil and boiling water. Stir to combine. Let the mixture sit for 10 minutes.
- Spread the batter into a thin layer on top of the parchment paper (a small offset spatula really helps this along). Sprinkle the top with sea salt.
- Transfer to the oven and bake for about 90 minutes or until golden brown and crisp, rotating the sheet pan as necessary to encourage even browning. Once it is cool enough to handle, move the parchment paper with the cracker on top to a wire rack to cool completely. To serve, break the crispbread into pieces for a rustic look or cut into squares using a serrated knife.
Video
Notes
- Take your time spreading the dough into a thin, even layer. This may take a few minutes so be patient. If you are having trouble, you can always dampen the spatula with water to help smooth things out.
- Rotate the pan occasionally if the crispbread is browning unevenly. Oven temperatures can vary from one corner of the oven to another. Rotating the pan helps everything become evenly golden brown.
Nutrition
If you loved this recipe, give it a star review! Also, snap a picture of your Gluten-Free Seed Crackers (Norwegian Crispbread) and share it with me on Instagram using the hashtag #truenorthkitchen and tagging me @true_north_kitchen.

Is there a substitute for oil? I’m doing Plant Based
Hi Becky,
You will need some kind of oil to help bind the crackers, but any kind of plant based oil will work. You can use olive oil, vegetable oil, avocado oil....whatever you prefer!
Kristi
Thank you for sharing this recipe! I am addicted to these crackers. The ingredients are super cheap for me to get out of the bins at the local store. I think I only paid about 5 dollars, but it makes a lot. And so good for you too. Great recipe!
Thanks, Kat! I'm so glad you are enjoying them!
Kristi
THANK YOU KRISTI! I have been making these at least once a month since January 2025 and I'm obsessed. Sometimes I add herbs & seasonings, or mix & match with whatever other seeds I have on hand. I use a second baking sheet to smash the dough between 2 sheets of parchment and smooth out with a dough scraper. I use a pastry docker instead of pre cutting crackers. I used to get crispy edges and a softer middle when I baked them in a big sheet so the docker has been a game changer!
Awesome tips, Cari! Thanks so much for your comment!
Kristi
My tip for making this crispbread is to take TWO sheets of parchment. Spread your mixture to the edges of sheet one roughly, then lay sheet two on top and use a rolling pin to finish the evening out process much more efficiently. Peel off the top layer slowly, then use a pizza cutter or knife to score your crispbread into squares. Bake as usual, it will be easy to lift of the sheet and break evenly..
I made this because on a recent trip to Norway and Denmark I fell in love with the crisp bread - however I followed this recipe exactly and my mixture was watery - I did cook it and it came out good but I’d like to figure out to not have it so watery. Thanks
Hi Cheryl,
Did you let it sit as directed? It should absorb a lot of the liquid while it sits making it easier to spread out.
Kristi
This is my go to cracker recipe. I have shared this recipe countless times. So easy to make and so yummy and versatile. My book club expects me to bring them every month.
Thanks so much for your comment, Sarah! I love that the whole book club is on the program. 🙂
Kristi
Thank you so much for this recipe. I was buying similar seeded crackers at Whole Foods for nine dollars now I can make double the batch for a significantly lower price.
That's wonderful to hear! I'm so glad you love the crackers and are saving some money at the same time. Thanks so much for the comment!
Kristi
Can I use olive oil or avocado oil for this recipe. Thank you!
Yes, either one will work!
Help! I didn’t have parchment paper so knuckle head me baked them in 2 heavily greased glass pans. Welp, they’re all stuck like they’re superglued to the glass pans.
I wouldn’t mind crumbles, but they’re so tightly stuck, even getting little chunks out is proving difficult.
Any ideas how to get them out? Tia!
How many crackers are 84 calories ?
Each cracker is 84 calories if you cut the big square into 24 pieces.
I swear this is my favorite recipe. It’s so easy & I make it several times a week now because we go through it so quickly! I’d never made bread, crackers, etc. before but truly anybody can do this. And it’s much simpler (with easier to find ingredients) than other crisp bread recipes I’ve seen!
Thanks so much for your feedback, Caroline! I'm glad this has become a part of your weekly meal prep!
Kristi
I swear this is my favorite recipe. It’s so easy & I make it several times a week now because we go through it so quickly! I’d never made bread, crackers, etc. before but truly anybody can do this. And it’s much simpler (with easier to find ingredients) than other crisp bread recipes I’ve seen!
These are delicious and easy to make. I make them weekly as part of my meal prep routine.
Thanks so much for your feedback! I'm so glad you enjoy them.
Kristi
I've been making this crispbread ever since I saw the demonstration at Hostfest about 3 years ago. After an attempt to spread it thin, I just started putting another sheet of parchment paper over the top and using a rolling pin. I see others have done this also. It is much more efficient and gives a beautiful even layer. Also I've added various herbs such as rosemary and thyme.Don't forget to salt it with kosher salt before baking it.
Thanks, Carol! I'm so glad you've been making these. I love the herb variations. Thanks so much for your feedback!
Kristi
Love these crackers! I used 3 T. of oil and it was just fine. They have a great flavor just because of the variety of seeds used! Easy and yummy!
Thanks for your feedback, Sherri! I'm glad you enjoyed them!
Kristi
Thanks for your feedback, Lisa!
Kristi
I love these crackers! my cousin, in Denmark, makes them all the time with flour, I have an in-law that can't have gluten so this is perfect. I did change them up a bit. Used Olive Oil and reduced oil by 1/2, added crushed rosemary to the mix. Yummy. Also spreading this out was painstaking. My cousin rolls it out between 2 pieces of parchment. It is MUCH quicker and easier. Also I cut them BEFORE placing them in the oven, at the very least score then and they will break apart much easier and maintain the shape better.. The other way they just broke up in all kinds of shapes. This is a GREAT recipe to play with. Thank you so much for sharing.