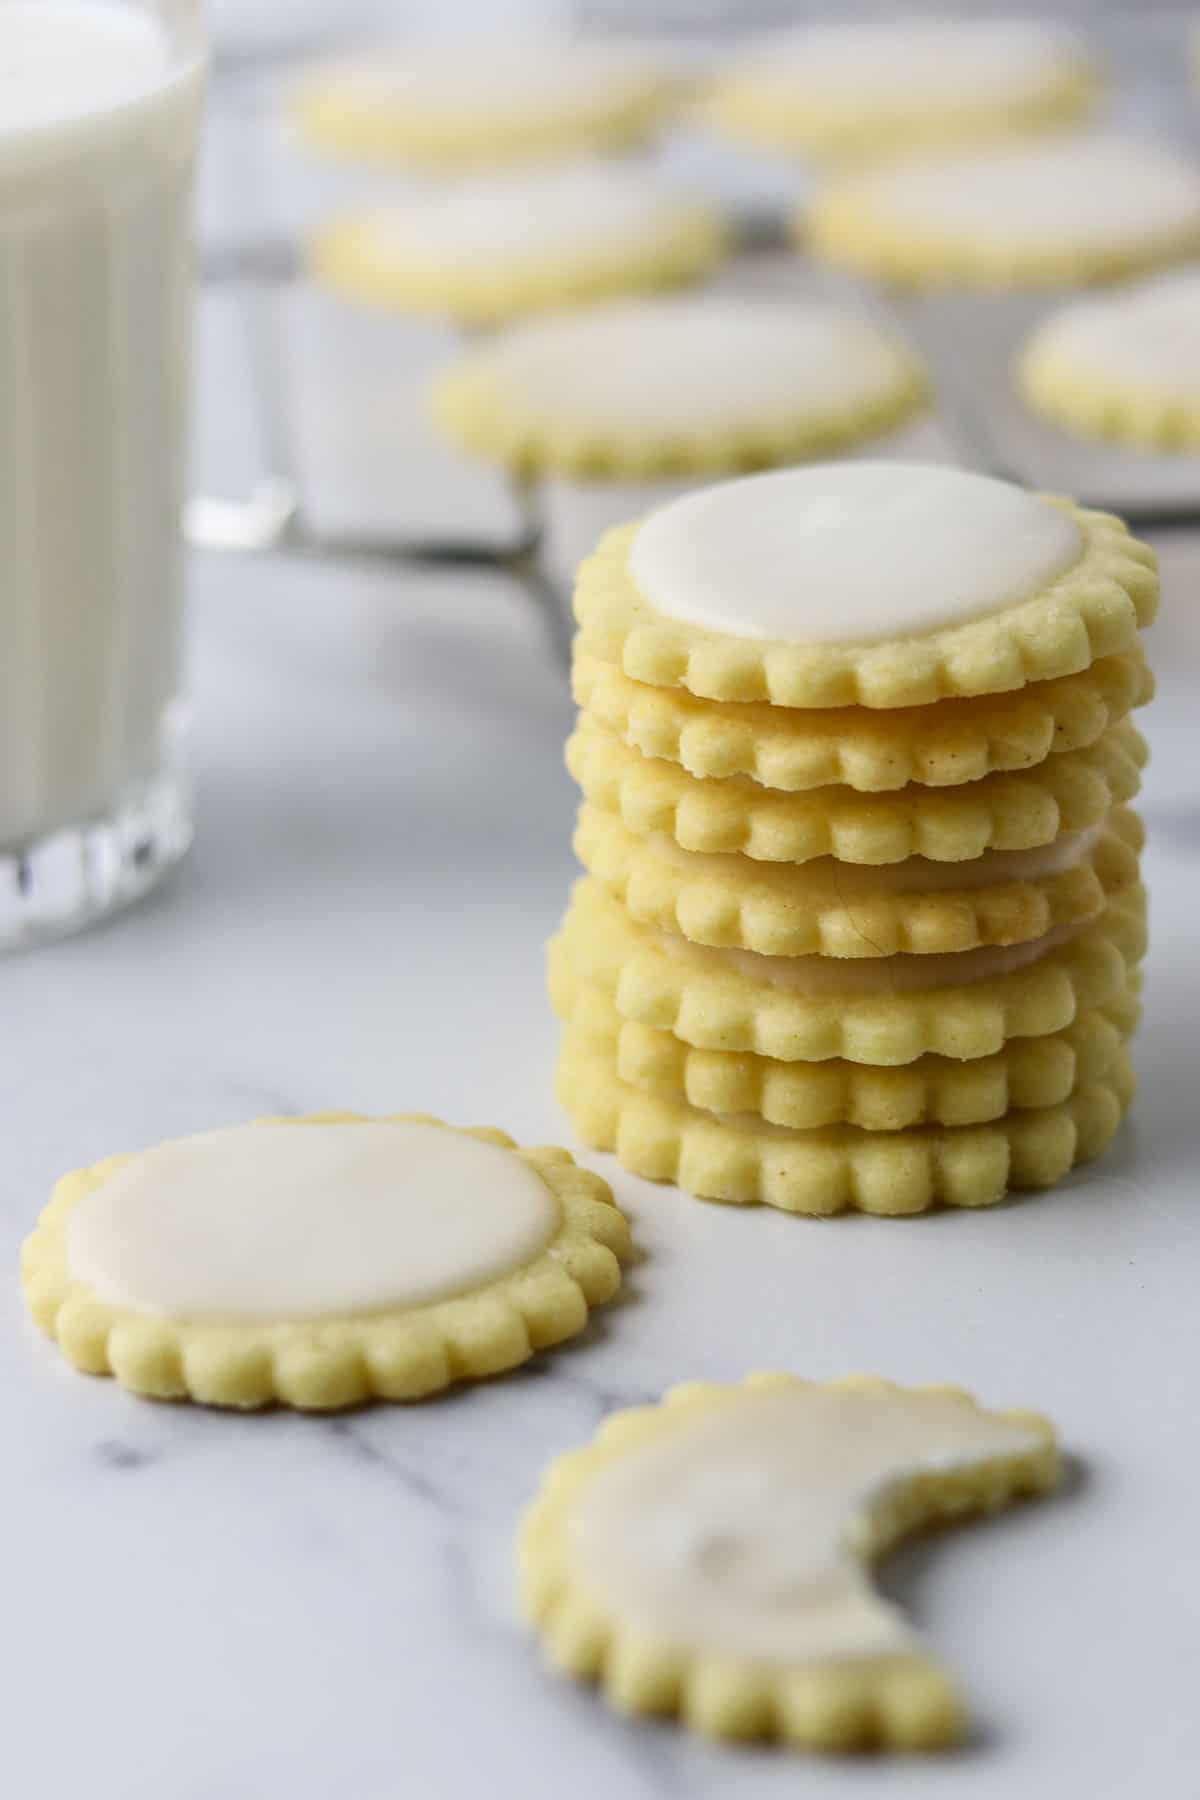
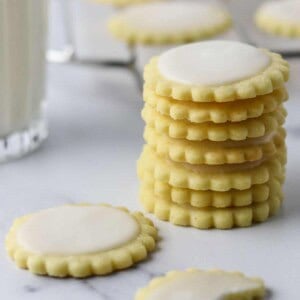
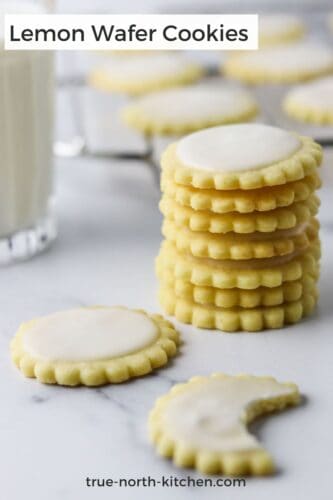
Lemon Wafer Cookies
Buttery and bursting with lemon flavor, these cheerful Lemon Wafer Cookies are the perfect treat to brighten any afternoon. Not only are they easy to make, they are everything a frosted lemon cookie should be...sweet, tart and tender with just the right amount of lemon flavor and covered in a light cream cheese glaze to finish things off just right.
Bake a batch of these light, sunshine-y cookies for the lemon lovers in your life! Keep reading for step-by-step instructions for baking these lemon wafer cookies at home.
Why This Recipe Works
- The dough contains a modest amount of cornstarch which creates an extra-tender cookie.
- The combination of lemon juice and pure lemon extract brings big lemon flavor to the recipe.
- A thin layer of a lemon-cream cheese glaze adorns the top of these cookies and adds even more lemon flavor to these delicious cookies.
Ingredients
For the Cookies:
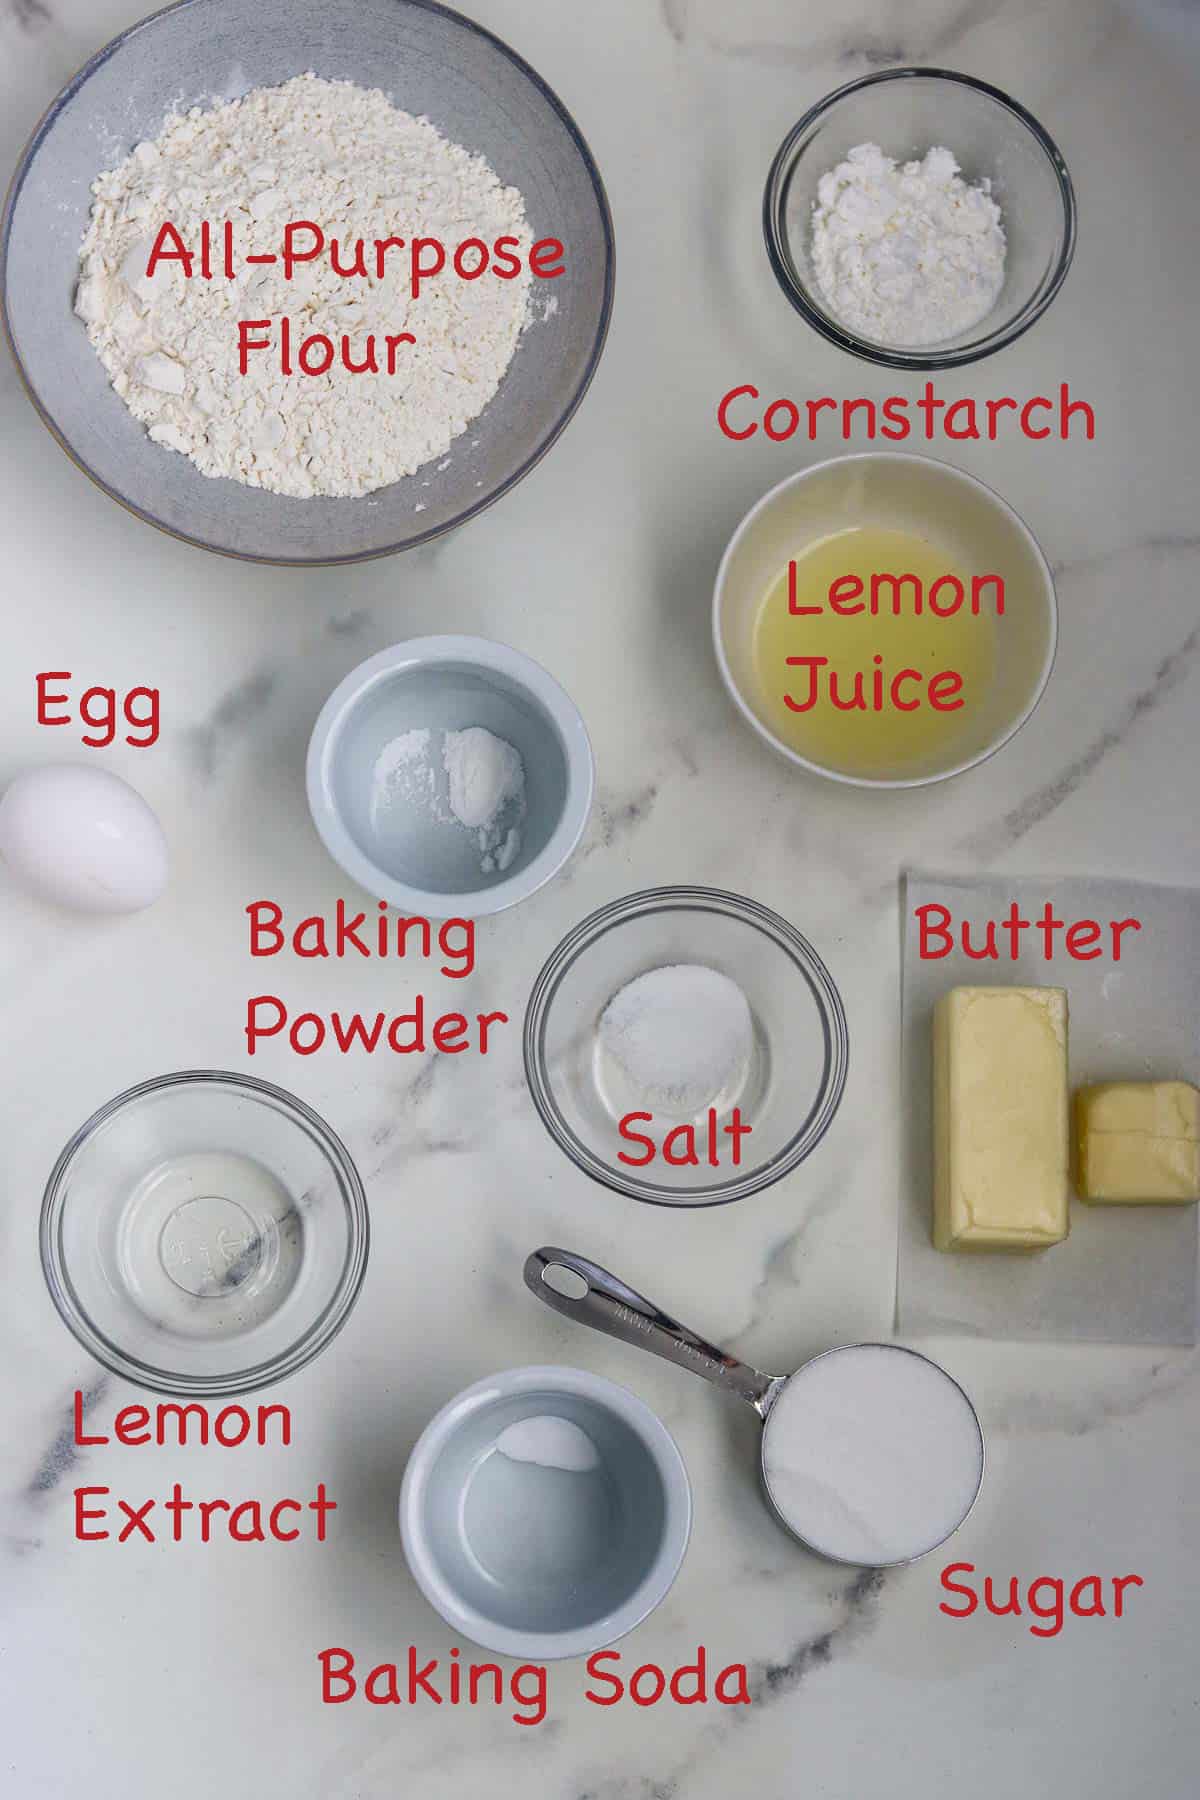
- All-purpose flour and cornstarch form the base of this cookie recipe. As I mentioned above, the addition of a modest amount of cornstarch helps these cookies achieve an exceptionally tender texture.
- We are only using the egg yolk here, not the whole egg. This also imparts tenderness to the final product.
- If you are a lemon lover, you know the disappointment of biting into a lemon cookie only to find that it really isn't all that lemon-y. This recipe promises BIG lemon flavor thanks to the inclusion of both lemon extract and lemon juice.
For the Glaze:
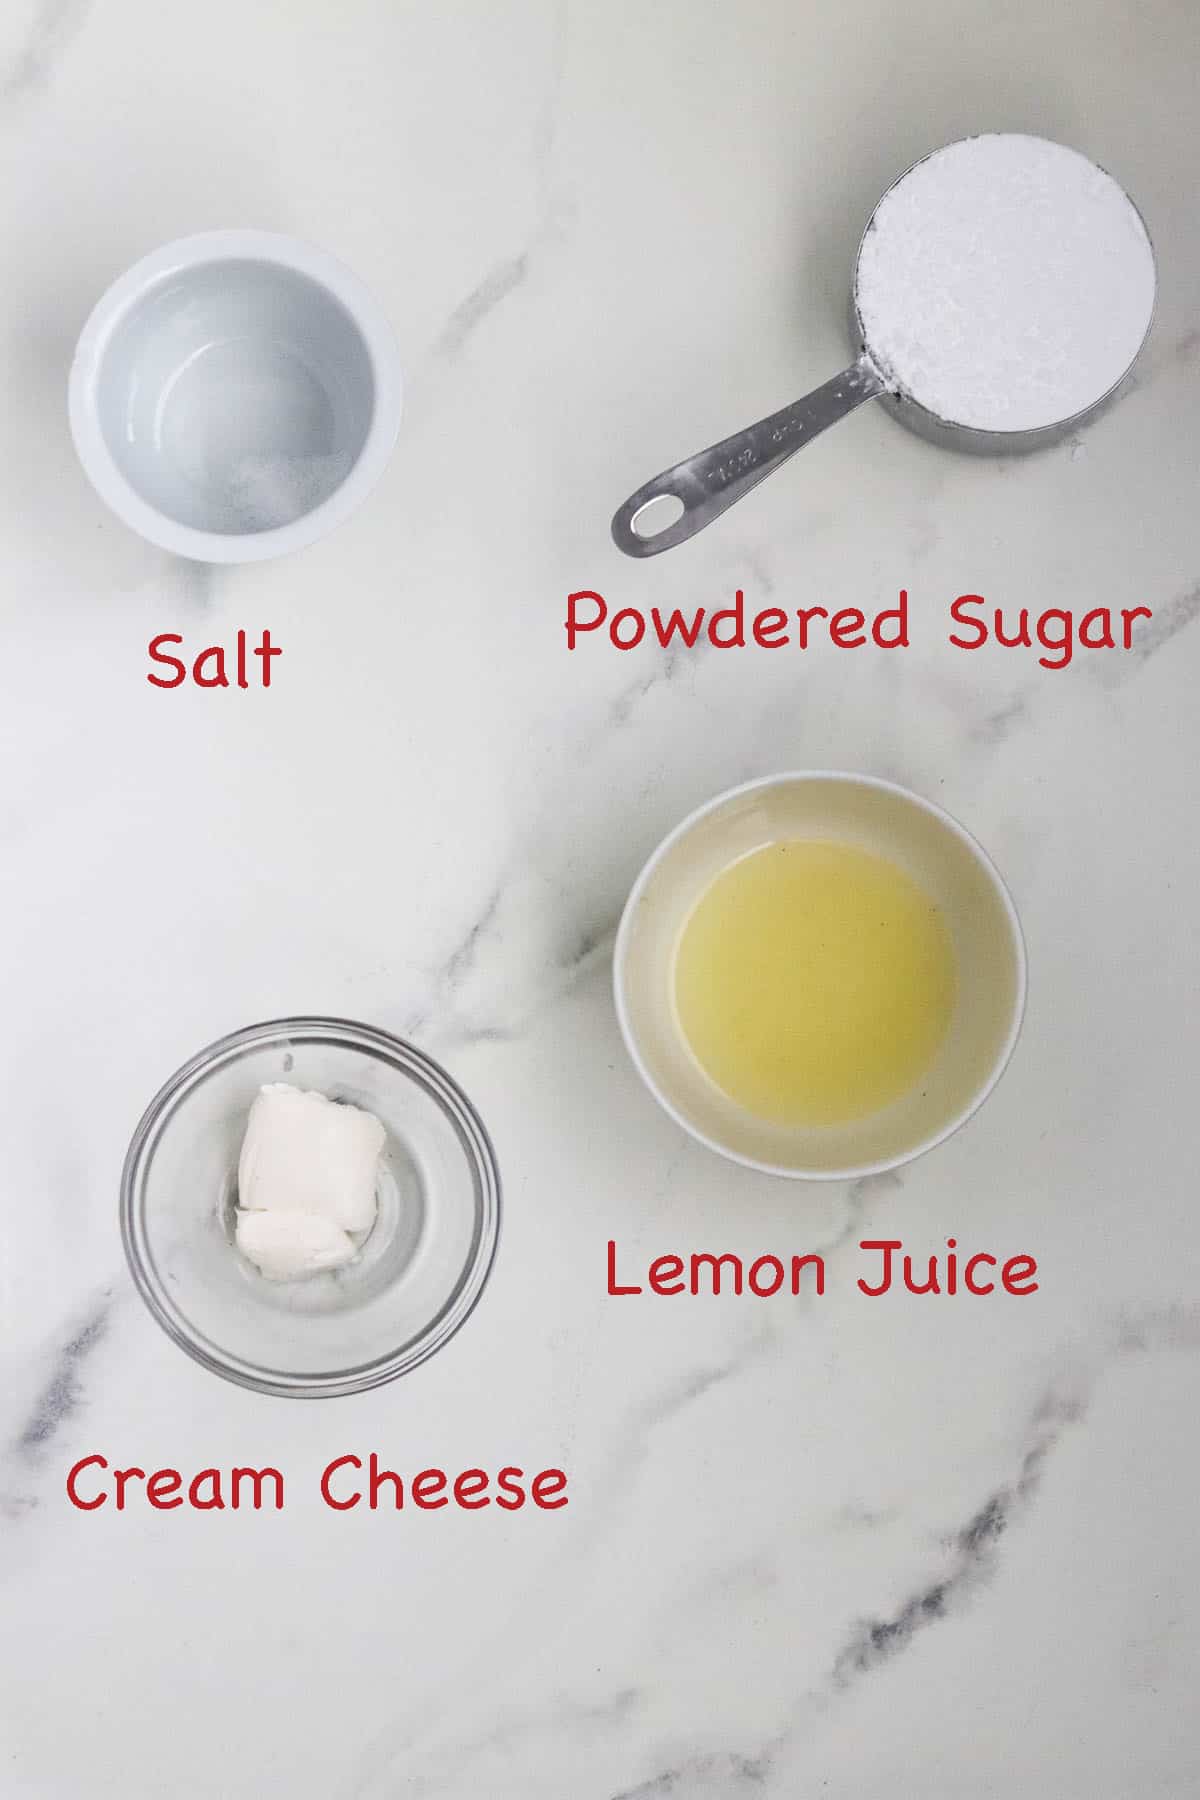
Just 4 simple ingredients but this glaze is a real winner with its big lemon flavor and subtle tang from the cream cheese.
Special Equipment Needed
- Round 2-2 ¼ inch cookie cutter, preferably with a scalloped edge for that sunshine-y cheerful look.
- Rolling Pin. I like the French tapered style of rolling pin but any kind will be just fine.
- Dough Scraper. This is an invaluable tool helps release rolled dough from your work surface and is something I can't live without!
How to Make This Recipe
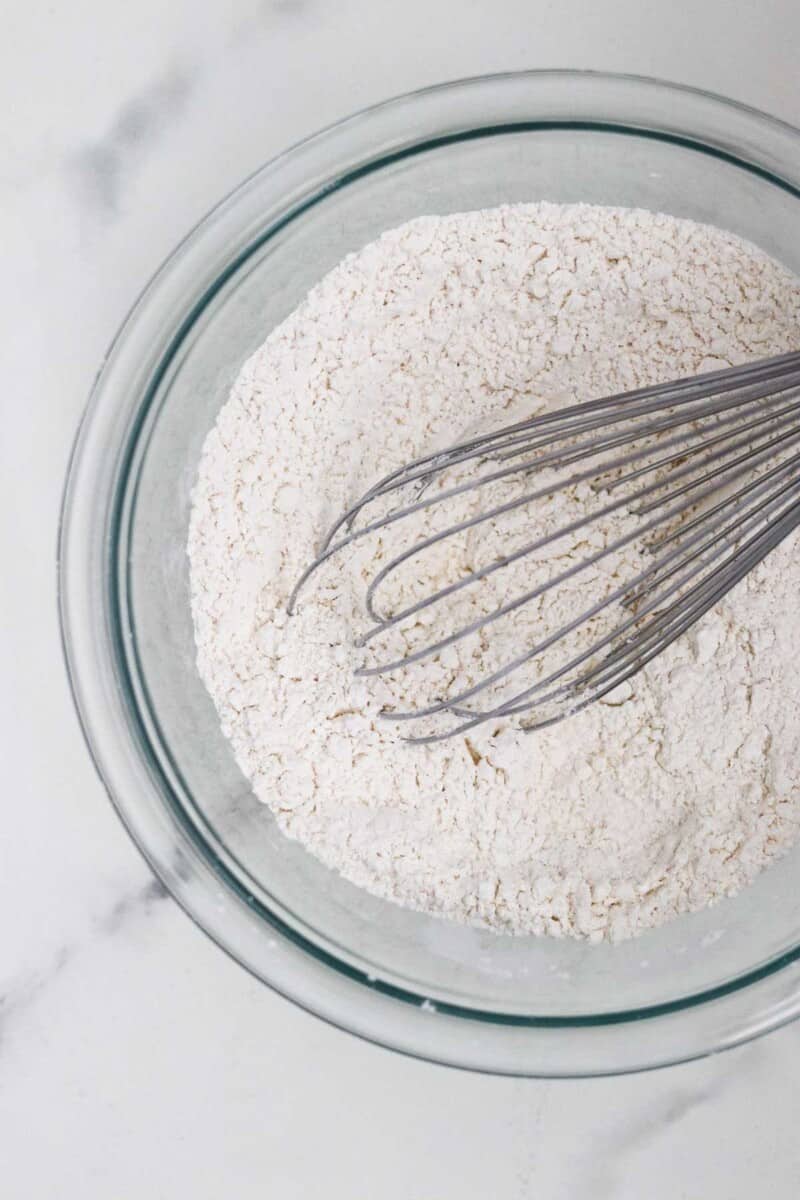
- Whisk the flour, baking powder, baking soda, salt and cornstarch together in a medium bowl. Set aside.
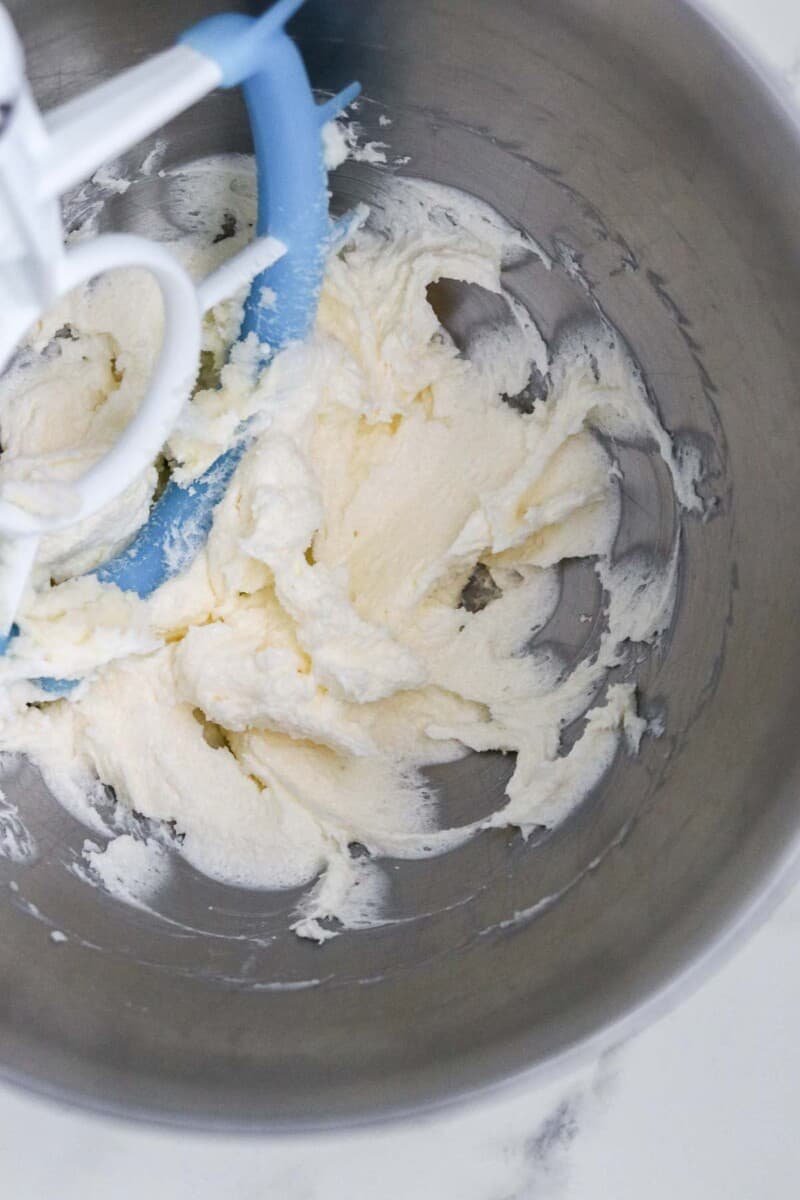
- Combine the butter and sugar together in the bowl of a stand mixer. Using the paddle attachment, mix on medium speed until light and fluffy, about 3 minutes.
- Add the egg yolk, lemon juice and lemon extract. Continue to mix until everything is fully incorporated.
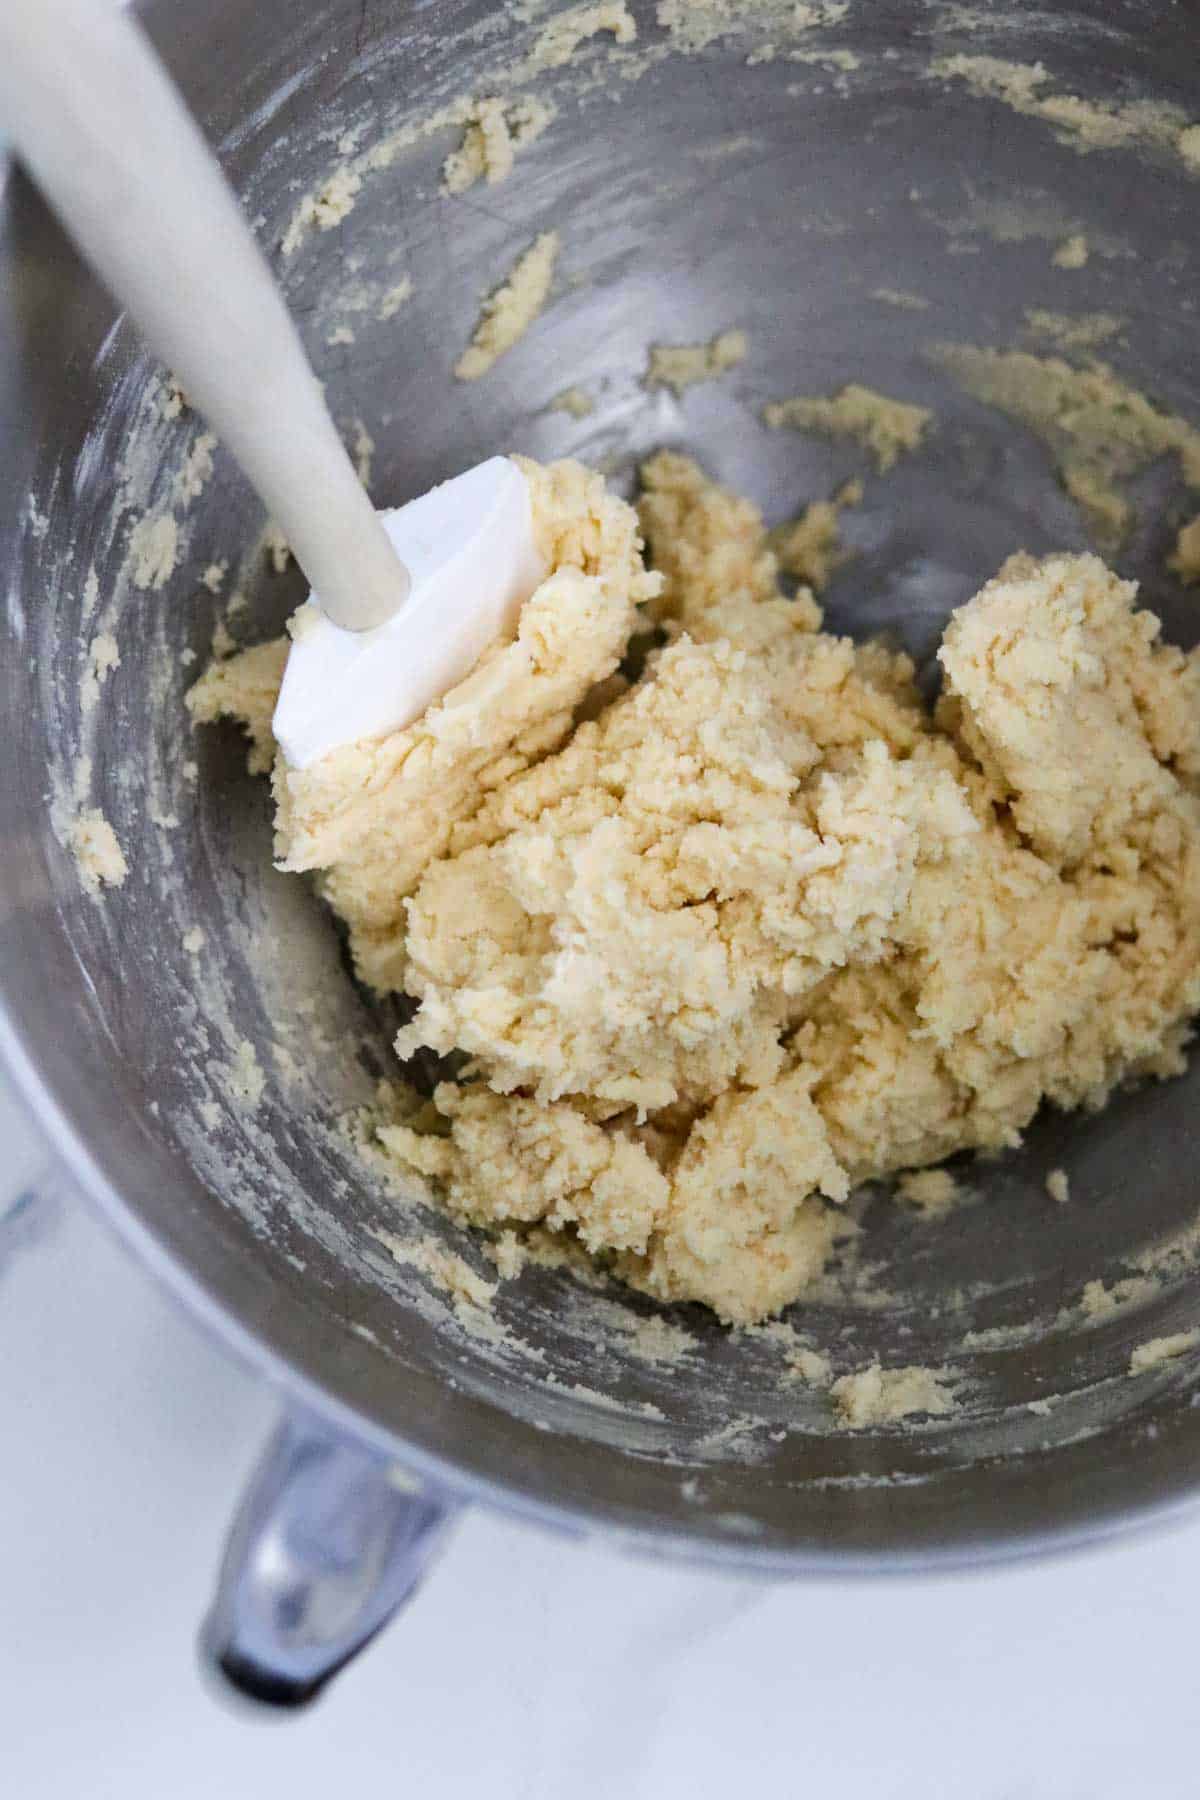
- Reduce the mixer speed to low and add the dry ingredients. Mix until the dough just comes together. Scrape the dough out onto a piece of plastic wrap and shape into a 6 inch disk. Wrap tightly and transfer to the refrigerator for at least an hour and up to one day.
- When you are ready to bake, heat the oven to 325 degrees and line a rimmed baking sheet with parchment paper.
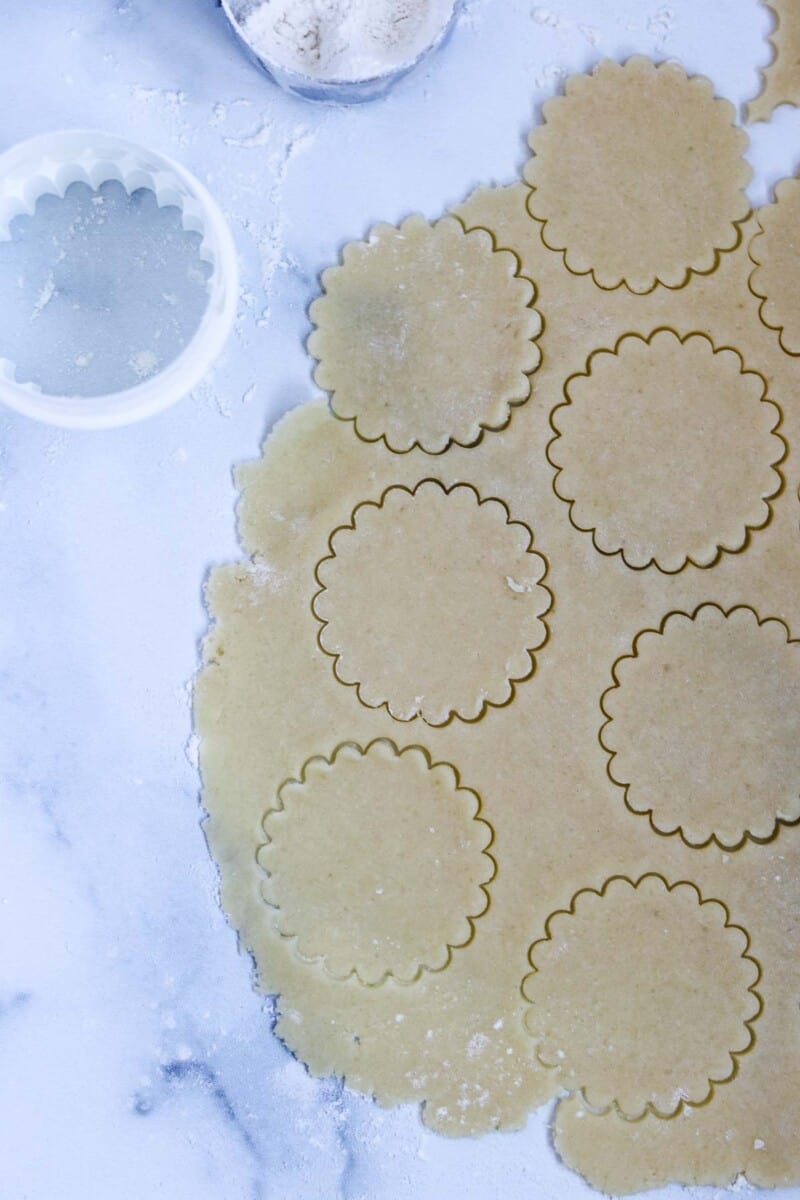
- Remove the dough from the refrigerator. If it has been in there awhile, it may be really firm and need to warm up slightly before you can start rolling. Divide the dough into 2 pieces and dust a clean work surface with flour. Working with one piece of dough at a time, dust the top of the dough with flour and roll with a rolling pin until it is between ¼ and ⅛ inch thick. Add more flour as necessary to prevent the dough from sticking to the counter or the rolling pin.
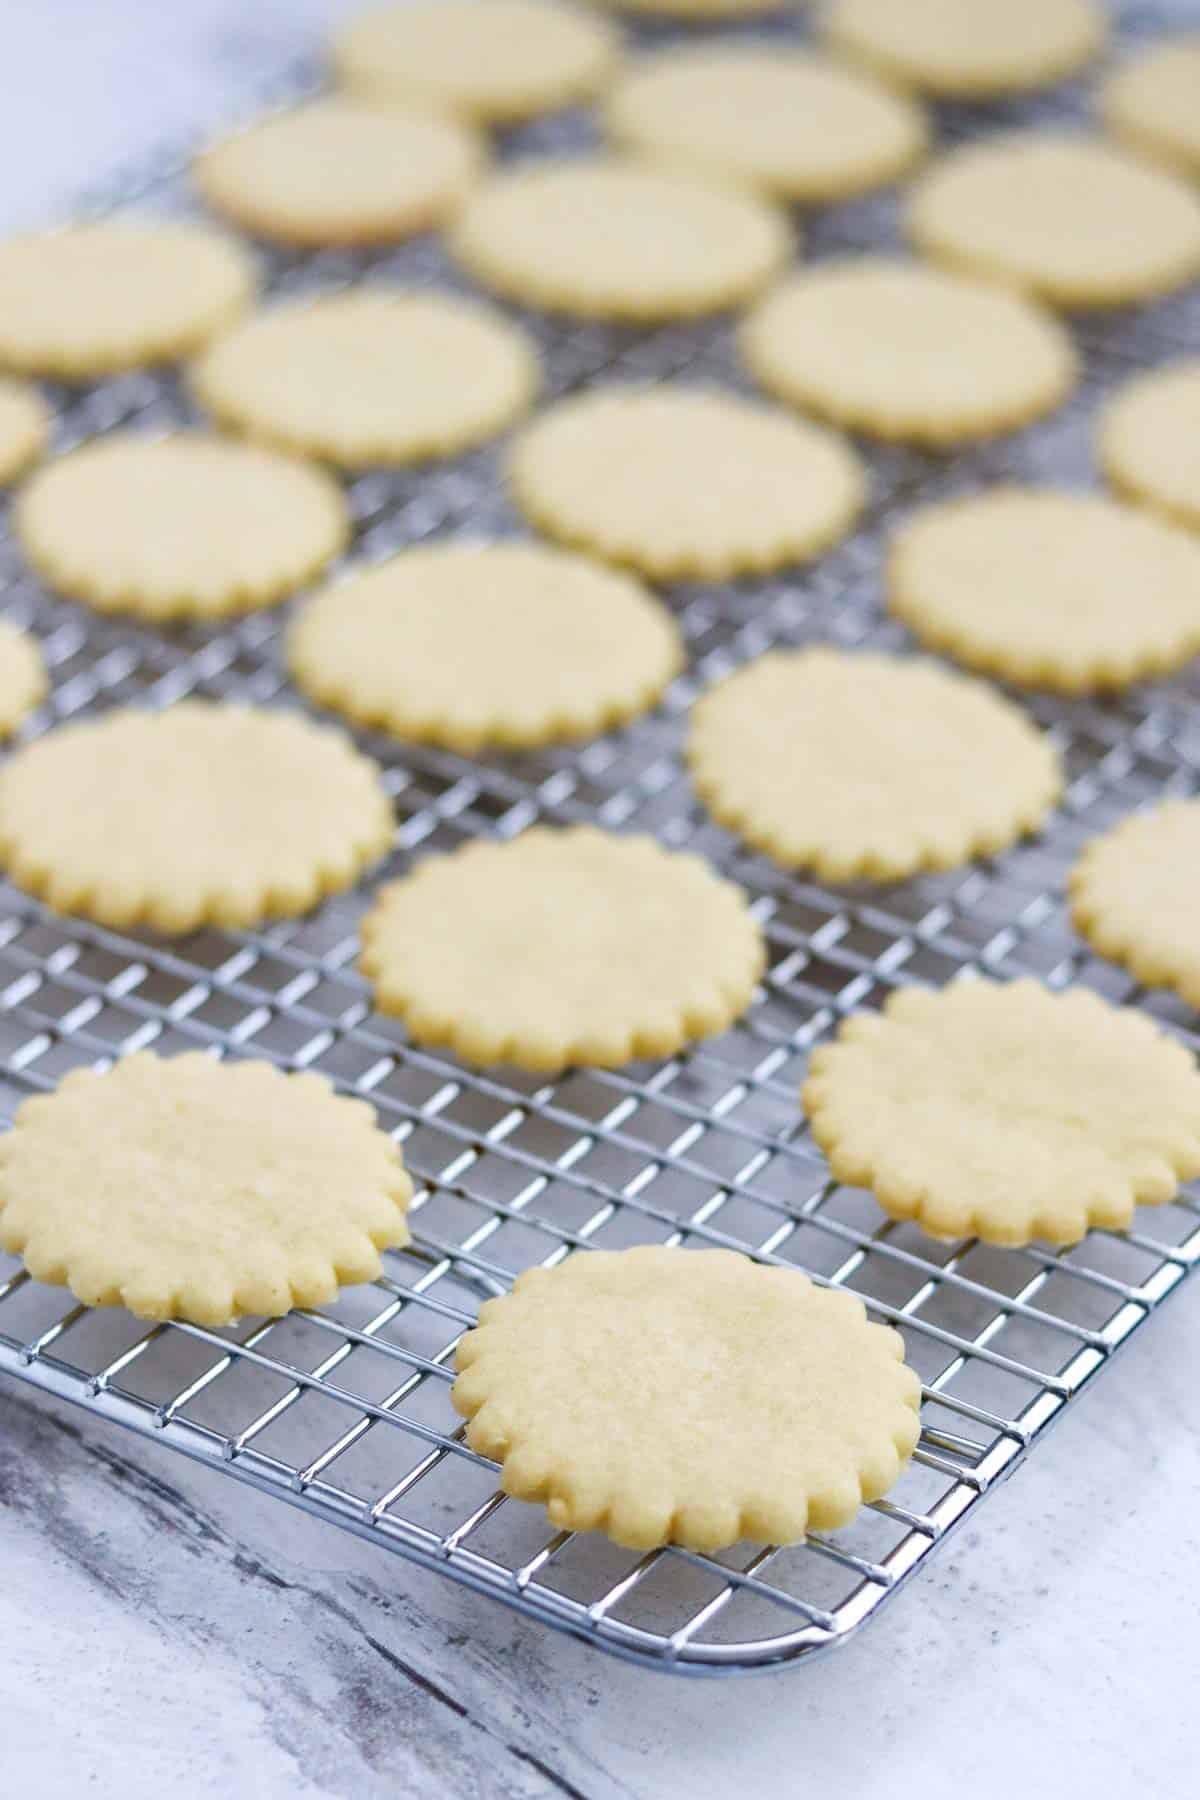
- Cut round shapes using a 2-2 ¼ inch cookie cutter (I like this one with the scalloped edge). Carefully transfer the unbaked cookies from the counter top to the prepared cookie sheet. If the cookies are sticking to the counter, use a dough scaper to gently coax them off the work surface.
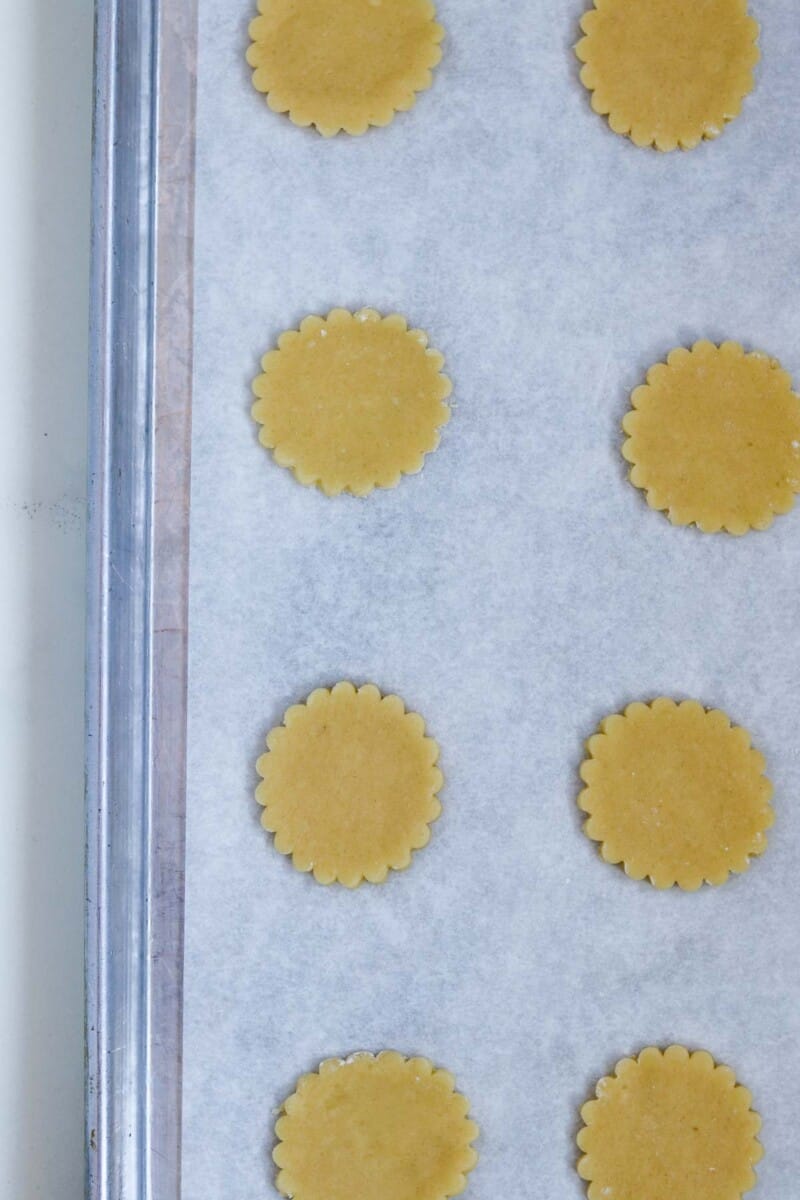
- Bake the cookies for 11-13 minutes or until they are just about to brown. Transfer to a wire rack to cool completely. Continue with the remaining dough, gathering and re-rolling scraps as needed.
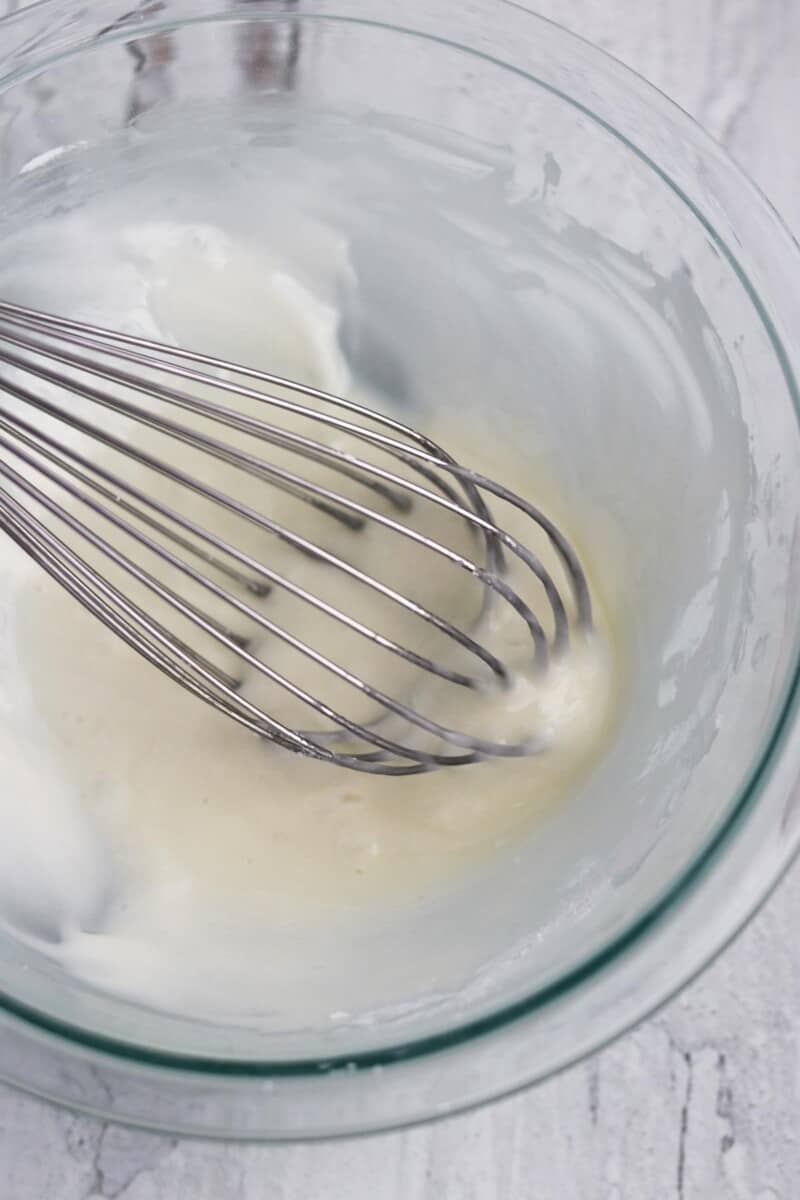
- While the cookies cool, make the glaze: Whisk all the ingredients together in a small bowl. Using a small spoon, place a tiny dollop of glaze on top of each cookie and spread out with the back of the spoon.

- Enjoy!
Expert Tips
- Use a high-quality, all-natural lemon extract for big lemon flavor. It can be difficult to coax enough lemon flavor from juice and lemon zest alone. Lemon extract packs a serious lemon punch which is just what this cookie calls for.
- Chill the dough thoroughly prior to rolling it out. The dough will be much easier to work with if it's been in the refrigerator for at least an hour prior to working with it.
- Flour the countertop and the top of the dough, adding more flour as needed to prevent sticking.
- If the cookies do stick to the counter, use a dough scraper to help loosen them.
- If your cookies become less than round as you transfer them to the baking sheet, pat them gently with your fingertip to bring back their round shape. Sometimes when you are trying to move the cut cookies from the work surface to the baking sheet, they can become misshapen. Simply patting them with your finger once they are transferred to the baking sheet will help round out their appearance.
- Don't overbake. There is something about lemon cookies and browning that that just doesn't go together. Keep them light in color for the best flavor.
- Make sure the cream cheese is room temperature before whisking the glaze ingredients together. This helps prevent a lumpy glaze.
- A little glaze goes a long way. Each little cookie needs just a small dollop of glaze. No need to over do it!
FAQs
They can be stored in an airtight container at room temperature for up to 3 days. For longer storage, transfer to a freezer-safe container and freeze for up to 3 months.
Yes! If you really want them to seem "fresh" from the freezer, freeze them without the glaze and wait to add the glaze after you defrost them and are ready to serve.
Related Recipes
Looking for more delicious cookie recipes? I've got several irresistible options for you!


I hope you bake a batch of these sunshine-y Lemon Wafer Cookies sometime soon. They are likely to become a new family favorite!
Recipe
Lemon Wafer Cookies
Equipment
- Rolling Pin
- 2- 2 ¼ inch round cookie cutter, preferably with a scalloped edge
- Dough scraper
Ingredients
- 1 ½ cups all purpose flour
- 2 tablespoons cornstarch
- ½ teaspoon fine salt
- ¼ teaspoon baking powder
- ⅛ teaspoon baking soda
- 10 tablespoons unsalted butter room temperature
- ½ cup granulated sugar
- 2 tablespoons freshly sqeezed lemon juice
- 1 large egg yolk
- 1 ½ teaspoons lemon extract
Glaze:
- 1 cup powdered sugar
- 1 tablespoon softened cream cheese
- 2 tablespoons freshly squeezed lemon juice
- Pinch of salt
Instructions
- Whisk flour, cornstarch, salt, baking powder and baking soda together in a medium bowl. Set aside.
- Combine butter and sugar together in the bowl of a stand mixer. Mix on medium speed until light and fluffy, 2-3 minutes, scraping down the sides of the bowl as needed. Add lemon juice, egg yolk and lemon extract and mix until fully combined. Reduce speed to low and slowly add dry ingredients until dough just comes together.
- Wrap the dough with plastic wrap and press into a 6 inch disk. Refrigerate until firm, at least 1 hour or up to 1 day.
- Preheat the oven to 325 degrees and line a baking sheet with parchment paper. Remove the dough round from the fridge. If it has been in there awhile, it may be really firm and need to warm up slightly before you can start rolling. Divide the dough into 2 pieces and dust a clean work surface with flour.
- Working with one piece of dough at a time, dust the top of the dough with flour and roll with a rolling pin until it is between ¼ and ⅛ inch thick. Add more flour as necessary to prevent the dough from sticking to the counter or the rolling pin. Cut round shapes using a 2-2 ¼ inch cookie cutter, preferably one with a scalloped edge. Carefully transfer the unbaked cookies from the counter top to the prepared cookie sheet.
- Bake for 11-13 minutes or until cookies are almost beginning to brown on the edges. Cool slightly on the baking sheet and then transfer to a wire baking rack to cool completely. Repeat with remaining dough, gathering and re-rolling scraps as needed.
- Once cookies have cooled to room temperature, whisk glaze ingredients together. Using a small spoon, top each cookie with a tiny dollop of glaze and spread with the back of the spoon. Allow glaze to dry before serving, at least 15 minutes.
Notes
Nutrition
If you loved this recipe, give it a star review! Also, snap a picture of your Lemon Wafer Cookies and share it with me on Instagram using the hashtag #truenorthkitchen and tagging me @true_north_kitchen.

This is possibly the best lemon cookie recipe ever. Light and tender and super lemony, they are always a favorite whenever I share them with friends and family!