Homemade Gravlax (Easy Cured Salmon Recipe)
Gravlax is a classic Scandinavian dish that is surprisingly simple to make at home! Silky smooth in texture and perfectly flavored with aquavit, white pepper and dill, this easy cured salmon recipe is both impressive and delicious.
It only takes a few minutes of hands on time to prepare the salmon for curing. The hardest part is waiting patiently for it to be done so you can enjoy it!
Gravlax is a beloved Scandinavian dish enjoyed throughout the year, but it holds special significance for occasions such as Christmas, New Year's, Easter and Midsummer. It is a staple on many Scandinavian holiday smörgåsbords and is often served as part of a cold appetizer spread alongside rye bread, dill sauce, Creamy Deviled Eggs with Dill and other traditional fare.
Jump to:
Ingredients

- Sushi-grade salmon - It's important that the salmon be of the highest quality, sushi grade and as fresh as possible. This recipe is truly a showcase of the salmon itself so make it the very best!
- Kosher salt - forms the base of the dry rub for the cure. Do not substitute regular table salt for the kosher salt. The resulting dish will be far too salty.
- Brown sugar - brings in some sweetness. Most recipes call for regular white sugar, but brown sugar is such a nice pairing with salmon.
- White peppercorns - add a little mild heat and are a traditional choice. I love the clean look they bring to the final dish.
- Fresh dill - contributes an herbaceous flavor that is quintessential to Scandinavian cuisine and to gravlax in particular.
- Aquavit - helps with the curing process and gets the fish primed and ready for rubbing with the salt and sugar mixture.
See recipe card for exact amounts and detailed instructions.
Substitutions
- Black Peppercorns: You can substitute black peppercorns in this recipe for the white.
- A different type of alcohol: Feel free to substitute gin, vodka or brandy for the aquavit.
How to Make Homemade Gravlax
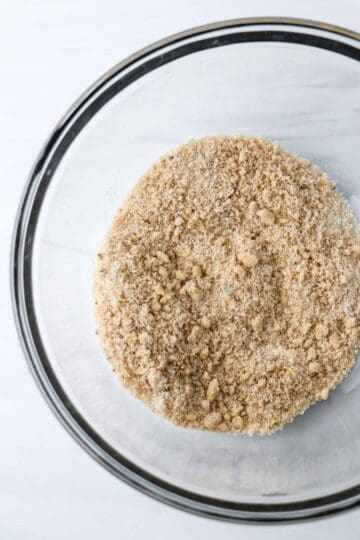
- Step 1: Begin by crushing the peppercorns using the bottom of a heavy skillet, the side of your chefs knife, a spice grinder or a mortar and pestle. Combine the crushed peppercorns, kosher salt and brown sugar in a bowl and stir to combine. Set aside.
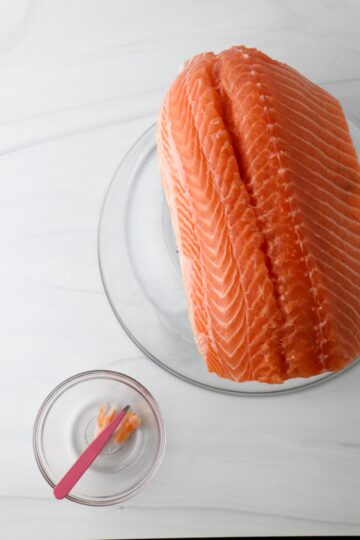
- Step 2: Check the salmon for pin bones and remove any that you can find. The easiest way to do this is to lay the piece of salmon over the top of a large overturned bowl. This helps any remaining pin bones to protrude from the flesh and makes them easier to find and remove. Use a clean pair of tweezers or pliers to gently pull them out.

- Step 3: Lay the salmon skin side down in a 9 x 13 glass baking dish and drizzle the aquavit over the top. Rub into the flesh with your fingers.

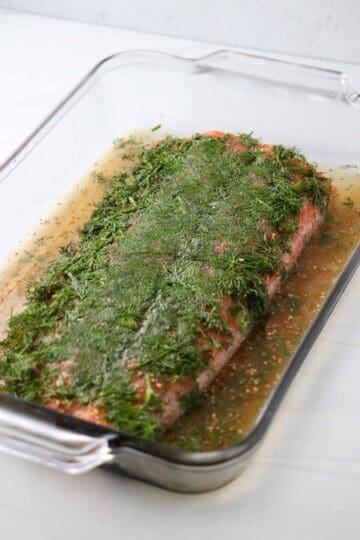
- Step 4: Top the salmon evenly with the salt/pepper/sugar mixture. Rub it around to make sure the entire surface is covered. Follow that with an even layer of chopped fresh dill.
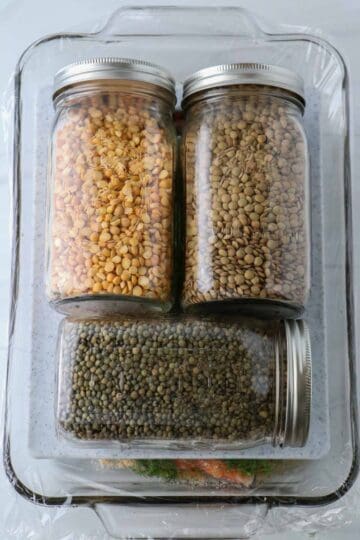
- Step 5: Tightly wrap the dish in plastic wrap. Place a cutting board, smaller baking dish or something else that is about the same size as the piece of salmon on top of the fish (on top of the plastic wrap). Stack a few cans or jars of vegetables or beans on top to weigh the salmon down. Transfer everything to the refrigerator and let the salmon cure for 12 hours or overnight.
- Step 6: Take the salmon out of the refrigerator and remove the plastic wrap, cutting board and weights. Baste the top of the salmon with some of the accumulated juices from the bottom of the dish and pour off and discard any remaining juices at the bottom of the pan.
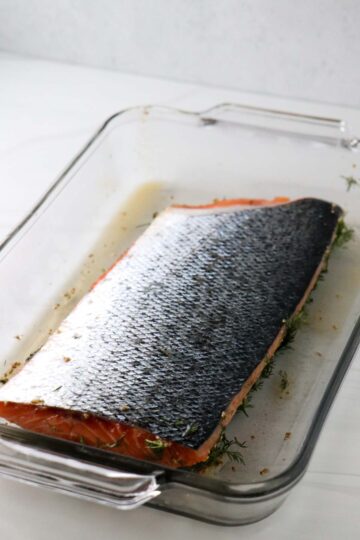
- Step 7: Flip the salmon over so that it is now skin side up. Wrap with a new piece of plastic wrap and top again with the cutting board and weights. Place it back in the refrigerator for another 12 hours.
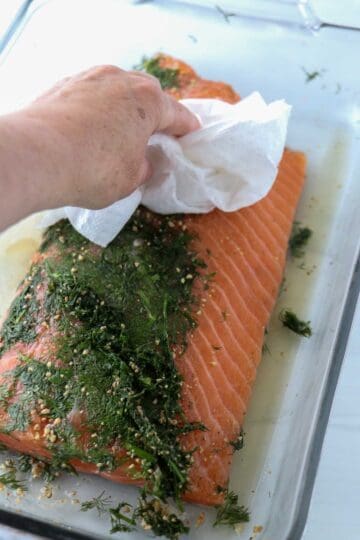
- Step 8: Repeat the process above one more time, flipping the salmon so that it is now skin side down again. Rewrap with fresh plastic wrap and replace the board and weights. Back to the refrigerator for 12 more hours. Take the salmon out of the refrigerator (the total cure time should be about 36 hours) and remove the plastic wrap, cutting board and weights. Using a paper towel, wipe the dill and any remaining rub from the top of the salmon.
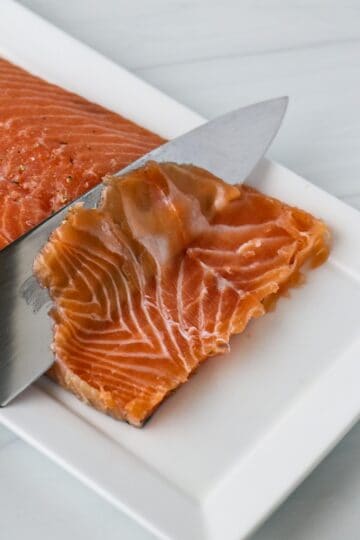
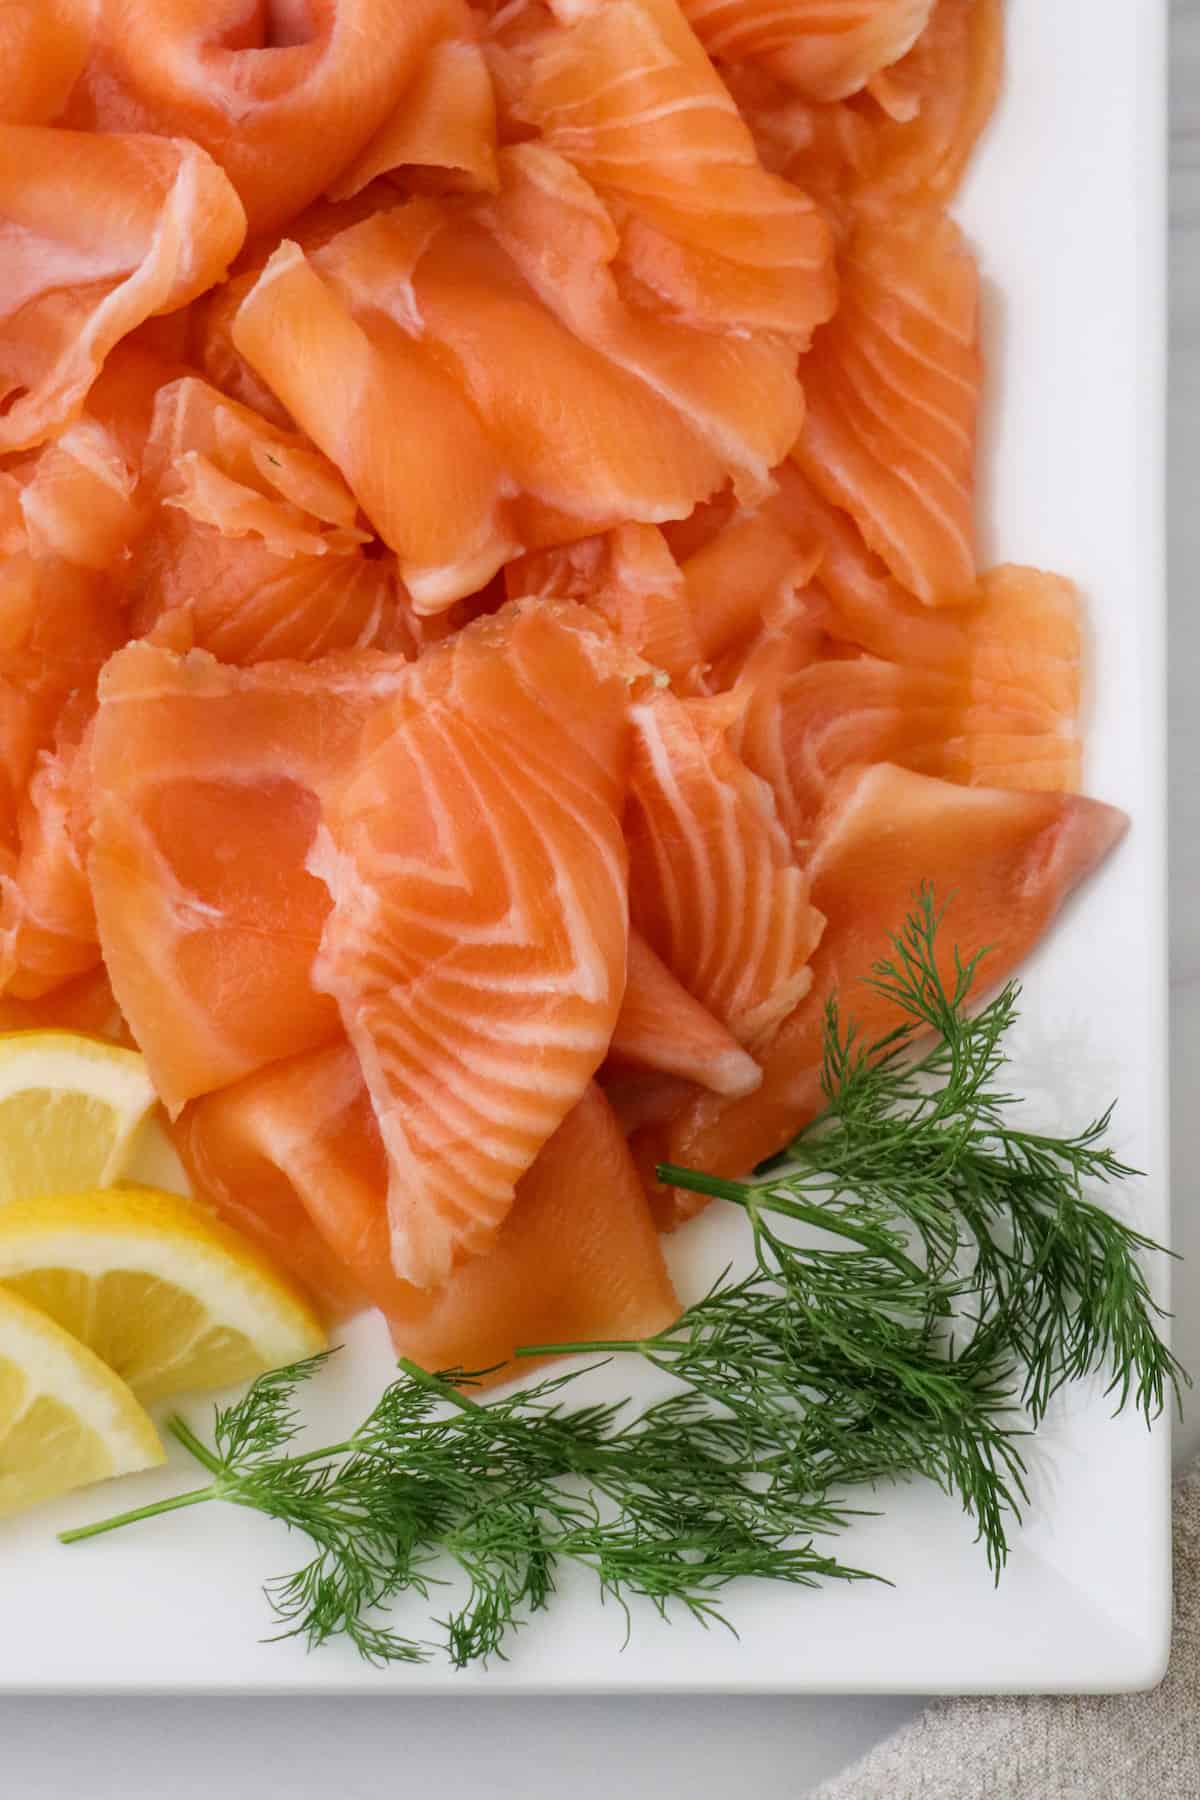
- Step 9: Slice on the bias against the grain of the fish into very thin slices (leaving the skin behind).
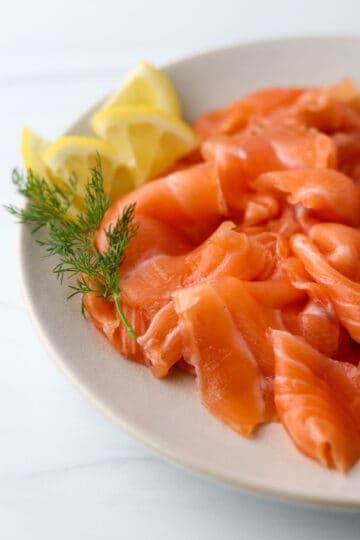
- Step 10: Serve and enjoy!
Expert Tips
- Buy only the best, freshest sushi grade salmon you can find (preferably a center cut) for best results.
- Using a very sharp knife will help slice the gravlax into thin slices for serving.
- Be on the lookout for pin bones you might have missed as you are slicing the salmon and remove them as you go.
- Once the salmon is cured and the rub and dill has been removed, you can wrap the unsliced gravlax tightly in plastic wrap and return it to the refrigerator until you are ready to serve. It's best to slice the gravlax just before serving.
- Gravlax will keep tightly wrapped in the refrigerator for 3 days.
FAQs
The literal translation of gravlax is "salmon from the grave" which is in reference to the fact that it is buried in salt and sugar during the curing process.
Curing is a preservation technique, not a cooking process. The salt draws moisture out of the fish and creates an environment that prevents the salmon from spoiling. Technically, cured salmon is still raw, hence the importance of buying sushi grade salmon for this dish.
Gravlax is cold cured meaning that it is covered in a mixture of salt, sugar, spices (usually white pepper and dill). It is wrapped, weighted and stored in the refrigerator for anywhere from 24 hours to 3 days. This process preserves the fish rather than cooking or smoking it. There is no smoke involved in the process of making gravlax.
Smoked salmon can be hot or cold-smoked: For hot smoked salmon, the fish is smoked over heat that is greater than 120 degrees F. The result is a firm-fleshed, intensely smoky fish that has a cooked texture. Cold smoked salmon, on the other hand, is usually cured in a sugar and salt mixture first (like gravlax) and then smoked at temperatures less than 80 degrees F. This process keeps the texture silky and smooth, more like gravlax.
Once the salmon is cured and the rub and dill have been removed, you can wrap the unsliced gravlax tightly in plastic wrap and return it to the refrigerator until you are ready to serve. It's best to slice the gravlax just before serving. Gravlax will keep for at least 3 days when tightly wrapped in the refrigerator.
Yes, you can! Tightly wrap the sliced gravlax in plastic wrap in serving size portions and lay the portions flat inside a larger freezer bag. Defrost in the refrigerator before serving. Frozen gravlax will keep well for a couple of months if tightly wrapped.
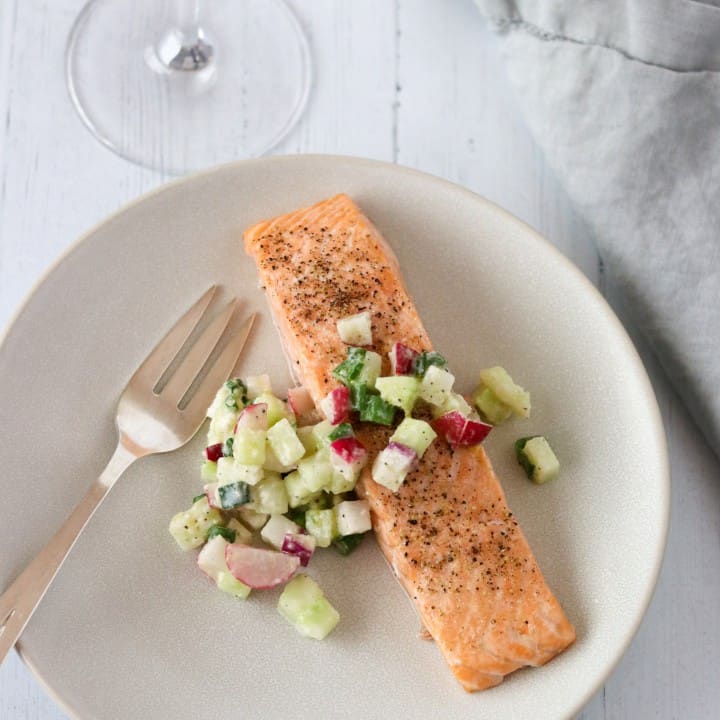
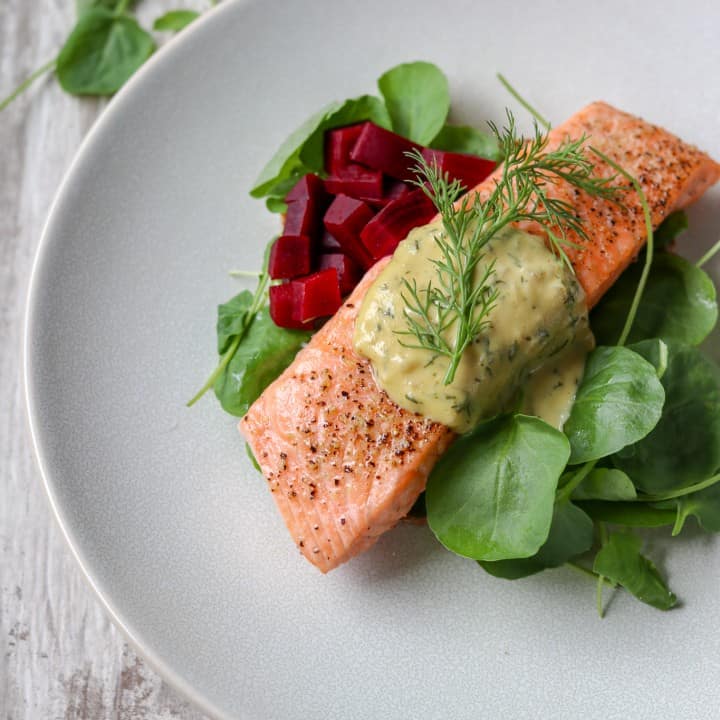
How to Serve Gravlax
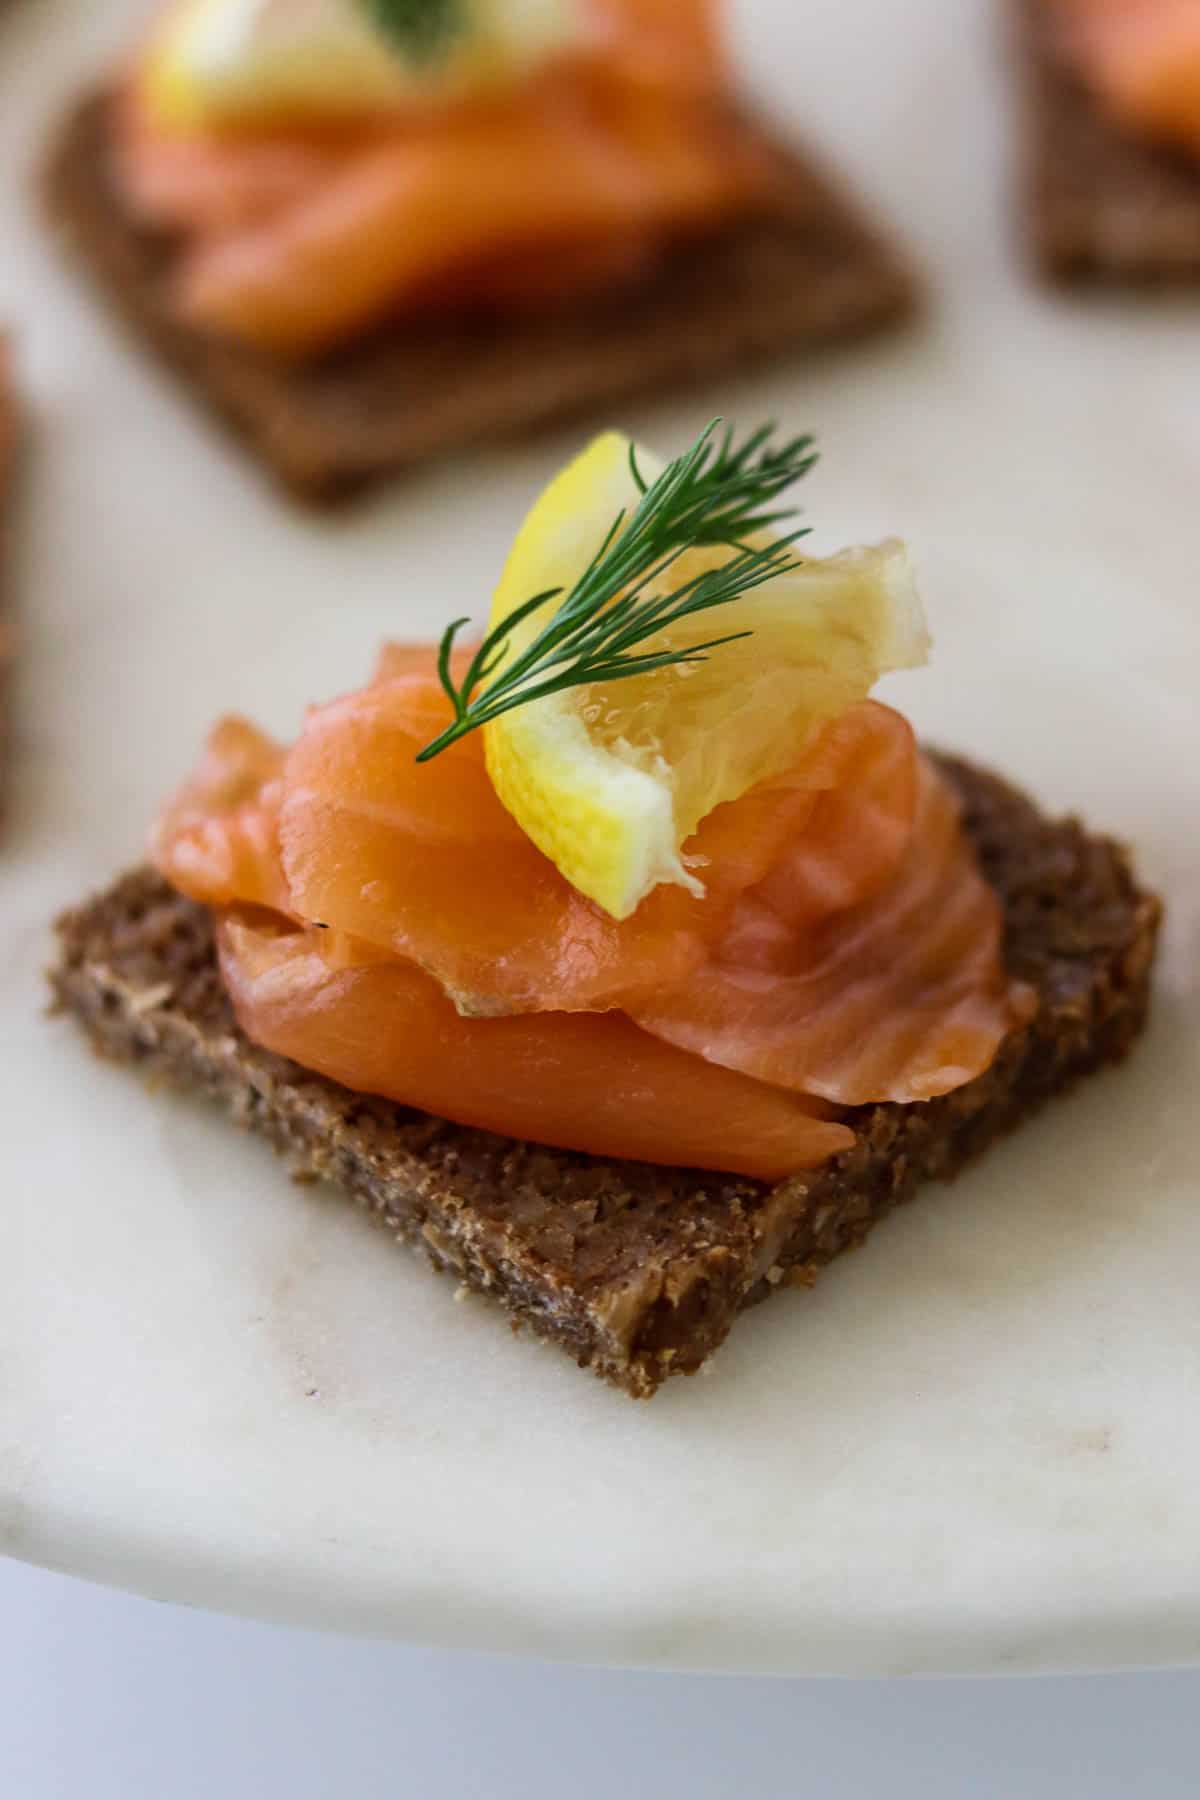
Gravlax is traditionally served with a tangy mustard dill sauce (gravlaxsås in Swedish) alongside dense rye bread, rye crispbread (knäckebröd) or Swedish Dill Potatoes. It also pairs beautifully with Swedish Cheese Pie (Västerbottenpaj) for a festive Midsummer or holiday spread.
Personally, I love to enjoy gravlax simply with a squeeze of lemon juice and a fresh sprig of dill-clean, classic, and perfectly Nordic.
More Salmon Recipes
If you tried this Homemade Gravlax recipe or any other recipe on my website, please leave a 🌟 star rating and let me know how it goes in the comments below. I love hearing from you!
Recipe

Homemade Gravlax (Easy Cured Salmon Recipe)
Equipment
- 1 9 x 13 Glass baking dish
Ingredients
- 1 tablespoon white peppercorns
- ⅓ cup packed light brown sugar
- ¼ cup kosher salt
- 1 cup coarsely chopped fresh dill
- 2- pound skin on salmon filet sushi-grade, pin bones removed
- 3 tablespoons aquavit or gin, vodka or brandy
- To serve:
- Thinly sliced rye bread or crispbread
- Small lemon wedges
- Fresh dill sprigs
- Mustard and Dill Sauce for Gravlax (Gravlaxsås) (optional)
Instructions
- Crush the peppercorns with the bottom of a small heavy skillet, the side of a chef's knife, a spice grinder or a mortar and pestle. Combine the brown sugar, kosher salt and crushed peppercorns in a small bowl. Set aside.
- Pat the salmon dry and lay skin side down in a 9x13 glass baking dish. Drizzle with the aquavit and rub it into the surface of the salmon with your fingers. Sprinkle the salmon with the salt, pepper and sugar mixture and rub to coat the surface evenly, making sure it is completely covered. Top with an even layer of chopped dill.
- Tightly wrap the baking dish in plastic wrap. Place a cutting board, smaller baking dish or something else that is about the same size as the piece of salmon on top of the fish. Stack a few cans or jars of vegetables or beans on top to weigh the salmon down. Transfer everything to the refrigerator and let the salmon cure for 12 hours or overnight.
- Take the salmon out of the refrigerator and remove the plastic wrap, cutting board and weights. Drizzle the top of the salmon with some of the accumulated juices from the bottom of the dish and pour off and discard any remaining juices at the bottom of the pan. Flip the salmon over so that it is now skin side up. Wrap with a new piece of plastic wrap and top again with the cutting board and weights. Place it back in the refrigerator for another 12 hours.
- Repeat the process above one more time, flipping the salmon so that it is now skin side down again. Rewrap with fresh plastic wrap and replace the board and weights. Back to the refrigerator for 12 more hours.
- Take the salmon out of the refrigerator (the total cure time should be about 36 hours) and remove the plastic wrap, cutting board and weights. Using a paper towel, wipe the dill and any remaining rub from the top of the salmon.
- Transfer to a platter or cutting board and slice on the bias against the grain of the fish into very thin slices, leaving the skin behind. Serve with rye bread and/or crispbread, mustard dill sauce, lemon wedges and/ or dill sprigs.
Notes
- Buy only the best, freshest sushi grade skin-on salmon you can find (preferably a center cut) for best results.
- DO NOT SUBSTITUTE REGULAR TABLE SALT FOR THE KOSHER SALT. The resulting dish will be much too salty.
- The easiest way to remove pin bones from salmon (other than to ask the fish monger to do it for you) is to lay the piece of salmon over the top of a large overturned bowl. This helps any remaining pin bones to protrude from the flesh and makes them easier to find and remove. I like to use a clean pair of tweezers to remove them. A small, clean pair of pliers works well, too.
- Once the salmon is cured and the rub and dill has been removed, you can wrap the unsliced gravlax tightly in plastic wrap and return it to the refrigerator until you are ready to serve. It's best to slice the gravlax just before serving. Gravlax will keep tightly wrapped in the refrigerator for at least 3 days.
- Using a very sharp knife will help slice the gravlax into thin slices for serving. Be on the lookout for pin bones you might have missed as you are slicing the salmon and remove them as you go (I always find a few).
- To freeze gravlax, tightly wrap it in plastic wrap in serving size portions and lay the portions flat inside a larger freezer bag. Seal tightly Defrost in the refrigerator before serving. Frozen gravlax will keep well for a couple of months if tightly wrapped.
- There is no way of knowing how much salt is absorbed during the curing process so please be aware that the sodium numbers in the nutrition information may not be accurate. The calculation is based on the amount of salt in the cure itself.


I would love to try this recipe. Unfortunately I live where a fresh salmon is unavailable, only frozen, would it be okay to use defrosted one for this recipe?
Hi Ayako,
Absolutely! In fact, previously frozen salmon is often the best choice for gravlax. Freezing helps eliminate potential parasites, which is one of the reasons I recommend using sushi-grade or previously frozen fish.
Simply thaw the salmon overnight in the refrigerator, pat it dry with paper towels, and proceed with the recipe as written. The quality of the fish is more important than whether it was fresh or frozen, so look for a good-quality salmon fillet with firm flesh and a fresh, clean smell.
I hope you enjoy the gravlax!
Kristi
Easy recipe, I probably should have used less of the sugar salt mix as I feel I removed too much of the moisture. Still tastes great though. Just a lesson learned for me.
Delicious take on a favorite summer food! We make it 4 or 5 times every summer. We love your ideas. You have definitely changed the way we make it! We agree about the brown sugar. There are so many versions with salt and/or white sugar, but light brown sugar adds an extra little something that the others don't have!
Thanks so much, Kathryn and Allan!
Kristi
Thank you for this recipe. It tasted great, but my gravalax was spongy, and not a lot of liquid came out. I'm thinking I made a mistake. Maybe I didn't leave titling enough to cure. Can I save my gravalax?
Hello,
I’m so glad you enjoyed the flavor! A spongy texture usually means the gravlax didn’t cure quite long enough or that not enough liquid was drawn out during curing so you’re right on track with that thought. Make sure the fillet is evenly coated with the salt-sugar mixture, tightly wrapped, and pressed under weight while curing.
Unfortunately, once gravlax has been rinsed and is spongy, there isn’t a good way to “save” it, as the curing process can’t really be restarted. But for next time, try extending the cure to 48–72 hours (depending on the thickness of the salmon) and keep it well weighted. You should see more liquid release as it cures.
Kristi
I've always loved salmon lox, but equally resented how expensive it is off the shelf. I decided to give making my own a go and I've now made this recipe more than a dozen times. It's never failed me, and it has always turned out better than what the grocery store has to offer. At at least a fifth the price, no less.
Thanks for your comment Jared! So glad you enjoyed the gravlax.
Kristi
So delicious and surprisingly easy!