Sourdough Danish Rye Bread (Rugbrød)
So...do you have a sourdough starter bubbling away on your countertop yet? Many of you must because I've had several recent requests for a sourdough version of rugbrød, the dense Danish rye bread that is often used as the base for smørrebrød. So I figured it was probably time to get this recipe up on the blog!
I've been making this sourdough rugbrød for several years now, long before I created this easy overnight version that I posted on the blog last fall. At the time, I figured that a lot of people don't keep sourdough starters at home, and they might appreciate a version that relies on commercial yeast for leavening. But, there is something to be said for making the real thing with your very own sourdough starter. Not only is it satisfying to use wild yeast for leavening, it also creates a delicious bread with a subtle tang that you will only get through the sourdough process. Sourdough bread also lasts longer than bread leavened with commercial yeast thanks to its acidic nature. So let's get started with the basics, shall we?
WHAT IS RUGBRØD?
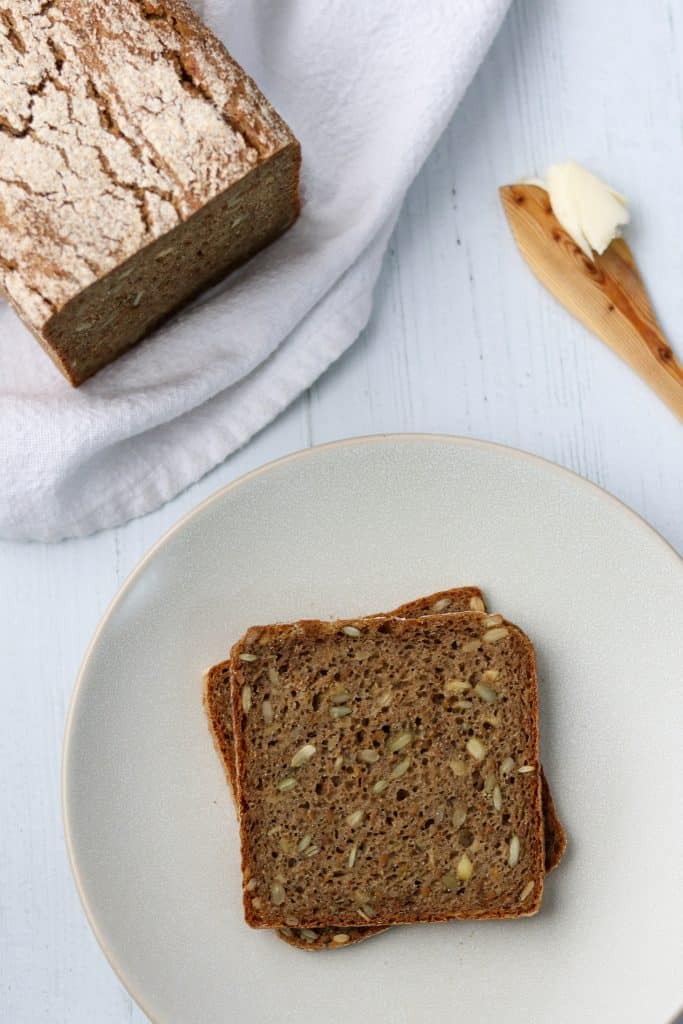
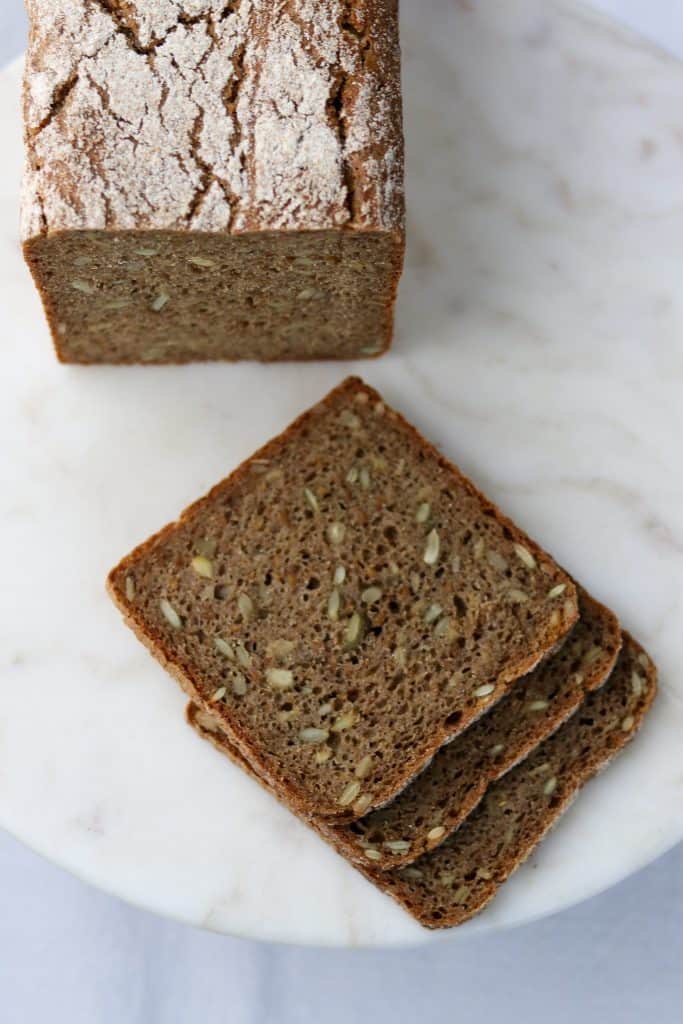
Rugbrød simply means "rye bread" in Danish. It is a sturdy, dense loaf that is comprised of rye flour, chopped rye grains and is often studded with sunflower, pumpkin and/or flax seeds. It is almost always baked in a 13 x 4 inch pullman pan with a lid. This helps the rye bread bake properly and gives it its characteristic square shape.
Rye breads, particularly those baked here in America, often have a variety of ingredients added to them to enhance their color (making them darker in appearance) and flavor. Common additions include caramel coloring (no thank you), stout beer, cocoa powder, espresso powder and molasses. Rugbrød, in contrast, has very little additional flavoring, perhaps just a little molasses for sweetening. It is meant to be a very straightforward bread so that it can serve as a neutral base for a variety of different sandwich toppings. Sometimes I will come across a rugbrød recipe that calls for flavor enhancers such as caraway, fennel or anise seed in the dough, but this seems to be more of an exception than the rule. Again, simple is the name of the game here.
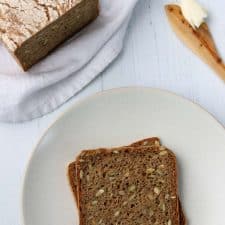
When it is served, Rugbrød is typically sliced thin (a little less than a quarter of an inch) and buttered liberally with salted butter. There is actually a word in Danish, tandsmør, which means "tooth butter". It refers to buttering your bread generously enough so that when you bite into it you can see your teeth marks in it. You butter lovers know what I'm talking about. It may be enjoyed as is, simply slathered with butter, or it can be piled with additional ingredients to form the base of smørrebrød, the famous Danish open sandwich.

WHAT MAKES RYE SO SPECIAL?
Rye has many unique qualities that make it quite different from wheat, both as a whole grain and in flour form:
- Rye has historically been important for the Nordic region as it is a hearty plant that can tolerate poor soil and weathers cold and wet conditions better than most grains. It was the primary grain relied upon for bread-baking in the north for centuries and is still popular today.
- Rye flour has less gluten than wheat flour. Gluten strands form the structure of bread and trap gases produced by the yeast so that your bread leavens properly. Because gluten doesn't form well when rye flour is mixed with water, rye breads are always more dense in structure and have a closer crumb that wheat breads.
- Rye flour holds more water than wheat flour and contains certain enzymes that convert starch to sugar. This can cause rye breads to be overly moist and have a gummy texture if not handled and baked properly.
- Your sourdough starter will help your loaf of rye bread succeed. While rye's unique qualities can make it challenging to use in a bread recipe, your sourdough starter can help counteract some of those challenges. Using a sourdough starter contributes certain acids to the dough which help neutralize some of the negative effects of the enzymes that can cause the bread to have a gummy texture.
- Rye breads get better with a little age. Unlike wheat breads which are best eaten shortly after cooling, both the texture and flavor of rye bread improves after a rest of 24-36 hours.
- An interesting fact: There is a fungus called ergot that can attack rye plants causing the grains to become highly toxic to humans and trigger hallucinations if ingested. Some historians believe that ergot-infested rye was the cause of the hallucinations that led to the Salem witch trials in Massachusetts in 1692. Fortunately, modern industrialization has all but eliminated any risk of ergot-infected rye as any diseased grains are removed prior to processing.
The Sourdough Process
Making sourdough rugbrød is really quite simple. Here is a quick overview of the process from start to finish:
Weighing Your Ingredients in Grams
The first thing you might notice about the recipe is that it is written in grams. Don't let that intimidate you. Most sourdough recipes are written by weight in grams and it is actually a really easy and accurate way to bake. Simply zero out your kitchen scale with the bowl you plan to use sitting on top. Set the scale to grams and start weighing! Seriously....easier than cups and spoons. Just remember to zero out your scale every time you add a new ingredient.
The Day Before You Bake: Refresh Your Starter
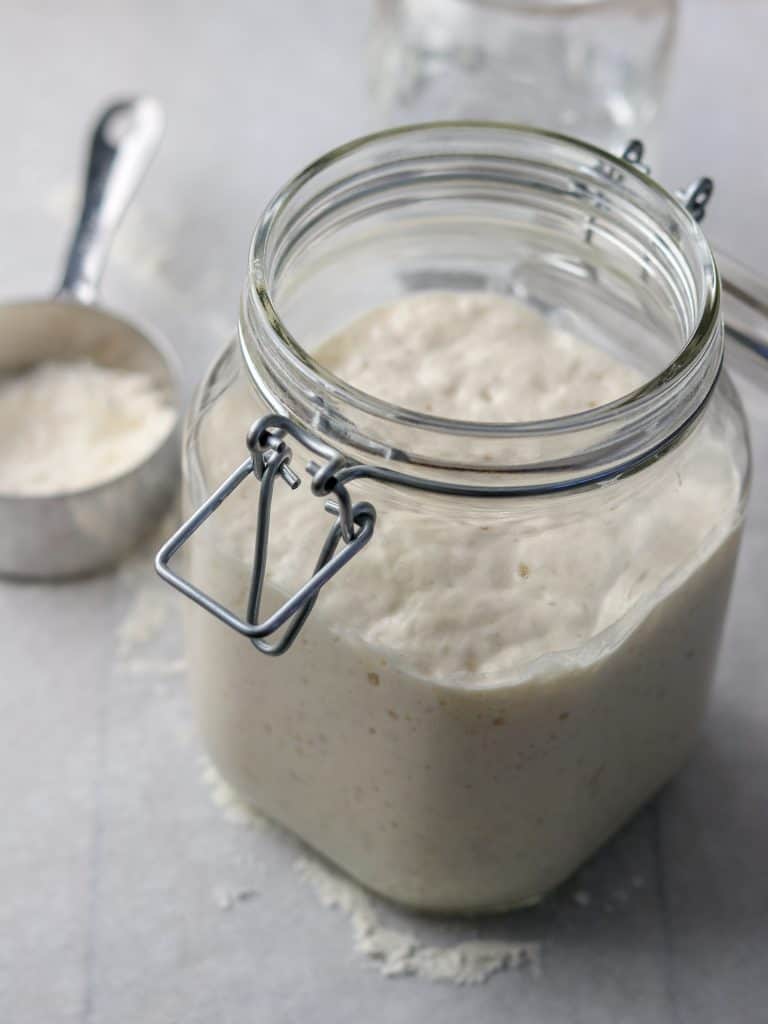
It's best to a use refreshed and ripe sourdough starter when you begin to build your dough. What does "refreshed and ripe" mean? Simply that you fed your starter about 8 hour prior to when you plan to use it. It should be bubbly, active and puffy throughout.
The Night Before You Bake: Create a Levain
This recipe calls for a levain, which is a term for a portion of the dough that will ferment overnight before we mix the final dough. A levain consists of water, flour and a bit of ripe sourdough starter.
The Night Before You Bake: Create a Soaker
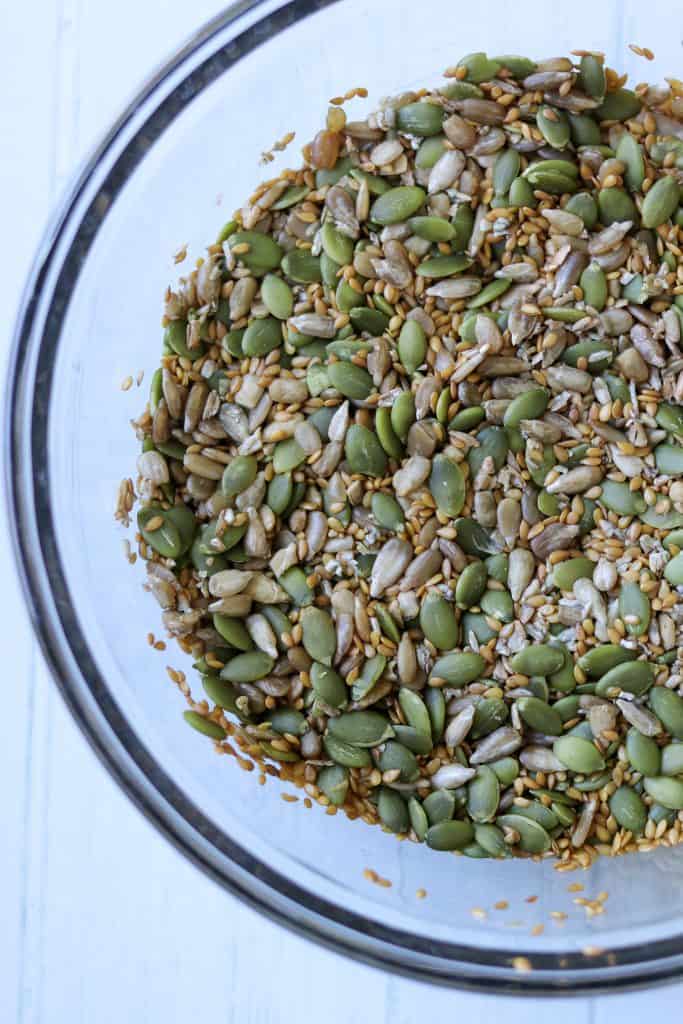
This recipe also calls for a soaker. This is a mixture of rye chops (or Bob's Red Mill 7 Grain Hot Cereal Mix) and seeds that will sit overnight in water prior to adding it to the final dough. Soaking these ingredients overnight in water helps soften them so that they will have a pleasant texture in the final loaf. And there is no need to drain the soaker prior to adding it to the final dough.
The Next Morning: Build Your Final Dough
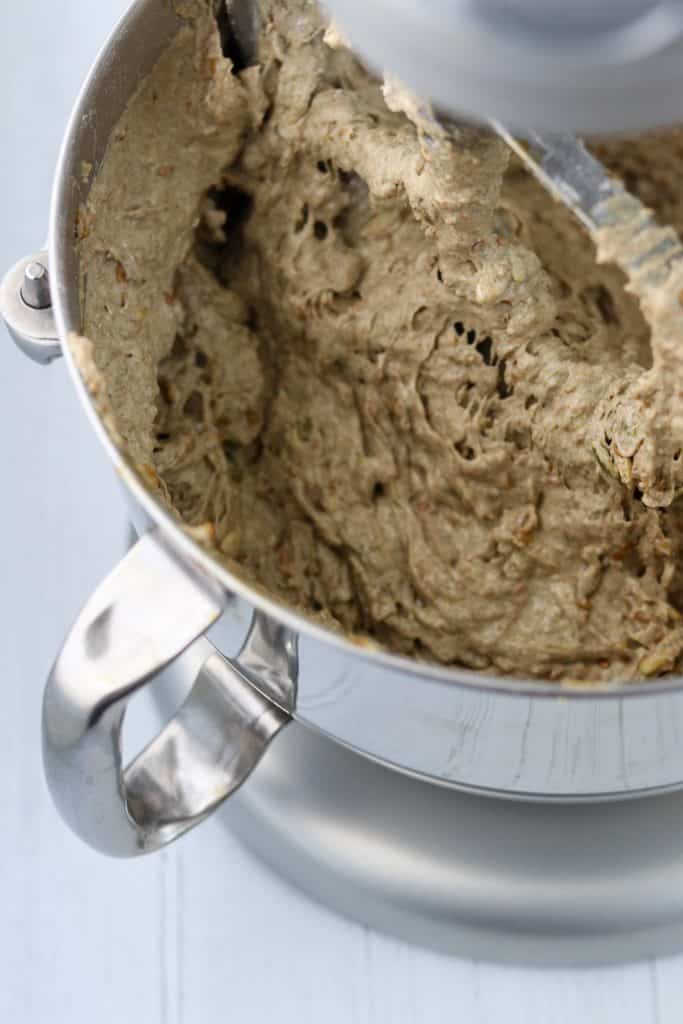
Your levain and soaker have been sitting overnight and it's time to put the final dough together. This couldn't be easier. Simply add all the ingredients for the dough to the bowl of a heavy duty stand mixer. Mix on low for a few minutes and then increase the speed to medium for a few minutes, scraping down the sides of the bowl occasionally. That's it! There is no kneading of this dough by hand as it is far too sticky to do so.
The Rise
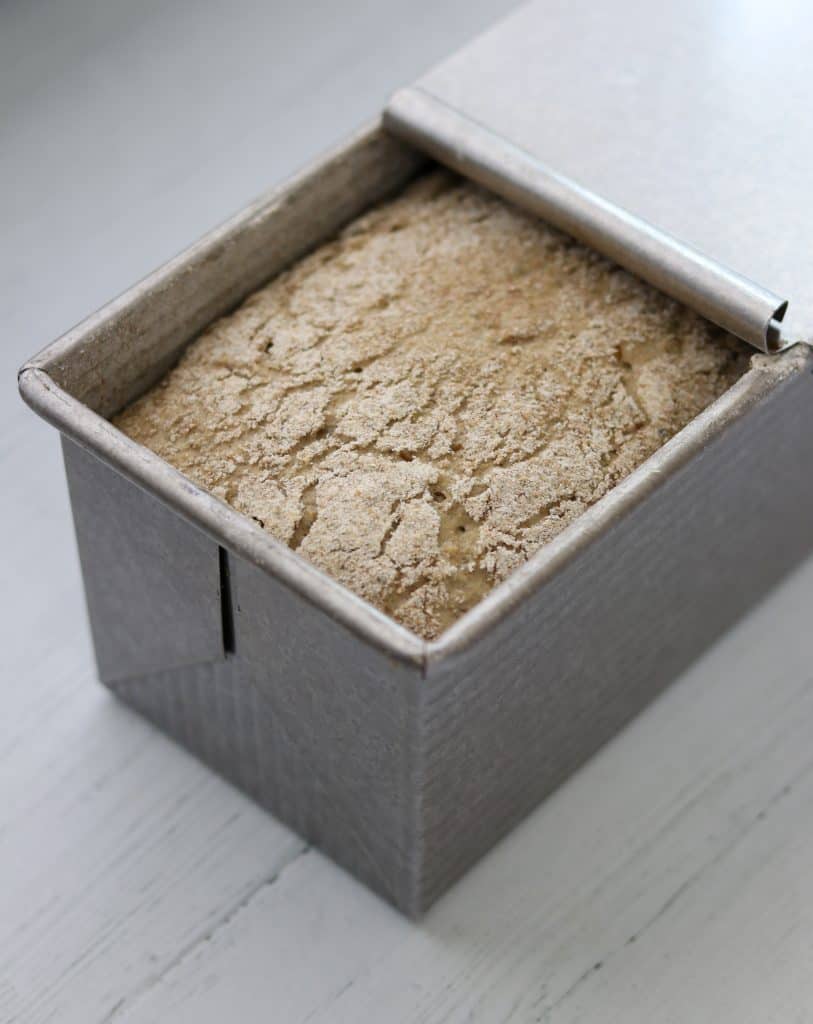
From here we scrape the dough into a greased and floured 13 x 4 pullman loaf pan with a lid. And then we wait. We let the dough rise and do its thing while we attend to whatever it is that we need to do. The dough should come within ½ inch of the top of the pan before we pop it in the oven. This will take anywhere from 1 ½ hours to 4 hours depending on the temperature of the dough and the temperature of your kitchen. Be patient and move your dough to a warmer spot if you want to speed things up a little. I will often turn the oven on and then let the pan sit on top of the stove while the oven preheats.
The Bake
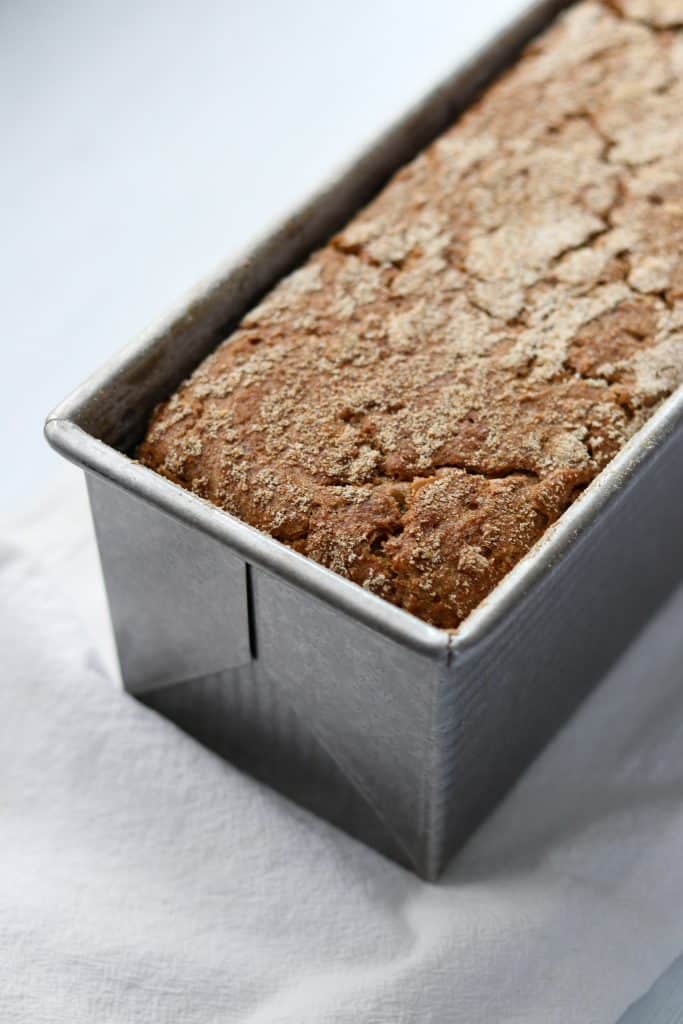
So what's up with the different baking temperatures in this recipe? They really do have a purpose, I promise. This method of baking helps prevent the enzymes that produce a gummy texture in rye breads from developing by keeping the loaf from spending too much time in the temperature zone where enzyme formation is the most favorable. The texture of your your bread will be moist and cooked evenly all the way through....just like you want it to be!
If you make your own smørrebrød at home or would like to, please give this sourdough rugbrød a try. It is one of the most delicious and nutritious breads out there and a great way to dip your toe into the world of sourdough. And using it as a base for a Nordic open sandwich will give you a true taste of authenticity. If you are new to smørrebrød, there are several open sandwich recipes on the blog to get you started:
- New Potato Smørrebrød with Garlic Aioli and Crispy Shallots
- Roasted Beet Hummus Smørrebrød with Avocado and Pickled Onions
- Roasted Broccoli Smørrebrød with Whipped Ricotta
- Roast Beef Smørrebrød with Remoulade and Crispy Shallots
- Italian Salad and Ham Smørrebrød
- Balsamic-Glazed Mushroom Smørrebrød with Garlicky White Bean Puree (vegan)
- Easy Garden Tomato Smørrebrød
- Chickpea Salad Smørrebrød
- Caramelized Leek and Snap Pea Salad Smørrebrød
- Smoked Salmon and Fennel Salad Smørrebrød
- Roasted Salmon Smørrebrød with Creamy Mustard Dill Sauce and Pickled Beets
- Beet and Celery Root Cake Smørrebrød with Herbed Skyr Sauce
- Roasted Butternut Squash Smørrebrød with Spicy Harissa Mayo and Pepitas
Recipe
Sourdough Danish Rye Bread (Rugbrød)
Ingredients
Special Equipment Needed:
- Kitchen scale
- Heavy duty stand mixer
- Pullman loaf pan with lid (13 x 4 inches in size)
Ingredients for the Night Before:
For the Levain:
- 300 grams dark rye flour
- 100 grams bread flour
- 350 grams water
- 70 grams ripe sourdough starter
For the Soaker:
- 75 grams rye chops or 7 grain hot cereal such as Bob's Red Mill
- 1 cup raw sunflower seeds (131 grams)
- 1 cup raw pumpkin seeds (142 grams)
- ½ cup flax seeds (65 grams)
- 285 grams water
Ingredients for the Day of Baking:
- All of the Levain
- All of the Soaker
- 200 grams dark rye flour
- 130 grams bread flour
- 180 grams water
- 18 grams salt
- 2 tablespoons molasses
Instructions
- The night before, make the Levain and the Soaker: Combine the ingredients for the Levain in a medium bowl. Stir with a spoon to combine (mixture will be thick and the texture of wet cement). Cover with plastic wrap and leave at room temperature overnight, approximately 12 hours. Combine the ingredients for the Soaker in a small bowl. Cover with plastic wrap and leave at room temperature overnight, approximately 12 hours.
- The next morning, grease a 13 x 4 inch pullman loaf pan (with a lid) and dust it with rye flour. Set aside.
- Combine the Levain and the Soaker (no need to drain) in the bowl of a heavy duty stand mixer. Add remaining dough ingredients. Using the paddle attachment, mix on low speed for 3-4 minutes, scraping down the sides of the bowl occasionally. Increase speed to medium and continue to mix and periodically scrape down the sides of the bowl for another 4 minutes.
- Using a sturdy spoon or spatula, transfer the dough to the prepared loaf pan, distributing it evenly across the length of the pan and smoothing out the top with a rubber spatula (if you are having trouble smoothing out the top, dampen the spatula slightly with water). Dust the surface of the loaf generously with rye flour. Put the cover on the loaf pan and let it rise until it comes to within a ½ inch of the top of the pan. This may take anywhere from 1 ½-4 hours depending on the temperature of your kitchen and the dough.
- Meanwhile, preheat the oven to 500 degrees. Place the covered loaf pan in the oven and bake for 15 minutes. Reduce the temperature of the oven to 400 degrees. Bake, covered, for an additional 15 minutes. Pull the loaf pan from the oven and remove the lid. Reduce the temperature of the oven to 325 degrees and continue to bake, uncovered, for an additional 45 minutes. Remove loaf from the oven and tip out onto a wire cooling rack. Let cool completely before slicing. Rye breads improve after a bit of resting time. If you can wait until the following day to slice into it, wrap the completely cooled loaf loosely in foil and let it cure until the next day. The bread will keep for about 4 or 5 days at room temperature wrapped loosely in plastic wrap and a layer of foil. For longer storage, wrap tightly and freeze.

https://i.vgy.me/6KzqMu.jpg
Tremendous recipe. I'm making another loaf now with steel cut oats instead of the 7 grain cereal. I'm also using Maple syrup instead of the molasses. I'll let you know how it turns out.
Hi George!
Thanks for the feedback! So glad you enjoy the bread. I hope the experimenting turned out well. Steel cut oats and maple syrup sound like a good combination!
Kristi
Hi,
I made your Rugbrôd bread with great success, but mine rose all the way to the top of the Pullman and then oozed out during baking making a very angular loaf! When I cut into it there was a long hole, in the middle, running almost the whole length of the loaf. Do you think I let it rise too long or perhaps I should find a cooler spot? It rose quite quickly just barely an hour, or should I run a knife through it first next time?
Thanks,
Nina
Hi Nina,
I think your instincts are correct....maybe both a shorter rise and a cooler spot. I've made this bread more times than I can count, and I did have something similar happen once on a particularly warm day. Please let me know if you try it again and what happens! Hopefully you were still able to enjoy the bread even if it didn't look perfect!
Kristi
I just want to say thank you because this recipe is amazing. My partner and I had a wonderful week pre covid in Copenhagen. During lockdown I was given sourdough starter and gave this recipe a try.
I make it every two weeks, freezing half of the loaf. Every morning for breakfast I have a soft boiled egg and some smoked salmon on top of a slice of this wonderful bread. Thank you.
HI Matt,
Thanks for your kind note! I'm so glad you are enjoying the bread and that it has become a part of your regular baking rotation. And I love your breakfast idea! I'm totally trying that. Thanks for taking the time to leave me a review! It is much appreciated.
Kristi
Hi Fiona,
Thanks for your questions!
1. Yes, you should still cover the pan if you have a steam oven. You won't get the characteristic square shape without covering the pan.
2. I've never tried this bread with all rye flour so I'm not sure. As you are probably aware, 100% rye loaves can be tricky. Please let me know if you give it a try! I would love to hear if it works out.
3. Yes, rye chops and chopped rye grains are the same thing.
4. I use a 100% hydration starter but I think %166 would be fine, too.
Hope this helps! Happy baking!
Kristi
Hi, I have 4 questions:
I have a steam oven. Does this mean that it is unnecessary to cover the baking bread with a lid?
Does this recipe work with 100% sprouted rye flour, rather than with the additional bread flour mentioned?
Are rye chops the same thing as cracked rye grains?
Does it really make a difference which percentage 100% or 166% starter/levain mix used?
Thanks!
Hi, would love to make this bread, it looks absolutely delicious. Can I substitute the 7 grain hot cereal mix for the 10 grain hot cereal mix? As I can’t seem to find the 7 grain.
Hi Franca,
Yes, that should be fine! The 7 grain cereal has been hard to find recently. Let me know how it turns out!
Kristi
Thank you
Hello Kristi
I live in England & have always wanted to bake homemade Rugbrød so decided to try during lockdown. I researched recipes & chose yours, & have bought everything you suggested. You wrote in your recipe for the American's that measuring in grams is easier than using cups. Well imagine my frustration when 3 of your ingredients for the Soaker (sunflower, pumpkin & flax seeds) are all measured in cups! So I looked up on the web to find out how many grams are in a US cup & found the Pinterest site, & to my horror its different every time! depending on the ingredient. PLEASE can you tell me how many grams of Sunflower, Pumpkin & Flax seeds I should use in your recipe? As I am ready, & excited to bake my first Rugbrød! Thank you Susannah
Hi Susannah!
Thanks for your question! I did the measurements for you this morning:
65 grams flax seeds
142 grams pumpkin seeds
131 grams sunflower seeds
I will add those to the recipe card as well. Hope this helps! Happy baking!
Kristi
Hello,
Thank you for this informative post. I have been playing with Rugbrod for a couple of months now, and had reasonable success. I have a great rye starter that is going like gang-busters. My only question is the rugbrod I had in Denmark was much darker than what I am producing. I have heard that true rugbrod is actually baked at a very low temperature (250 degrees F) for 12-14 hours fully covered for the entire time and it is that process that creates the dark color. Have you ever tried this?
Hi Rick,
Thanks for your comment! I have not tried that method, but I can see how that might produce a darker colored bread. I also wonder if it has something to do with the type of rye flour available here in the US vs. in Denmark. My rugbrød is always a medium brown color rather than a a dark brown. Please keep in touch and let me know if you try a new technique that produces a darker loaf!
Kristi
Hi Kristi!
This was my third time making this bread and on this last try it turned out gummy. I did not see much rise. I followed your recipe as the other two previous time but this time I did use the mixer to mix for three and then four minutes. It's the only thing that I remember doing differently. Any idea why it turned out gummy? Does the mixing impact the rise?
Thank you!
Gabriela
Hi Gabriela,
That is strange! I definitely could be the mixing time. The mixing activates the gluten in the wheat flour which provides the structure for the bread. Without a strong gluten network, the gumminess is a possibility. Hopefully this is helpful! Please report back after you give it another try.
Kristi
Thank you for the recipe. My loaf turned out wonderfully. I followed the recipe exactly the only difference being my pan which was a 13 x 5” Emile Henri large loaf pan with a domed cover. I was surprised by the moisture of the dough but having read all the comments and instructions I thought it fit what everyone it said. The bread is super tasty. Thank you again
Hi Laurie,
Thanks for your feedback! I'm so glad you enjoyed the bread. Happy baking!
Kristi
Hi Kristi, I made this rugbrød for the first time; I had been looking for a good recipe since our last visit to Denmark last summer. I have always loved the Danish bread and now was the time to bake one myself 🙂 and your recipe sounded good!
I adjusted it a little because I don’t have the size pan you mentioned. I actually used an old Corningware baking dish and fabricated a lid out of tin foil as the glass lid seemed to be a bit too low to allow for expansion. I used coconut oil to grease the dish thoroughly. My bread needed a proofing of 4 hours for perfection. The baking was interesting compared to a regular sourdough bread. But worked great! The bread came out just perfect, slightly moist, beautiful texture, great taste and crunchy crust. Delectable! My husband is also very happy 🙂
Thank you for sharing!!
This was my first rugbrod and I was so nervous, but this felt easy in the end! Thank you for this excellent recipe! We had smorrebrod for NYE dinner and it was wonderful. Not gummy or heavy, just beautiful dense, almost mildly flavored but still rich rye bread!
- I used whole rye berries, because I couldn't find cracked rye and I couldn't seem to break them down with either a food processor or my mortar and pestle. Soaked about 13 hours and it was fine!
- I used a normal loaf pan and three mini loaf pans. Normal loaf pan - 10/10/35 minutes, and the mini loaf pans went 5/5/35 minutes at the above settings. I checked internal temp to 190 to confirm they were done.
That's so great, Lauren! Thanks for your feedback. I love the idea of smørrebrød for New Year's. So perfect! Happy New Year to you!
Kristi
THANK YOU FOR THIS! It came out great except for some adventures with the baking containers. If I don't care about a perfectly square bread, could I make this with a regular loaf pan without a lid and put it in a dutch oven with a lid?
Hi! If you want to use a regular loaf pan, split the bread dough between two 9 x 5 loaf pans or make a half recipe for one loaf pan. Use a metal baking sheet as a "cover" during the portion of the bake that is covered. All baking times and temperatures remain the same. Hope this helps!
Kristi
6 stars. When I started baking more seriously at the beginning of the pandemic, this recipe seemed too complicated for me. Now, 6 months later, it turns out to be super easy to follow, you just need to start the night before. I bought a 4" x 4" x 6.5" Pullman just for this bread, so I make a half recipe. It has come out perfect every time so far. The 6th star comes because it made my European ex-pat neighbors cry, they hadn't had bread like this since last they went home.
Kyle,
Thanks so much for your comment! I'm glad the bread has worked well for you, and that part about your neighbors really made my day. Thanks again for taking the time to leave me a note. It is greatly appreciated. Happy baking!
Kristi
Hi Kristi, here's an observation on my sourdough starter and proofing time that might be interesting for others. My one-year-old starter is whole-grain rye flour at 100% hydration (50/50 flour and water by weight) which I keep in the fridge and feed every 1-2 weeks for weekend bakes. It's rye based because I've delved deep into a lot of rye recipes.
I've made your rugbrød recipe twice, to great success (thanks again!). I feed my starter in early afternoon before making the levain at night, as per the recipe. We keep our thermostat at 71F year'round. The final rise in the pans has taken only an hour—which amazes me, since there is no instant-yeast spike involved! I don't know which of these factors help with the efficient rise, but it's a boon. I speculate that the balance of yeast/bacteria in a rye starter might be particularly good at blowing up a mostly-rye levain?
Hi Jim,
That is really interesting! Thanks for sharing. I do notice that readers describe a wide variety of proofing times and I'm sure we are all working with different types of starters. Mine is a 100% hydration bread flour starter and my proof for rugbrød is anywhere from 1 1/2 to 3 hours depending on the temperature of the kitchen. I'm so glad you are still enjoying the rugbrød recipe. If you've got any suggestions for some other Scandinavian rye breads you would like to see on the blog, please let me know! I'm definitely looking to expand my repertoire in 2021.
Happy baking and thanks so much for the feedback!
Kristi
Oops, I need to correct myself. Checking my baking diary, it has taken no more than the low end of the range, 1.5 hours, to proof in the pans. I still find that to be really fast considering the dough is not getting any help from instant yeast.
Agreed!